
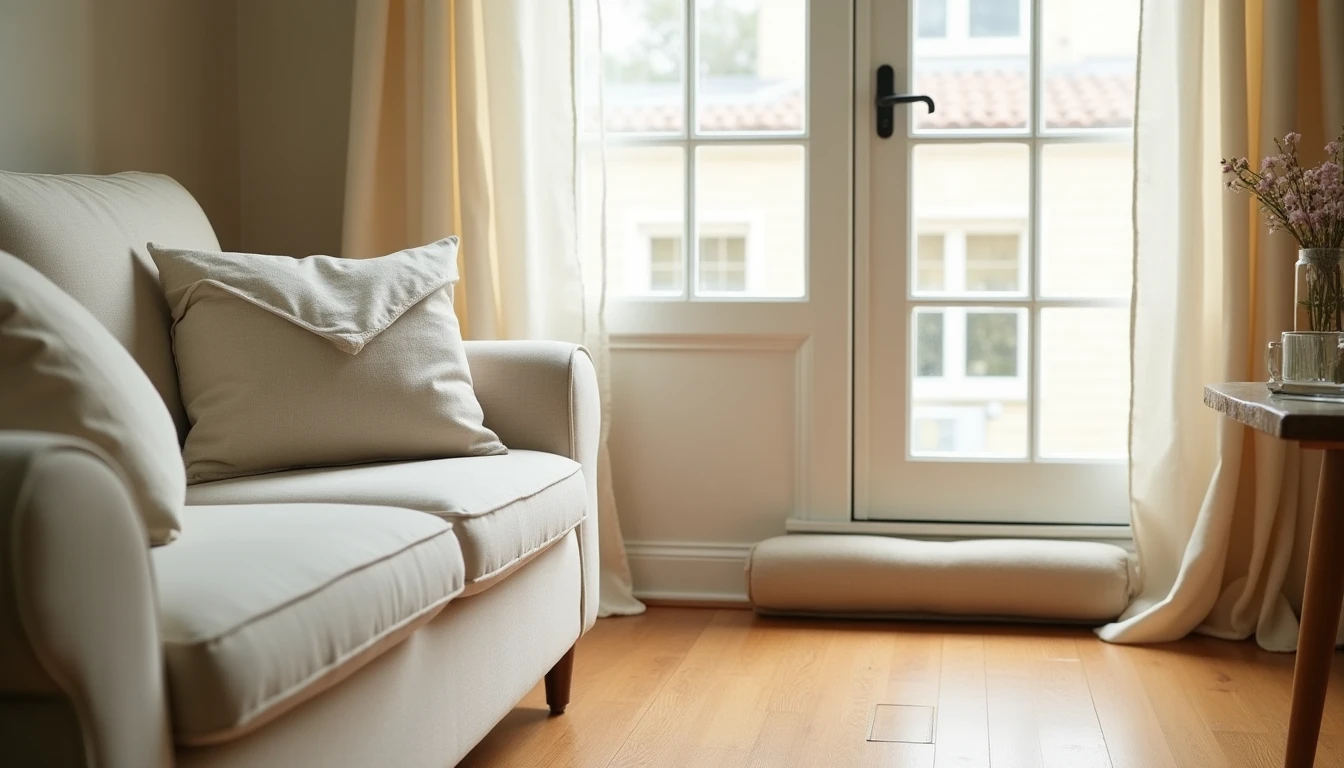
Look around your house for a minute. The pillow on your couch, the curtain at your window, the napkin folded by your plate, the towel hanging in your bathroom. Almost every one of those is a rectangle, or started as one. That’s the secret behind home decor sewing projects: most of them don’t need darts, zippers, or curved pattern pieces. They need straight seams, a few honest measurements, and a little patience.
This guide walks through your house room by room, starting in the bedroom and ending with the small stuff everywhere else, with exact cut dimensions and verified step-by-step methods along the way. If you want a broader menu of projects sorted by skill level before you dive into any one room, the project chooser at https://sewingpatternsexplain.com/sewing-projects is a good place to browse first.
Some links below are affiliate links. Prices are 2025-2026 estimates and change often, so always check current pricing.
The Bedroom
The bedroom is where a lot of home sewists start, mostly because a pillowcase is one of the friendliest projects in the whole craft.
The pillowcase, burrito style
The burrito method (some sewists call it the hot dog method) is the standard way to sew a pillowcase because it hides the seam completely inside the cuff, with no raw edges showing anywhere on the finished case.
- Cut your fabric: a body panel about 27in x 40in (some patterns trim this to 26.5in x 40in) for a standard pillow, plus a contrast cuff strip about 9in x 40in. About 1 yard of fabric total covers a standard case.
- Lay the cuff strip right side up on your table with the long raw edge closest to you.
- Lay the body fabric right side up on top of the cuff strip, matching that same long raw edge.
- Starting from the far edge of the body fabric, roll it up tightly toward the shared raw edge like a jelly roll, stopping a few inches before you reach the edge.
- Bring the free end of the cuff strip up and over the rolled body fabric, wrapping it like a burrito, so the cuff’s other long raw edge lines up again with the body’s raw edge.
- Pin through all the layers along that matched raw edge and stitch a 1/2in seam straight across the tube.
- Reach inside the tube from one open end and pull the rolled-up body fabric out through the gap, unrolling everything until it lies flat, right side out. The seam you just sewed is now completely enclosed inside the cuff.
- Press the cuff seam, then fold the whole piece in half lengthwise, right sides together, and stitch the long open side and the bottom edge to finish the case.
That’s it. A standard pillowcase fits a standard 20x26in pillow, and once you’ve sewn one you can adjust the numbers up for a body pillow or down for a smaller case.
The envelope pillow cover is the decor pillow you never need a zipper for. Cut a front panel the size of your pillow form plus seam allowance, and two back panels that each measure roughly half the pillow height plus 3 to 4in for overlap and a hem. Hem one long edge of each back panel with a double fold, about 1/2in, then 1/2in again. Lay the front right side up, place both back panels right side down on top with the hemmed edges overlapping in the middle by 3 to 4in, pin around all four raw edges, and stitch a 1/2in seam around the perimeter. Turn it right side out through the overlap opening. No zipper, no buttons. The overlap alone holds the pillow form in place.
A duvet cover is a different animal, and it’s worth being honest about it upfront. It’s one of the biggest home decor sews you can take on, but it isn’t the hardest one technically. A duvet is essentially two large flat rectangles (two flat sheets or several yards of fabric) sewn together on three sides, with a zipper, buttons, snaps, or fabric ties closing the fourth. The size is what makes it feel like a big project, not the technique. If you can sew a straight line and wrangle a big spread of fabric across your table or floor, you can make one.
Sewing minky
Minky shows up in baby blankets, throws, and stuffed animals for good reason. It’s a plush, 100% polyester microfleece knit fabric with a soft, raised pile, and that pile is why it behaves differently under your needle than a woven cotton would.
- Use a walking foot so the top and bottom layers feed through evenly. Without one, minky’s pile tends to shift and the layers creep apart as you sew.
- Lengthen your stitch to about 3 to 3.5mm. Tiny, tight stitches punch through the pile and cause puckering, while a longer stitch lets the fabric keep its loft.
- Pin or clip generously, roughly every 1 to 1.5in, since minky is slippery and shifts easily between pins.
- Never iron directly on the pile side. If you must press, use the lowest heat setting through a press cloth, or press only the seam allowance from the back.
- Minky stretches on the crosswise grain and bias but not lengthwise, so pay attention to which direction you’re cutting and stitching, especially when piecing two panels together.
- Minky pairs nicely with a woven cotton or flannel backing. The self-binding method, where you fold the larger backing fabric over the minky front and topstitch or zigzag it down, skips separate binding strips entirely.
The Living Room
The living room usually runs on the same envelope pillow covers from the bedroom, just scaled up as cushion covers for a couch or a reading chair. Same overlap, same no-zipper logic, just bigger fabric pieces.
Throws and quilts belong to a different kind of project, one built from smaller pieced blocks rather than a single cut of fabric. Seasonal throws and quilted blankets live over at https://sewingpatternsexplain.com/seasonal-holiday-sewing, worth a look before you buy yardage for a full quilt top.
The door draft stopper
This one is a practical sew, and it comes down to a fabric tube and what you put inside it.
Rice or dried beans are the cheapest fillers and widely used, but they can attract pests and slowly absorb moisture or odor over time, so they’re better suited to a short-term or gift project than a decade of daily use by the door. Poly pellets, the same plastic bead filling used in weighted toys, are the best long-term choice: they don’t degrade, don’t attract bugs, and add good weight. Sand gives the heaviest, most solid seal against a door, but it should go inside a plastic liner bag before it goes into the fabric tube, since sand can work its way through woven fabric over time. Poly-fill or quilt batting scraps make the lightest version, and a common trick is blending fiberfill with a bit of rice, beans, or sand (roughly two-thirds fiberfill to one-third weighty filler) to get bulk and weight without the tube going stiff.
- Measure your door’s width and add about 2in for seam allowance.
- Cut a piece of sturdy home decor or canvas-weight fabric about 7 to 10in wide by (door width plus 2in) long.
- Fold it in half lengthwise, right sides together, and stitch down the long open side to create a tube, leaving both short ends open.
- Turn the tube right side out and press.
- Sew one short end closed.
- Fill the tube through the open end with your chosen filling, leaving a couple inches unfilled so it can bend and sit flush against the door.
- Fold in the raw edges of the open end and stitch it closed, by machine or with a hand slipstitch.
For a version that sits under the door instead of leaning against the base, some sewists make two narrower parallel tubes joined by a strip of fabric so one tube rests on each side and the whole thing folds over the bottom edge. Same fill options apply.
Once the pillows are stacked and the draft stopper is in place, the last thing most living rooms need is proper curtains, which get their own section next because there’s a fullness rule worth getting right before you cut.
Curtains and Valances
Curtains look intimidating mostly because of the math, not the sewing. Once you understand the fullness rule, the rest is straight seams and hems.
The rule, verified across multiple curtain-making sources: your flat panel width should equal your window or rod width multiplied by a fullness ratio of 2 to 2.5 for standard rod pocket curtains, plus a couple inches for side seam allowances. Lightweight sheers can go up to 3x fullness for a soft, gathered look. Heavier or bulkier fabric is usually kept closer to 1.5 to 2x so the rod pocket doesn’t get too thick to slide.
- Measure your window or rod width, then multiply by your fullness ratio (2 to 2.5x is standard) to get the total flat panel width before seams. For a refresher on taking accurate window and rod measurements, see https://sewingpatternsexplain.com/sewing-measurements.
- Measure the length from where the rod sits down to your desired hem point (floor, sill, or apron), then add allowances for the rod pocket at the top and the bottom hem.
- Cut your fabric, piecing panels together if you need extra width to reach the full measurement.
- Hem both side edges with a double fold, typically 1 to 1.5in per fold.
- Press and stitch a double-fold bottom hem, generally 3 to 4in per fold, about 6 to 8in of fabric total. That generous hem adds weight so the panel hangs straight and drapes well, and it’s fabric you’ll never actually see once it’s tucked in.
- At the top, fold down a header allowance, then fold again to create the rod pocket channel, and stitch the bottom edge of that channel in place, leaving the pocket open so the rod can slide through.
Rod pocket depth should equal the rod’s diameter plus a little ease so the fabric slides freely. A precise workroom rule adds about 1/4 to 1/2in to the rod’s outer diameter, but many home sewing tutorials round up to a more generous 1/2 to 1in of ease, especially with a thicker decorative rod. When in doubt, err generous.
A valance is a short decorative topper, hung alone or layered over full curtains, typically finished around 15 to 18in long. The two common styles are a straight rod-pocket valance, built exactly like a mini curtain, and a scalloped valance with a wavy bottom edge, usually interfaced or lined so the curve holds its shape.
Lining isn’t required, but it adds real benefits. A lined curtain blocks more light, hangs with a fuller and more structured drape, and protects the face fabric from sun fading and window condensation over time. If you’re deciding between a lightweight cotton and something heavier for either the curtain or the lining, https://sewingpatternsexplain.com/sewing-fabrics walks through how fabric weight affects light, privacy, and drape.
The Kitchen and Table
Kitchen linens are some of the fastest projects in this guide, and a great place to practice a clean finish before you commit to something bigger.
Cloth napkins get their polish from mitered corners, which give a clean finish with no bulky folded lump at each corner. Press all four raw edges under about 1/2in, then press under again about 1in. Unfold one corner, fold it diagonally so the two raw edges align, and mark a perpendicular line where the creases meet. Trim the corner just outside your stitching line at roughly a 45 degree angle, then refold the hems so the trimmed corner tucks into a neat diagonal miter, and stitch around the whole napkin close to the inner fold. This technique builds directly on a basic double-fold hem, which is covered in full at https://sewingpatternsexplain.com/how-to-hem.
Placemats and table runners are both a quilt-style sandwich: top fabric, a layer of batting, and a backing, sewn right sides together, turned, then edge-stitched or bound. A standard placemat runs about 12in x 18in, with a comfortable range of 12 to 14in wide by 16 to 20in long. Quilters often bump up to 13in x 19in for a quilted mat finished with binding. A table runner is typically 12 to 16in wide and long enough to cover the table’s length plus about a 6in drop on each end, or roughly a third to half the table’s width running down the center.
Potholders vs trivets
These two look similar but do different jobs, and the batting inside them isn’t interchangeable. A potholder protects your hand while you’re gripping something hot. A trivet protects your table or counter from a hot pot or dish set down on top of it.
Potholders can use Insul-Bright, a heat-resistant batting with a thin metalized layer, sandwiched between two layers of 100% cotton batting for grip protection. But Insul-Bright is heat-resistant, not heatproof, and it is never microwave-safe because of that metalized layer. It will spark. Trivets, since they sit under cookware rather than being held, are usually made thicker instead, often with two or three layers of plain cotton batting rather than Insul-Bright, for sturdier table protection. If a piece might ever go in the microwave, like a bowl cozy, use 100% cotton batting only. No Insul-Bright, no metallic thread or trim.
Aprons round out the kitchen list, in two main styles. A full bib apron covers the chest and ties around the neck plus the waist, with room for a large front pocket. A half or waist apron is just a skirt and waistband that ties in front, more like a kitchen sash. Both are beginner-friendly, straight-line sewing. A half apron can come from well under a yard of fabric, and a full bib apron can often be squeezed from about 1 yard using a use-it-all layout. Ties are usually a folded fabric strip, sometimes pointed at one end, stitched down the long edge and across the point, then turned right side out. For a full apron that adjusts without retying knots, loop the neck strap through two D-rings instead. A patch pocket, plain or divided into two, is an easy add-on stitched to the front before the apron comes together.
The Blanket Stitch, Step by Step
Every room in this guide leans on straight seams, but there’s one hand stitch worth learning on its own, since it shows up on fleece blankets, felt applique, and finished edges all over the house.
The blanket stitch is a decorative edge stitch that wraps thread around a raw or folded edge, leaving a row of little L-shaped stitches sitting right on the edge itself. It finishes the edge and adds a decorative line at the same time, which is why it’s the standard choice for fleece blanket edges and felt applique.
- Thread your needle and knot the end. Bring the needle up from the back to the front, right at the edge of the fabric, to anchor your first stitch.
- Decide your stitch depth, how far in from the edge you’ll stitch (commonly 1/4 to 3/8in), and your stitch width, the spacing between stitches along the edge.
- Insert the needle down into the fabric at that depth, one stitch-width along from where you started, and bring the point back up right at the edge, further along in the same direction.
- Before pulling the needle all the way through, catch the working thread under the needle’s point so the thread loops over the edge. This is the step that makes the stitch work, and it’s easy to skip by accident the first few times.
- Pull the needle through gently. The loop should settle snugly along the edge, forming the signature bar-and-loop shape. Pull firm but not tight, or the edge will pucker.
- Repeat the insert-catch-pull sequence evenly down the entire edge.
- At a corner, work three stitches into the same corner hole, one straight, one diagonal, one straight on the new side, so the stitching turns the corner without a gap.
- To finish, slip the needle under the last stitch’s loop, tie a small knot against the fabric, then bury the tail through a few threads before trimming.
Even spacing is what separates a tidy blanket stitch from a messy one. Mark dots along the edge with tailor’s chalk or a fabric pen at your chosen interval before you start, or run a seam gauge along the edge to keep your depth and width consistent as you go, rather than judging it stitch by stitch.
Beyond fleece blankets, the blanket stitch is the usual choice for attaching felt applique shapes with a decorative border, finishing felt ornaments and coasters, and generally for any edge you want to look intentional rather than raw. Most modern sewing machines also have a built-in blanket stitch, sometimes labeled an applique stitch, which mimics the hand-stitched look automatically along an edge. It’s commonly used for machine applique or a faster fleece blanket finish. For the rest of the hand stitches worth knowing, from running stitch to whipstitch, the full library is at https://sewingpatternsexplain.com/hand-sewing-stitches.
Quick Ideas for Every Other Room
Not every room needs a full project. A few small sews go a long way.
- Entryway: a fabric-lined basket liner turns a plain storage basket into a tidy catch-all for keys and mail.
- Bathroom: a hanging towel loop, a small folded fabric tab with a button, keeps a hand towel from ending up on the floor.
- Home office: fabric cord catchers, small wrapped fabric ties or pouches, keep charging cables from turning into a tangle on the desk.
- Laundry room: a drawstring hamper bag is just a big fabric tube with a casing and cord, sewn the same way as a draft stopper tube.
- Anywhere: fabric storage bins, a box shape sewn from home decor weight fabric, sometimes with a stiff interfacing or a cardboard insert, organize shelves without buying more plastic.
- Kids’ rooms: a fabric bookend or toy-bin liner reuses the same box-corner technique as the storage bins above.
If you want the full instructions behind any of these room-by-room projects in one place, there’s a printable library of 155+ sewing patterns you can download and keep at hand, available at https://02d624xwwl5tak9emrnfsnp-2n.hop.clickbank.net.
Frequently Asked Questions
What are easy home decor sewing projects?
Almost everything in home decor sewing starts as a rectangle, which makes it some of the most beginner-friendly sewing there is. Pillowcases, envelope pillow covers, door draft stoppers, cloth napkins, placemats, and simple curtains are all straight-line home decor sewing projects with no fitting and no curves, so they’re the usual starting point for anyone learning to sew for the house.
How do you make a pillowcase with the burrito method?
Layer the cuff fabric right side up, then the body fabric right side up on top, matching one long raw edge. Roll the body fabric up toward that shared edge, wrap the free end of the cuff over the roll, stitch across the tube through all layers, then pull the rolled body back out through the gap. The seam ends up hidden inside the cuff with no raw edges showing, which is why it’s also called the hot dog method.
What do you fill a door draft stopper with?
Poly pellets are the best long-term filling since they won’t attract pests or absorb moisture. Rice and dried beans are cheap and easy to find but can draw bugs or hold moisture over time. Sand adds the most weight but should sit inside its own liner bag. Poly-fill or batting scraps make the lightest version, and a mix of fiberfill with a bit of rice or sand is a common middle ground.
How much fabric do I need for curtains?
Multiply your window or rod width by a fullness ratio of 2 to 2.5 for standard rod pocket curtains (lighter sheers can go fuller, heavier fabric a bit less), then add your length plus allowances for the rod pocket at the top and a generous 3 to 4in double hem at the bottom.
What is minky fabric and how do you sew it?
Minky is a plush, 100% polyester microfleece knit fabric with a soft pile, used mainly for blankets and stuffed items. Sew it with a walking foot, a slightly longer stitch (about 3 to 3.5mm), lots of pins or clips, and never iron directly on the pile side. It stretches on the cross grain and bias but not lengthwise, so watch your cutting direction, and it pairs well with a cotton or flannel backing.
What is blanket stitch used for?
Blanket stitch finishes a raw or folded edge while adding a decorative border at the same time. It’s the standard edge stitch for fleece blankets (no hem needed), felt applique, and felt ornaments, and it also shows up as a built-in machine stitch on most sewing machines for a faster version of the same look.
What batting should I use for potholders vs trivets?
Potholders, which protect your hand, can use a layer of Insul-Bright heat-resistant batting sandwiched between two layers of 100% cotton batting. Trivets, which protect your table from a hot pot, are usually made thicker with two or three layers of plain cotton batting instead. Insul-Bright is never microwave-safe because of its metalized fiber, so anything that might go in the microwave should be 100% cotton batting only.
Are home decor projects good for beginners?
Yes. Most home decor sewing is rectangles and straight seams, no darts, zippers, or curved fitting required. Pillowcases, draft stoppers, napkins, and placemats are commonly recommended as first projects, and even curtains and envelope pillow covers stay in straight-line territory.