
If you can already sew a straight seam, thread your machine without a fight, and press a hem, you are closer to wearing something you made than you probably think. Learning how to sew clothes is a different skill from learning to sew, though, and that gap is where most beginners stall out. Sewing techniques are things like a straight stitch, a zigzag, a French seam. Garment-making adds three variables on top of that: fit, construction order, and fabric choice, all working together on a shape that has to move with a real body. This roadmap walks you through that gap in order, starting with the lowest-stakes garment you can make and ending with a wardrobe you actually reach for. If you haven’t nailed the basics yet, our guide to sewing for beginners covers the fundamentals first. If you have, keep reading.
Some links below are affiliate links. Prices are 2025-2026 estimates and change often, so always check current pricing.
What Makes Clothes Different
Home-decor projects and craft sewing (totes, pillowcases, scrunchies) are forgiving because they’re flat, or loosely 3D, and nobody’s body has to fit inside them. The second you sew a garment, fit becomes the variable you cannot skip. The fabric has to wrap a moving, three-dimensional body, so drape, stretch, and grain suddenly matter as much as a straight line of stitching. Construction order stops being optional too: shoulders go on before sleeves, facings go on before hems, because garment pieces are curved and shaped rather than simple rectangles, and each step depends on the one before it holding its shape.
That’s why almost every experienced teacher agrees on the same starting move: your first garment should isolate fit as a variable instead of testing it. Pick a pattern that makes fit nearly impossible to get wrong. Look for these four things:
- Stable woven fabric (nothing slippery, sheer, or heavily stretchy)
- No complex closures (elastic waist or pull-over only, no zippers or buttons yet)
- A forgiving, loose fit with no darts or heavy shaping
- Only 1-2 new skills introduced per project
Every rung on the ladder below builds on that idea.
The Garment Ladder: Sew in This Order
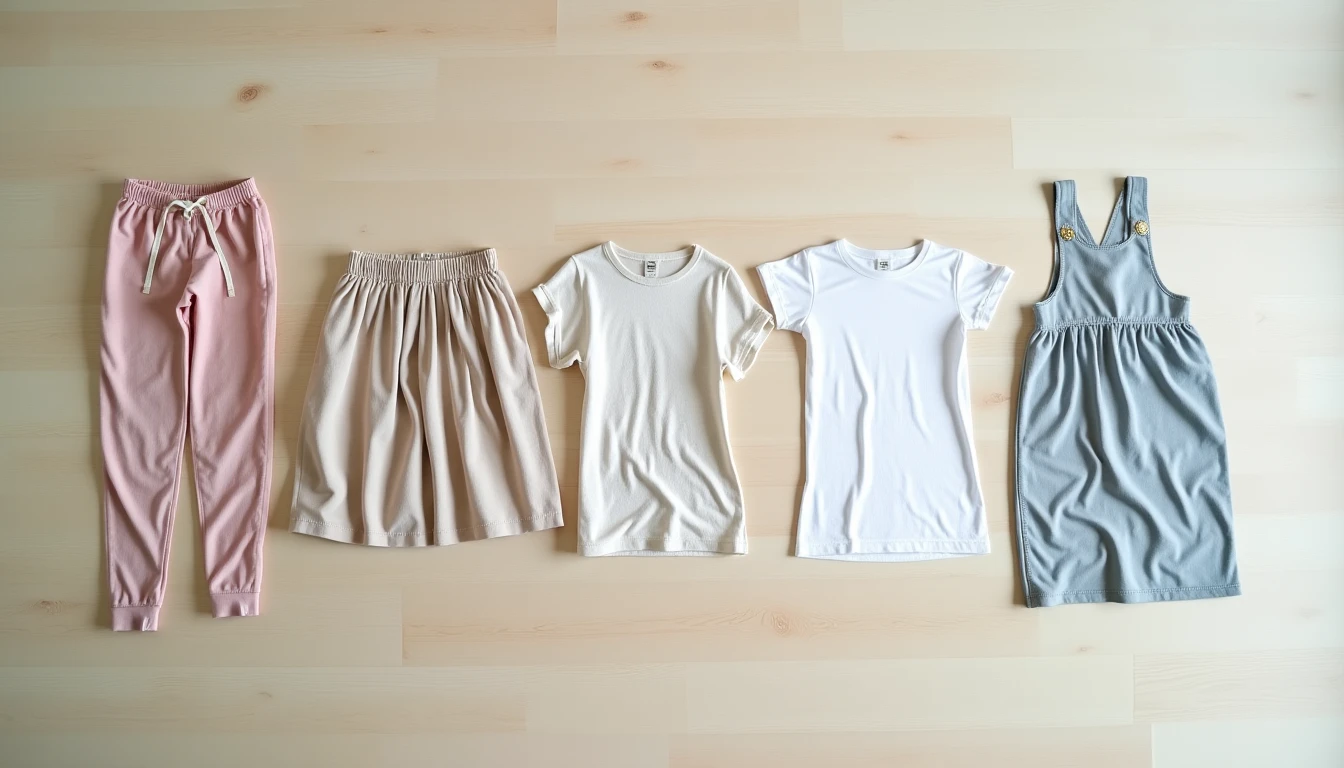
Think of this as six steps, each adding exactly one new skill on top of the last. Skipping rungs is how beginners end up frustrated with a zippered dress instead of proud of a wearable pair of pants. Sew each rung two or three times before moving up. Repetition is what turns a shaky new skill into muscle memory.
1. Pajama or lounge pants (or shorts). This teaches straight seam sewing plus your first elastic waist casing, on a garment nobody but you will ever see, which keeps the pressure at zero. A true beginner should budget 2 to 5 hours (once you’ve made a pair or two, expect closer to 1 to 1.5 hours). Peppermint Magazine’s free Loungewear Set, made with Common Stitch, includes drawstring or elastic lounge pants and is built specifically for beginners, with minimal pieces and no set-in sleeves.
2. Rectangle or gathered elastic-waist skirt. This adds your first real waistband casing plus a clean hem, still with zero fitted shaping, just straight seams and elastic. Budget 2 to 4 hours. There’s no single famous free pattern that dominates this rung (any basic elastic-waist skirt tutorial does the job), but it’s widely taught as the second step after PJ pants, including in Elaine Luther’s well-known beginner sewing-order lessons. When you’re ready to go deeper on this shape, our skirt-sewing guide walks through it in full.
3. Boxy woven top. Here you’ll sew your first neckline finish using a facing, which is easier to execute cleanly than bias-tape binding, and you may meet basic shaping through darts (or none at all). Budget 3 to 6 hours. Seamwork’s Hansie is a genuinely free woven tee with cut-on sleeves, a facing-finished neckline, darts, and just 5 pattern pieces, explicitly marketed as a beginner pattern (you’ll need a free account to download it). Our full tops and shirts guide picks up from here.
4. Knit tee. This is your first time sewing on stretch fabric: a ballpoint needle, a stretch or narrow zigzag stitch, and the concept of negative ease, where the fabric’s own stretch replaces some of the wearing ease a woven would need. Budget 2 to 4 hours (a familiar knit tee can drop to about an hour once you’ve made a few). Basic knit tee patterns from beginner-friendly indie lines, like Seamwork’s knit tops, are the standard choice here. Really, the skill being taught is the knit fabric itself more than any particular pattern.
5. Simple dress. Now you’re combining a bodice and a skirt into one garment, and often meeting your first zipper or closure, the point where two previously separate skills (top-shaping and waist or hem finishing) merge into one project. Budget 4 to 8 hours, sometimes a full weekend (intermediate sewists still report 3 to 5 hours on patterns labeled “beginner: 2-3 hours,” so don’t panic if it takes longer than the envelope promises). Tilly and the Buttons’ Bettine dress is explicitly labeled for beginners: an elasticated waist, no darts, no fastenings, grown-on sleeves, and it works in either wovens or knits. If your dress does call for a zipper, our first zipper guide walks through it step by step, and our full dress-sewing guide covers the rest of the rung.
6. Fitted pants or jeans. This is the graduation project: true fit adjustments, a fly-front zipper, a waistband with belt loops, and topstitching, the first garment where fit precision, not just construction, decides whether it works. Budget 8 to 15 hours including fitting time; most jeans sewalongs plan for a full weekend or more for a first pair. Closet Core Patterns’ Ginger Jeans are rated “Confident Beginner,” achievable if you’re willing to learn a fly-front zip, pockets, and topstitching, and they come with an extensive free sewalong on the Closet Core blog. Our dedicated pants-sewing guide covers this rung when you’re ready for it.
Choose a Pattern Like a Pro
The big pattern companies flag their easiest designs, so use those labels while you’re building confidence:
- Simplicity: “Learn to Sew” and “It’s So Easy” lines
- Burda Style: a difficulty rating with a “Super Easy” tier (older print magazines used a cotton-reel icon scale instead)
- New Look: “Easy” / “Very Easy” labeling
- Butterick: “Yes! It’s Easy” / “See & Sew” lines
- McCall’s: “Learn to Sew for Fun” collection, 83+ patterns designed for people just starting out with detailed step-by-step instructions
Indie PDF patterns, think Seamwork Hansie, Tilly and the Buttons Bettine, Closet Core Ginger, or Peppermint’s loungewear, don’t share a common difficulty label system, so check two things yourself before buying. First, whether seam allowance is already included in the pattern pieces (some indie designers leave it out and expect you to add your own). Second, whether the designer publishes a free sew-along. Those step-by-step, photographed walkthroughs are often more useful for a first-timer than the instruction sheet alone.
Before you buy or download, check PatternReview.com, a community of roughly 600,000 members, for real reviews of the exact pattern: fit notes, fabric recommendations, and honest difficulty reports from people who’ve actually sewn it. And once you have the pattern in hand, read the entire instruction sheet start to finish before you cut a single piece of fabric. It sounds like overkill until the moment step nine assumes you did something in step four that the sheet only explained in a diagram you skimmed past.
One more practical choice: PDF patterns are cheap and instant, but you’ll spend time printing, taping, and trimming multiple sheets before you can even trace them. Paper (envelope) patterns cost more and take longer to arrive, but they’re ready to trace or cut straight away. Many beginners start with paper patterns from the big four brands specifically to skip the assembly step.
Get the Fit Right
This is usually the part that scares people off garment sewing, so let’s take it slowly.
Start by measuring your bust (fullest point), waist (the natural crease you find when you bend sideways), and hip (fullest point, usually 7 to 9 inches below your waist), over light clothing, with the tape snug but not compressing. Our full measuring guide walks through exactly where to place the tape.
Then choose your pattern size by your largest measurement among bust, waist, and hip, not your usual ready-to-wear size. It is far easier to take a garment in than to let it out. On multi-size printed patterns, blend smoothly between sizes at the seam lines instead of jumping to a single size. If you’re a 12 at the bust and a 14 at the hip, cut a 12 tapering out to a 14, rather than picking one number and hoping.
For any garment with darts, fitted shaping, or a waist seam, sew a muslin first: a test version in cheap fabric. An old bed sheet or thrifted fabric works fine for this. Use a long basting stitch so the seams are easy to unpick and adjust. Fit from the top down: check the shoulders first (the seam should sit at your natural shoulder point, roughly where your arm bends when raised), then move to bust, waist, and hip, adjusting each area before you move to the next.
It helps to understand ease, the difference between your body measurement and the finished garment measurement. Wearing ease is the minimum room you need to move and breathe, roughly 2 to 3 inches minimum at the bust for a woven top. Design ease is added on top of that for silhouette, since loose styles need more room than fitted ones. Knits flip this: negative ease is normal and expected, because the fabric’s own stretch supplies the room to move. A knit tee finished 1 to 2 inches smaller than your body measurement is standard, not a mistake.
Once you’re wearing a muslin or a finished garment, read the wrinkles. Horizontal wrinkles or folds across a garment usually mean it’s too tight in that spot, so add width or length there. Diagonal drag lines point toward the area causing the pull, meaning the shaping is in the wrong place for your body and needs both width and length correction at the point the lines radiate from.
And take the pressure off yourself here: perfect fit isn’t the realistic bar for handmade clothes. Drastically better than ready-to-wear is. RTW is mass-graded to an average body that fits almost nobody exactly. A garment you’ve fitted to your own shoulders and hips, even imperfectly, will fit better than most of what’s hanging on a store rack.
Fabric for Garments
Your fabric choice can make an easy pattern hard or a hard pattern easy, so it’s worth a section of its own (our full fabric guide covers this in more depth).
Good options for early garments include:
- Quilting cotton: easy to cut, presses crisply, holds its shape, and forgives mistakes, which makes it ideal for structured shapes like boxy tops or gathered skirts. Be honest with yourself here, though: it’s stiff and doesn’t drape, and plenty of beginners regret using it for a dress that’s meant to flow.
- Cotton lawn, voile, or batiste: lightweight, soft drape, and still stable enough (not slippery) for a first woven garment.
- Chambray and linen: stable, breathable wovens with body but a nice drape for tops and dresses.
- Double gauze: soft, forgiving, doesn’t fray badly, and drapes better than quilting cotton.
- Rayon challis: beautiful drape for dresses and tops, though slightly more slippery than cotton, a good step-up fabric once your basic skills are solid.
- Cotton jersey with spandex: the standard first knit fabric, with stable stretch that doesn’t run or curl excessively and forgives imperfect seams.
- Ponte knit: a thick, stable double-knit that behaves almost like a stretchy woven, very forgiving for first knit garments.
- French terry: a stable sweatshirt-weight knit, easy to handle, great for loungewear and knit tops.
Steer clear, early on, of chiffon, satin, and silk charmeuse. They’re slippery, shift under the presser foot, and need special seam finishes like French seams. Also avoid slippery rayon or viscose blends, and very stretchy, thin knits, which run, curl, and distort easily under a home machine needle.
Two habits will save you real frustration. Always prewash fabric the same way you’ll launder the finished garment, to pre-shrink it and remove sizing. And follow the fabric recommendations printed on the pattern envelope or listing. They’re chosen to match the drape and stretch the pattern was designed around, and ignoring them (using quilting cotton on a pattern that calls for fluid drape, for example) is one of the most common reasons a finished garment doesn’t look like the photo.
Construction in the Right Order
Garments come together in a fairly universal sequence, and following it (rather than jumping ahead to the “fun” parts) is what makes the difference between a garment that lies flat and one that puckers. Our construction guide covers each of these steps in depth, but here’s the order:
- Prep your pieces: staystitch curved or bias edges to prevent stretching, then press.
- Apply interfacing to facings, collars, and closure areas as the pattern specifies.
- Sew and press darts or other shaping (tucks, pleats, gathers) first, while the pieces are still flat and small.
- Join the shoulder seams (baste and try on before final stitching if fit is a concern).
- Finish the neckline, whether that’s a facing, binding, or collar.
- Insert the sleeves. Flat insertion, sewn before the side seam is closed, is easier for beginners than set-in-the-round, and it’s standard on knit tees and casual wovens.
- Sew the side seams (and sleeve underarm seams in one continuous line if you used flat insertion).
- Add waistbands, plackets, or other closures.
- Hem last, once you can check the garment’s true finished length on your body. Our hemming guide covers this final step.
Two habits make everything above look better than it has any right to: press as you sew, every single seam, and try the garment on as you go rather than waiting until it’s finished to find out something’s off.
Know Your Styles
Once you can execute the basic construction steps, the next skill is vocabulary. Knowing the difference between an A-line and a fit-and-flare dress, a raglan versus a set-in sleeve, or a gathered versus a circle skirt lets you read a pattern envelope and predict how it will actually look and fit before you ever buy the fabric. That vocabulary turns pattern shopping from guesswork into a deliberate choice, which is exactly what our garment styles guide is built for.
Sewing for Little Ones
Kids’ and baby clothes are one of the best places to keep practicing new techniques. Garments are small, so they use little fabric and take a fraction of the time of an adult version. The forgiving, loose fits typical of kidswear (and the fact that kids don’t care about a slightly off hem) take fit pressure off completely. Knit fabrics are common and low-stakes here too. And a handmade item for a child or grandchild is one of the most appreciated gifts a beginner sewist can give, which keeps motivation high while your skills are still developing. Our sewing for kids guide has more on where to start.
Common Mistakes (and the Honest Cost Question)
Watch for these seven traps, all common enough that you shouldn’t feel bad if you’ve already hit one or two:
- Choosing a too-ambitious first project (a fitted dress, jeans, or a jacket) before building basic construction skills.
- Skipping the muslin or test version on a fitted style and cutting straight into good fabric.
- Sewing styles you’ll never actually wear instead of auditing your closet for the colors and silhouettes you already reach for.
- Ignoring the fabric recommendations printed on the pattern envelope or listing.
- Using stiff quilting cotton for a dress or top designed to drape and flow.
- Rushing construction and skipping pressing between steps, when pressing as you go is what makes seams lie flat and look professional.
- Picking your pattern size by your usual ready-to-wear number or a vanity size instead of your actual largest body measurement.
Now, the question everyone eventually asks: is it actually cheaper to sew your own clothes? Honestly, usually not, once you count fabric, notions, and your own time against a $12 mass-produced shirt. That math changes against mid-range and higher retail, though. A $40-80 dress or a tailored coat carries a large labor markup that sewing it yourself sidesteps, so against that tier the savings are real. Your first few months of sewing will also skew toward net cost, between classes, tools, and fabric mistakes while you’re learning. Once you’re comfortably repeating patterns and doing your own mending, the math flips in your favor.
The bigger value beyond price is fit, fabric choice, durability, and satisfaction, things a store rack can’t offer at any price. On time: a simple garment like PJ pants, an elastic skirt, or a basic knit tee is realistically a single sitting or afternoon for a beginner, roughly 2 to 6 hours. More involved makes, a lined dress, a first pair of fitted pants or jeans, take 10 to 20 hours including fitting time, often spread across a full weekend or several evenings.
Where to Go Next
You’ve now got the full shape of the roadmap. From here, the six deep-dives above are where to go depending on what you want to make next: skirts, tops and shirts, dresses, a first zipper, pants, or a full style vocabulary to shop patterns with confidence. Kids’ clothes are worth a detour too, both as low-stakes practice and as genuinely appreciated gifts.
If you’re ready to pick an actual project rather than just read about one, a beginner-friendly printable pattern is the natural next step. This library of 155+ printable PDF sewing patterns comes with step-by-step instructions and is a reasonable place to find your first garment.
Frequently Asked Questions
How do I start sewing my own clothes?
Start with a pattern that meets 4 criteria: stable woven fabric, no zippers or buttons, a loose forgiving fit, and only 1-2 new skills. Pajama pants or an elastic-waist skirt are the classic starting points. Master straight seams and a waistband casing before moving to necklines, knits, and fitted shaping.
What is the easiest clothing item to sew?
Elastic-waist pajama pants or shorts are widely considered the easiest first garment: straight seams and an elastic casing only, no fitted shaping and no closures, sewable in 2 to 5 hours by a beginner.
Is it cheaper to sew your own clothes?
Usually not cheaper than fast fashion once you count fabric and your time, but it is cheaper than mid-range or tailored retail clothing, where you’re avoiding a large labor markup. The real payoff is fit, fabric quality, and durability rather than raw savings.
How long does it take to sew a garment?
A simple beginner garment (PJ pants, elastic skirt, basic knit tee) takes roughly 2 to 6 hours. A simple dress runs 4 to 8 hours. A first pair of fitted pants or jeans, including fitting, typically takes 8 to 15 hours.
Do I need a pattern to sew clothes?
Not always. Very simple shapes, like a rectangle skirt or a pillowcase-style top, can be drafted freehand. But a pattern gives you tested proportions, seam allowances, and cutting layouts, and it dramatically shortens the learning curve for anything with shaping.
What fabric should a beginner use for clothes?
Stable, non-slippery light-to-medium wovens: cotton lawn, chambray, linen, double gauze, or quilting cotton for structured shapes. Once you’re ready for knits, reach for cotton jersey with spandex or ponte. Avoid chiffon, satin, silk charmeuse, and thin stretchy knits until you have more experience.
How do I sew clothes that actually fit?
Measure bust, waist, and hip accurately, choose your pattern size by the largest of the three, blend between sizes if needed, and sew a muslin test version for any fitted style before cutting your good fabric. Fit from the shoulders down, and read wrinkles: horizontal means too tight, diagonal drag lines point toward where you need more room.
Can a beginner sew a dress?
Yes, if it’s the right dress. A loose, elastic-waist or pull-over style with no darts, like Tilly and the Buttons’ Bettine, is achievable early on. Save fitted, zippered, or heavily shaped dresses for after you’ve built basic skills on the earlier rungs of the garment ladder.