
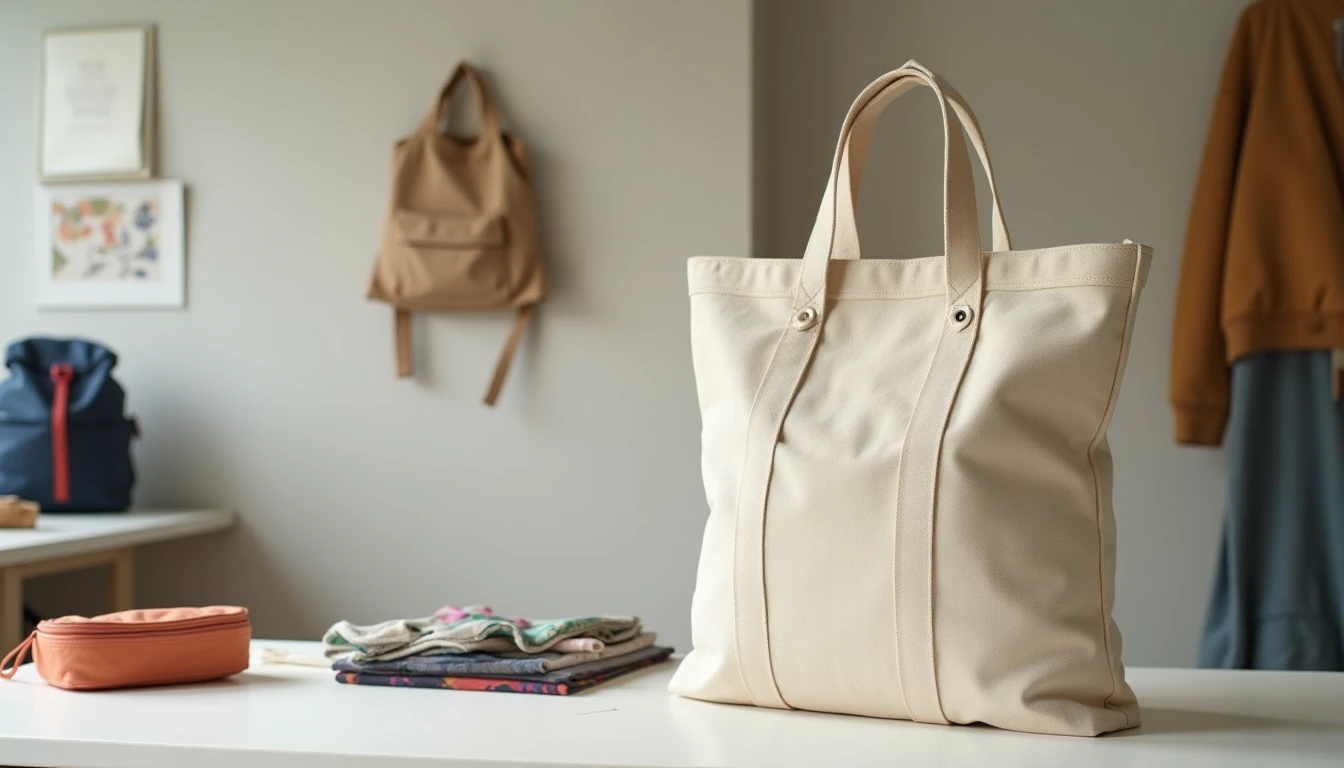
Bags are the friendliest project in sewing. There’s no body to fit, no grading between sizes, no muslin to test and refit. Cut two rectangles, sew three seams, and you have something you’ll actually use tomorrow morning. That’s why so many sewists learn the machine on a tote before they ever touch a garment pattern.
This guide walks the whole ladder. You’ll start with a basic tote bag (the project most people mean when they say “I want to learn to sew a bag”), then move into drawstring bags and the two cord backpack version, zip pouches and pencil cases, a fast tour of purse styles so you know what you’re looking at in a pattern shop, and finally the stabilizers and hardware that turn a soft bag into a structured one. If you want more beginner-friendly builds once bags click for you, browse the full library of sewing projects for what to try next.
Some links below are affiliate links. Prices are 2025-2026 estimates and change often, so always check current pricing.
How to Make a Tote Bag
A tote is two body panels, two straps, and a bottom. Get comfortable with this one and every other bag in this guide is a variation on it.
Fabric first. You have two honest routes. The first is a single layer of canvas or cotton duck, 10 to 12oz weight. It holds its own shape with no interfacing at all, and you can leave it unlined and finish the inside with French seams for a genuinely fast build. The second route is quilting weight cotton, which looks great and comes in every print imaginable, but on its own is too light to carry anything without sagging. Fuse it to Pellon SF101 Shape-Flex, the standard baseline woven interfacing for bag making, and pair it with a separate lining layer. For a primer on what different fabric weights can and can’t do on their own, see the guide on choosing sewing fabrics.
Yardage is simple to plan. About 3/4 to 1 yard of 44/45in wide fabric covers the exterior of a basic 14x16in tote. If you’re lining it, add a matching 3/4 yard.
Dimensions. Cut body panels roughly 14-16in wide by 15-16in tall. Once seams are sewn and the corners are boxed, the finished bag lands around 13-15in wide by 13-14in tall by 4in deep, a genuinely useful everyday size. Straps get cut 22-28in long by 3-4in wide, and they finish at about 1-1.5in wide once folded and topstitched.
The steps:
- Cut two exterior body panels (about 15in wide x 16in tall) and two strap strips (24-28in long x 3-4in wide). Cut matching lining panels if you’re lining the bag.
- If you’re using quilting cotton, fuse SF101 Shape-Flex to the wrong side of both body panels before any sewing happens.
- Make the straps. Press each strip in half lengthwise to crease the center, open it back up, fold both raw edges in to meet that center crease, press again, then fold in half once more and topstitch down both long edges. A 3-4in wide cut strip becomes a finished strap about 1-1.5in wide.
- Baste the straps to the right side of the top edge of the front and back panels, raw edges lined up with the panel’s top edge, positioned about 3-4in in from each side seam. Double check the straps aren’t twisted before you baste them down.
- With right sides together, sew the two body panels along both side seams and across the bottom, leaving the top edge open (and a turning gap in the lining’s bottom seam if you’re lining it).
- Box the corners (details below).
- If lining, sew the lining panels’ sides, bottom, and boxed corners the same way, leaving a turning gap, then slip the right-side-out exterior down inside the lining so right sides face each other, straps sandwiched in between, top edges aligned. Sew around the top opening, turn everything right side out through the lining’s gap, stitch the gap closed, and push the lining down inside the bag.
- If you’re leaving it unlined, finish the raw side and bottom seams with a French seam instead of a plain one: stitch wrong sides together at 1/4in, trim close, then stitch right sides together at 1/2in to fully enclose the raw edges, so the inside has no fraying seams.
- Fold the top raw edge down twice (or bind it) to hem it, catching the strap ends inside the fold, then topstitch all the way around the top opening 1/4-1/2in from the edge. This finishes the rim and holds the straps standing upright.
Boxing the corners
This is the one step that trips people up, and it’s really just one measurement. At each bottom corner, flatten the point so the side seam lies directly on top of the bottom seam, forming a triangle. Measure from the pointed tip along that seam, and the number you’re looking for is always half the finished depth you want. Want a 4in deep base? Mark your line 2in from the tip. Want a shallower 3in base? Mark it 1.5in from the tip. Sew straight across that marked line, backstitching at both ends, then trim the corner point to about 1/2in past the stitching. Repeat on the opposite corner and the bag suddenly has a flat bottom that stands up on its own on a table, instead of a floppy pillow shape.
Lining vs. French seams. A lining gives you a clean interior, a place to hide a pocket, and a bag that hangs a little heavier and more polished. It also roughly doubles your fabric and adds a step. Skipping the lining and finishing the raw seams as French seams instead gets you a fray-free interior with no extra pattern pieces and about half the sewing time. Neither is wrong. Pick lining for a gift or a bag you want to feel finished, and pick the unlined French seam route when you just want a tote today.
Budget about 1-2 hours for an experienced beginner once the fabric is cut, and add 20-30 minutes if you’re adding a full lining.
Drawstring Bags and Backpacks
The plain drawstring bag is the simplest cousin of the tote. Sew a single casing at the top, thread one cord through it with both ends exiting the same gap, and pulling the cord cinches the opening shut. That’s the whole project, and it’s a good confidence builder before you tackle the backpack version.
The drawstring backpack uses the same idea twice. Cut one rectangular body panel (or two panels sewn into a tube), sew a folded casing at the top edge, and stitch that casing into two separate channels (a seam splitting it into left and right halves is the usual way to do it). Cut two cords.
- Thread the first cord through both casing channels starting from one side, so both of its ends exit on that same side.
- Thread the second cord through both channels starting from the opposite side, so both of its ends exit on the opposite side.
- Bring each cord’s two ends down to the bottom of the bag and anchor them at one bottom corner each, either through a grommet or eyelet punched into the corner, or a small fabric loop sewn into the corner seam. A knot or a reinforcing fabric tab at that stress point is worth the extra five minutes.
- Pull both cords. The top cinches shut and the cords themselves become a pair of shoulder straps, no separate strap pieces needed.
It sounds fussier written out than it is to sew. Once you’ve threaded one cord through and seen how the opposite anchoring turns it into a strap, the second cord is just a repeat.
Sizing depends on what the backpack needs to hold. Small versions run around 10x15in finished. Larger ones run 13-17in wide by 17-18in tall, roughly 2-5in deep if you box the bottom the same way you’d box a tote. Gym and shoe bag versions usually sit at the smaller end, around 12-14in wide by 16-17in tall, since they only need to hold shoes, a change of clothes, or gym kit rather than books or a laptop.
Zip Pouches and Pencil Cases
If you’ve been putting off zippers, a flat pouch is the easiest place to start, and once it clicks you’ll reach for a zipper as often as a plain hem.
- Cut one exterior and one lining piece to the same size (finished pouch width plus seam allowance, by finished height plus seam allowance, doubled if you’re cutting on the fold).
- Sandwich the zipper between one exterior piece and one lining piece, right sides together with the zipper facing down, and stitch along the zipper tape using a zipper foot.
- Flip the exterior and lining away from each other so wrong sides face the zipper tape, and topstitch close to the zipper edge to hold it flat. If the zipper foot step feels shaky, the full walkthrough on how to sew a zipper covers it in more detail.
- Repeat on the other side of the zipper with the second exterior and lining piece.
- Open the zipper partway (this matters, or you won’t be able to turn the bag right side out later), then fold so exterior fabrics face each other and lining fabrics face each other, and sew around the remaining three sides, leaving a small gap in the lining bottom for turning if the lining isn’t left open elsewhere.
- Trim the corners, turn right side out through the gap or open zipper, push out the corners, and press. Stitch the turning gap closed if there was one.
To turn that flat pouch into a boxed pencil case that stands up, box each bottom corner before turning it right side out: flatten the corner into a triangle matching the side seam to the bottom seam, measure 1-1.5in from the tip, and sew straight across, the same technique as the tote corners, just scaled down. That single extra step turns a flat, floppy pouch into a case with a real footprint.
On sizing: standard pencils and pens run about 7.5in long, so a flat zip pouch needs a finished interior length of at least 9in to fit them with room to spare. A common flat pattern cuts panels around 9.5in x 5.5in for a roughly 9x5in finished pouch using a 9in zipper. A boxed pencil case that stands upright commonly finishes around 8-9in long by 3-4in wide by 2in deep once the corners are boxed.
A couple of zipper tips worth knowing before you cut. Buy or cut the zipper a bit longer than the pouch opening. It’s far easier to sew straight past the zipper pull and trim the excess tape afterward than to try to shift a pull out of the way mid seam. A #3 or #4.5 nylon coil zipper is the easiest weight for beginners to sew through and trim, and it gives enough flex for boxed corners on a pencil case.
A Quick Tour of Purse Types
Once totes and pouches feel routine, it helps to know what you’re looking at when a pattern is labeled “satchel” or “hobo.” Here’s the lineup, from simplest to most involved.
- Tote: An open-top rectangle with two parallel handles and no closure, the simplest bag shape there is. Beginner.
- Shoulder bag: A single wider strap sized to rest on the shoulder, often with a zip or magnetic snap closure added on top of tote-style construction. Beginner to intermediate.
- Crossbody: A long adjustable strap worn diagonally across the body, usually on a smaller, closure-equipped bag with a zip or flap. Intermediate.
- Hobo: A large, slouchy, crescent-shaped bag in soft unstructured fabric with a shoulder strap. The drape forgives imperfect seams. Beginner to intermediate.
- Satchel: A structured bag with a flat, boxed bottom, double top handles, and a flap or frame closure, needing stabilizer to hold its shape. Intermediate to advanced.
- Clutch: A flat, strapless bag closed with a zip, snap, or envelope fold, carried in the hand. Beginner.
- Wristlet: A small clutch with a wrist strap loop added, essentially a pouch upgrade. Beginner.
- Bucket bag: A round or cylindrical bag with a drawstring-cinched top opening, built around a circular or oval base. Intermediate.
- Backpack purse: Two shoulder straps on a smaller, structured body panel, usually with a zip or flap closure and interior structure. Intermediate to advanced.
- Baguette: A small, structured, rectangular bag sized to tuck under the arm, popularized in the 1990s, with a short handle or strap. Intermediate.
- Messenger: A large horizontal crossbody bag with a flap cover, adjustable long strap, and usually hardware like D-rings. Intermediate to advanced.
- Belt bag / fanny pack: A small zip pouch mounted on an adjustable strap with slider hardware, worn at the waist or hip. Beginner to intermediate.
If this list reminds you of shopping for a garment pattern by silhouette, that instinct is right. Purse types work the same way clothing styles do: a small set of construction choices (strap placement, closure, structure) combine into named categories, the same way the garment styles guide breaks down clothing silhouettes into their building blocks.
Leveling Up: Structure and Hardware
The gap between “cute tote” and “bag that holds its shape on a shelf” is almost entirely about stabilizer choice, not sewing skill. Here’s the ladder, softest to firmest:
- Pellon SF101 Shape-Flex is the standard baseline fusible woven interfacing for quilting cotton. It keeps the fabric from stretching or distorting while staying flexible, and it’s the right starting point for most totes and pouches.
- Fusible fleece (Pellon 987F) adds a soft, slightly relaxed loft when a bag needs more body than SF101 gives but shouldn’t feel stiff. You can also layer it with SF101 for a firmer result without the bulk of foam.
- By Annie’s Soft and Stable is a sew-in foam stabilizer, not fusible, and it produces a structured but squishy bag that holds its shape without feeling rigid.
- Pellon Peltex is the firmest option on the shelf, available sew-in (70) or fusible on one side (71F) or on two sides (72F). 71F is the one most commonly specified in bag patterns for rigid bases and structured panels that stand up on their own.
Beyond fabric and stabilizer, a small hardware kit opens up a lot of styles: magnetic snaps for closures, D-rings and swivel clasps for detachable or adjustable straps, rectangle rings or sliders for length-adjustable straps, purse feet to protect a structured bottom from wear, and rivets or Chicago screws for reinforcing stress points. None of it is required for a basic tote, but once you want a satchel or messenger bag from the list above, it’s what gets you there. The sewing tools and notions guide covers what’s worth owning versus what to buy per project.
One quiet fitting note: canvas, duck, and other heavy bag fabrics need a heavier needle than garment sewing. Use a denim or topstitch needle in size 90/14 to 100/16 for light to medium canvas (7-12oz), sizing up to 110/18 for heavier canvas. A walking foot helps feed thick, multi-layer, or interfaced fabric evenly instead of bunching, and lengthening the stitch to about 3-3.5mm reduces perforation tearing along seams.
Here’s the honest read on difficulty. A floppy tote or a flat pouch is genuinely beginner friendly. Anything described as “structured,” satchels, framed bags, backpack purses, is an intermediate step up, mostly because of the interfacing layers, boxed bases, and hardware installation rather than the sewing itself. A well-written pattern that specifies exact interfacing and hardware placement makes that jump much easier than drafting it solo.
Bag-Making Mistakes
Five things that trip up new bag makers more than anything about the actual stitching:
- Skipping interfacing on quilting cotton. The bag looks great off the bolt but goes floppy and shapeless the moment it’s loaded, because quilting cotton alone has no structure to hold a bag’s shape.
- Cutting straps too short for the actual carry style. A shoulder bag needs a strap drop (the distance from the top of the bag to the top of the loop) of roughly 9-12in to sit comfortably over the shoulder, while a crossbody strap needs a much longer drop, roughly 20-24in, to sit at hip level worn diagonally. Measuring over the shoulder or across the body before cutting (see the guide on taking sewing measurements) prevents a strap that’s too short to actually wear.
- Leaving interior seams raw and unfinished. Bags get more handling and stress than garments, so raw seams inside a tote fray and eventually pull apart. A lining, French seam, or serged or zigzagged edge solves it.
- Avoiding zippers out of nerves and defaulting to open totes for everything. A basic flat zip pouch is one of the fastest ways to get comfortable with a zipper foot, and it unlocks pencil cases, clutches, and wristlets once you’re past that first zipper.
- Using regular all-purpose thread on canvas or other heavy bag fabric. It shreds under the strain of a loaded strap. Heavy-duty or topstitch-weight thread, paired with the right needle size, holds up to real use.
If you’d rather sew from a pattern that already has the interfacing, hardware placement, and cutting dimensions worked out for you, the Sewing Pattern Secrets library has 155+ printable PDF sewing patterns, including bags and pouches, at this pattern library. No course, no upsell ladder, just the patterns.
Frequently Asked Questions
How do you make a simple tote bag?
Cut two body panels and two strap strips, fold and topstitch the straps, baste them to the top edge of the panels, sew the panels right sides together along the sides and bottom, box the corners for a flat base, then hem and topstitch the top opening. A basic version takes about 1-2 hours.
How much fabric do I need for a tote bag?
About 3/4 to 1 yard of 44/45in wide fabric for the exterior of a basic 14x16in tote, plus a matching 3/4 yard if you’re adding a lining. Larger totes or extras like pockets add another 1/4-1/2 yard.
How do you box corners on a bag?
Flatten each bottom corner into a triangle by matching the side seam to the bottom seam, measure from the tip a distance equal to half your desired finished depth (2in for a 4in deep base), sew straight across that line, then trim the corner point.
How do you make a drawstring backpack?
Sew a rectangular body into a tube, add a top casing split into two channels, then thread two cords through both channels starting from opposite sides so each cord’s ends exit on one side at the top. Anchor each cord’s two ends into the two bottom corners, through grommets or fabric loops. Pulling both cords cinches the top and forms the shoulder straps.
What size should a pencil case be?
A flat zip pencil case needs at least a 9in finished interior length to fit standard 7.5in pencils and pens, commonly cut around 9.5×5.5in for a 9x5in finished pouch. A boxed version that stands upright typically finishes around 8-9in long by 3-4in wide by 2in deep.
What interfacing should I use for bags?
Pellon SF101 Shape-Flex woven fusible is the standard baseline for quilting cotton bags. For more body, add fusible fleece (987F). For a structured but soft feel, use a sew-in foam like By Annie’s Soft and Stable. For a rigid, stand-up base or panel, use Peltex (71F fusible or 72F double-sided fusible).
What is the easiest bag to sew?
A flat zip pouch or an unlined canvas tote with French seams are the easiest starting points. No zippers to fear on the tote, no boxed corners or hardware on the pouch, and both can be finished in under an hour once the fabric is cut.
Do I need a special needle for canvas?
Yes. Use a denim or topstitch needle in size 90/14 to 100/16 for light to medium canvas, going up to 110/18 for heavier canvas, ideally with a walking foot and a slightly longer stitch length (3-3.5mm) to feed the thick fabric evenly.