
If you’ve got a pile of clothes with popped seams, small holes, a broken zipper, or jeans that don’t fit right anymore, here’s the good news: most of this takes 5 to 20 minutes once you know how to mend clothes properly. The trick is matching the damage to the right fix instead of guessing. A popped seam gets different treatment than a hole in a sweater, and a broken zipper pull is a different job than a fully shredded zipper. Once you can tell those apart, the sewing itself is easy.
You don’t need much to start: a few needles, matching thread, small scissors, a seam ripper, and pins cover almost everything below. If your kit is bare, our basic sewing kit guide walks through what to buy. And if you’re new to sewing, mending is the fastest way to build real skill, since you’re working on a finished garment and every fix teaches you something you’ll use again. Our beginner sewing roadmap has more on where mending fits into learning to sew.
Some links below are affiliate links. Prices are 2025-2026 estimates and change often, so always check current pricing.
Identify the Damage First
Before you thread a needle, figure out exactly what you’re dealing with, because the fastest fix is almost always the right one, not the fanciest.
| Damage | Best Fix | Difficulty |
|---|---|---|
| Loose or missing button | Resew through the shank, or add a thread shank for coats | Easiest |
| Popped or split seam | Ladder or whip stitch by hand, or machine backstitch along the original seam line | Easiest |
| Small hole in woven fabric | Ladder stitch worked from the inside | Easy |
| Pinhead hole in a knit or t-shirt | Nudge the surrounding threads back over the gap and stretch gently, or fuse a scrap of lightweight interfacing behind it | Easy |
| Tear or rip | Fusible interfacing behind the tear, then backstitch or narrow zigzag across it | Easy-medium |
| Popped or fallen hem | Re-hem with a blind stitch or double-fold topstitch | Easy |
| Broken zipper pull or slider | Squeeze the slider gently with pliers, or loop a keyring or paperclip through as a stand-in pull | Easy |
| Hole worn through a sweater, sock, or elbow | Darning: the woven-patch method with a mushroom and matching thread | Medium |
| Large hole or worn-through knee or seat | Sew-on patch (self-fabric is most invisible) or a combined patch-and-darn | Medium |
| Zipper with missing or broken teeth near the bottom | Bar tack above the damage to create a new bottom stop, or full zipper replacement | Medium-hard |
| Fully broken or corroded zipper | Full zipper replacement: seam-rip out the old one, sew in a new one | Hard |
Fix a Popped Seam (the Easiest Repair)
A popped seam is the most common repair you’ll run into, and it’s the best place to start if you’re nervous about a needle. Here’s how to close it up:
- Turn the garment inside out and press the split area flat so the seam allowance lies open and isn’t puckered.
- Trim away any loose or frayed threads along the split so you’re stitching clean fabric.
- Pin the seam back together, matching the original stitch line and easing the fabric flat, not stretched.
- By machine, backstitch along the original seam line, starting about half an inch into the still-sewn seam on each end so the repair anchors past the weak point, not just at it.
- By hand, for a repair that shouldn’t show, use a ladder stitch (for a folded seam) or a whip stitch, catching just a few threads on each side so the stitches sink into the fold. Our hand-sewing stitches guide has the exact motion for both.
- For knits or stretch fabrics, use a narrow zigzag or your machine’s stretch stitch instead of a straight stitch, so the seam stretches with the fabric.
- Lock your stitches at both ends so the repair doesn’t unravel, then turn right-side out and press again to set it.
That’s it. A popped seam that took two minutes to happen takes about the same amount of time to undo.
Fix Small Holes
Small holes come in two flavors: woven fabric (shirts, pants, dresses) and knit fabric (t-shirts, leggings, sweaters), and they get different treatment.
For a small hole in woven fabric, work a ladder stitch:
- Turn the garment inside out and thread a needle with thread matching the fabric color, then knot the end.
- Working from one side of the hole, take a small stitch catching just the fold of fabric, then cross to the opposite side and take a matching stitch. This back-and-forth is the ladder stitch, sometimes called a slip stitch.
- Continue zig-zagging small stitches down the length of the hole without pulling the thread fully tight yet.
- Once you reach the end, gently pull the thread taut so the two sides draw together and the hole closes, then knot off and press flat.
Because the stitches sink into the fold rather than sitting on top of the fabric, this repair is nearly invisible from the outside.
For a pinhead hole in a knit or t-shirt, try the low-effort route first: turn the garment inside out, use the tip of a needle (no thread needed) to gently nudge the loose surrounding knit threads back across the gap, then stretch the fabric lightly around the hole. On many knits this alone closes a pinhole, because the threads redistribute on their own. If it doesn’t fully close, fuse a small scrap of lightweight knit or tricot interfacing behind the hole with a low-heat iron and a pressing cloth.
One caution: many knit tops are polyester, nylon, or spandex blends that scorch, melt, or glaze at high iron heat. Always test on a hidden seam allowance first and use the lowest setting that will still fuse the interfacing.
Fix Tears and Rips
A tear is different from a clean hole because the edges are ragged and want to keep spreading if you don’t stabilize them first. Here’s the method:
- Cut a patch of lightweight fusible interfacing (or fusible web plus a fabric scrap) about half an inch larger than the tear on all sides, then slide it behind the tear, fusible side against the wrong side of the fabric.
- Press with a pressing cloth between the iron and the right side to fuse it in place and stabilize the torn edges.
- Once cool, backstitch by hand or run a narrow zigzag by machine along the tear line to close it permanently. The interfacing keeps the edges from stretching or fraying further while you stitch.
- For an L-shaped or angled tear, stitch it in two separate passes, one leg at a time, rather than pivoting through the corner in one line.
- Apply fray check or clear nail polish to any raw edges that keep fraying.
For a tear you can’t easily sew, like a lining or a spot you can’t get a needle behind, use fabric mending glue instead: apply it, press the edges together, then clamp or weight it flat overnight to bond.
Darning: Fix Holes in Sweaters and Socks
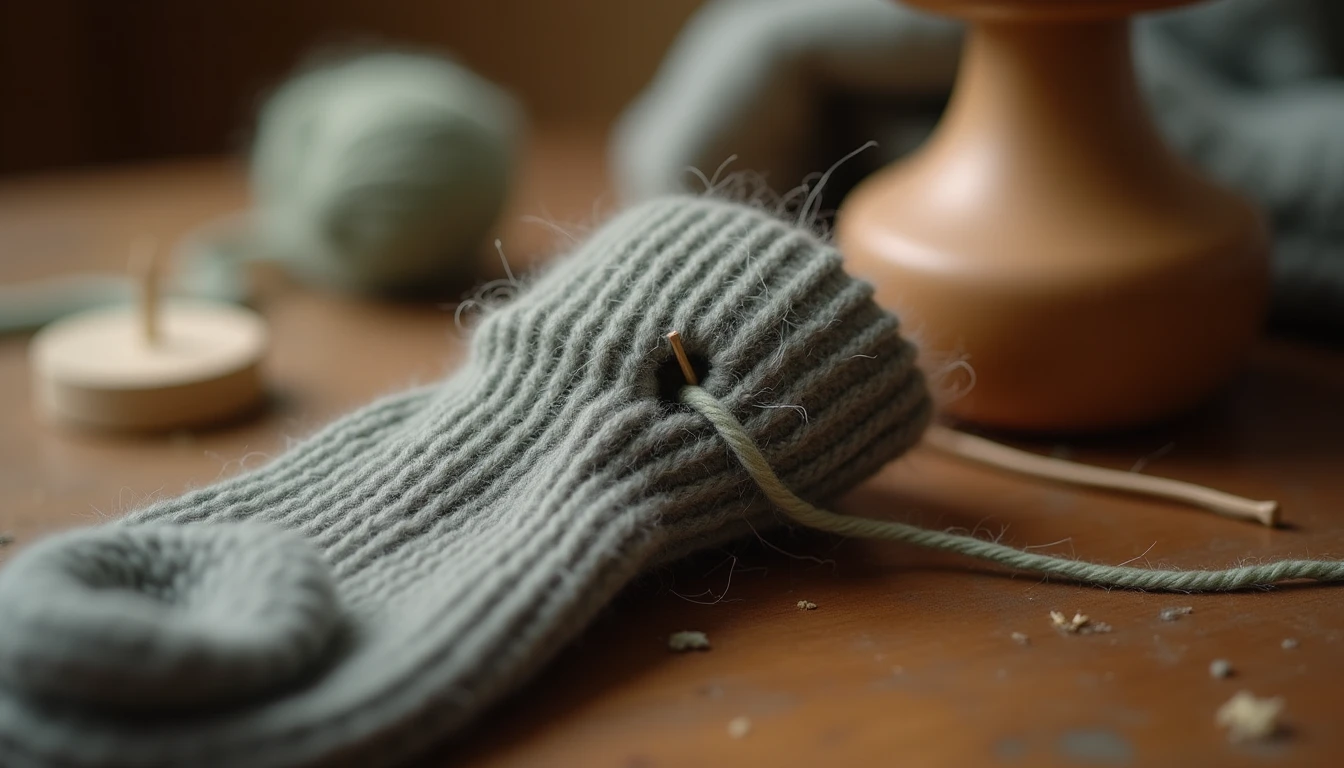
Darning is weaving new thread over a hole to replace the fibers that are missing, building a small patch of new fabric out of thread rather than covering the hole with a separate piece of material. It’s also called invisible mending, since a well-matched darn blends into the surrounding weave instead of standing out.
To darn a hole, you’ll want a darning mushroom or egg (a lightbulb or the bottom of a glass works in a pinch), a fine needle sized to the fabric weight, thread that matches the garment in both color and weight (pull a few threads from an inside hem for a near-perfect match), and an embroidery hoop to keep the area taut.
The weave method, step by step:
- Trim any loose or frayed threads around the hole so you’re starting with a clean edge.
- Place the fabric over the darning mushroom so the hole is supported and slightly domed.
- Stabilize the perimeter first with a small running stitch in a rough circle about half an inch out from the hole, through sound fabric.
- Lay vertical “warp” stitches straight across the hole, spaced about one thread-width apart, anchoring each end beyond the hole.
- Weave horizontal “weft” stitches across the warp threads, over one and under the next, alternating direction each row, just like mending a basket.
- Keep the tension loose. Don’t pull the thread tight, or the patch will pucker and pull the surrounding fabric.
- Leave a small loop of slack at the end of each row, since the weave draws in slightly as you work.
- Work from the wrong side where possible, so any unevenness is hidden.
- Weave until the hole is fully filled edge to edge, then knot off on the wrong side.
To darn by machine, place a stabilizer under the hole, drop the feed dogs, and use a darning or free-motion foot to move the fabric freely under the needle in overlapping passes, or run a narrow 3-step zigzag over the area from several directions. Trim the stabilizer once the fill is dense enough to hold its own weight.
Knits are the hardest fabric to darn well, since their loop structure runs and stretches differently than a woven’s warp and weft, so a woven-style darn can look stiff on a sweater. Duplicate stitch (Swiss darning) is often the better match: it follows the existing knit stitches with a tapestry needle and matching yarn, essentially re-knitting the surface instead of weaving across it.
If hiding the darn isn’t the goal, plenty of menders now use contrasting thread on purpose, or work the repair in a deliberate pattern: rows of sashiko-style running stitch, a bold color block, or a woven patch in a contrasting yarn. This visible mending approach, rooted in Japanese sashiko and boro traditions, has grown into a legitimate style choice and its own small craft-kit market, not just a fallback when invisible mending doesn’t quite work.
Patches
Self-fabric patches are the most invisible option: cut a patch from an inside hem allowance, facing, or seam allowance so the color, weave, and wear pattern match exactly. To sew one on, pin it in place (behind the hole for a knee or elbow patch, or on top for a visible one) and stitch around the edges with a running or blanket stitch, folding under the raw edge first if it will fray.
Iron-on patches bond quickly with heat, but for real durability they should also be sewn around the edge. Fusible adhesive alone tends to peel with washing and wear, and it won’t bond well to nylon or rayon at all.
For jeans knee holes, place a patch (a denim scrap or purpose-made iron-on denim patch) on the inside of the leg behind the hole, fuse it if using adhesive, then stitch over the area with several rows of free-motion stitching or a zigzag grid through both layers for reinforcement.
A patch-and-darn combo, a fabric patch behind the hole plus a woven darn stitched over the top, gives near-invisible results on visible areas like knees. For something decorative, applique a shaped patch on top, or try reverse applique, cutting a design into the top layer to reveal a contrasting fabric patched behind it.
How to Fix a Broken Zipper
Zippers look intimidating, but almost every zipper problem breaks down into one of five fixes, and most of them don’t require a new zipper at all.
Zipper separates behind the slider. This is almost always a worn or loose slider that no longer grips the two rows of teeth tightly enough to lock them together. Use needle-nose pliers to gently squeeze the top and bottom plates of the slider together at the back opening (the wider end, away from the pull), working in small increments, roughly 0.05mm at a time. Squeeze a little on one side, then the other, keeping it even, and test by zipping after each round. Go slowly, since over-squeezing can crack the slider. This is a solid stopgap, but if it separates again soon, replace the slider.
Broken pull tab. If the pull tab has snapped off but the slider is intact, thread a paperclip, a small keyring (about an inch across), or a loop of cord or wire through the hole where the original pull tab attached. It won’t win style points, but it works fine functionally. For a more permanent fix, replace just the slider rather than the whole zipper.
To replace the slider: check the back of the old slider for a stamped number, commonly #3, #4.5, #5, or #8. This indicates the zipper’s tooth width in millimeters and tells you what size replacement to buy (measure the teeth with a ruler if the number’s worn off). Using needle-nose pliers, carefully pinch and remove the top stop without cutting the tape, then slide the old slider off the top. Slide the new, correctly-sized slider on in the same orientation, pull tab facing the same way, easing it down onto both rows of teeth at an angle (a bit like parallel parking, it can take a few tries). Zip it down to confirm even tracking, then reattach a top stop: crimp on a new metal stop with pliers, or hand-sew a thick thread bar tack across the tape to keep the slider from running off again. Test by zipping fully up and down.
Slider off the track. If the slider has come off on one side, or teeth are misaligned but not damaged, work it gently off the bottom of the zipper, then guide it back on so both rows feed in evenly from the start. Avoid forcing it, which can bend or crack teeth. Remove the top stop first with pliers if it’s in the way, then replace it once the slider is back on correctly.
Broken teeth near the bottom. Missing or damaged teeth near the bottom can often be fixed without replacing the whole zipper: stitch a bar tack (a small, dense back-and-forth stitch) directly across the tape just above the damage, creating a new, shorter bottom stop. This permanently shortens how far the zipper opens but keeps the garment usable. If the damage is higher up or teeth are missing across a wide stretch, full replacement is usually needed instead.
When to replace the whole zipper. When it’s beyond a slider or bar-tack fix (extensive missing teeth, torn tape, or a fully degraded zipper), replace it entirely: seam-rip out the old one along its stitching lines, then pin and sew in a new zipper matching the length, tooth size, and color. Our full zipper installation guide walks through the centered, lapped, and invisible methods.
Simple Alterations You Can Do Yourself
Hem pants or jeans. Try the pants on with the shoes you’ll wear and pin the new length. Turn inside out, fold up an even hem allowance (typically 1 to 1.5 inches) to your pin line, press, then stitch close to the raw edge by machine or by hand with a blind or catch stitch. For jeans, you can preserve the original worn hem by cutting above it, folding the new hem up inside, and stitching just below the original stitch line so the factory hem still shows from the outside. Full steps are in our how to hem guide.
Take in a waistband. For the back center-seam method, unpick the waistband at center back, pinch out the excess in a tapered V (widest at the waistband, narrowing a few inches down), pin, try on, then sew along the new line and trim the seam allowance. For a faster fix on kids’ pants or jeans, thread buttonhole elastic through the existing waistband casing with a bodkin or safety pin and stitch both ends down, gathering the waist to size.
Taper pant legs. Turn the pants inside out and put them on, or use a well-fitted pair as a guide. Pin a new inseam and/or side-seam line down to the hem, tapering gradually with no sharp angle. Sew the new line, check you can still move and sit comfortably, then trim the excess seam allowance and finish the raw edge.
Shorten sleeves. From the cuff is simplest: pin the new length on, then trim and re-hem or reattach the original cuff or ribbing. From the shoulder is the advanced tailor’s method for structured jackets: the sleeve is detached, shortened at the top, and reset into the armhole to preserve the cuff and drape. It requires matching the sleeve cap ease and is best left to an experienced sewer or a tailor.
Replace waistband elastic. Open a small section of the casing with a seam ripper, pin the new elastic to the old with a safety pin, and pull the old elastic out, which draws the new one in behind it. Detach the old piece, overlap and stitch the new elastic into a loop, distribute the gathers evenly, and stitch the casing closed.
Add back darts to shape a loose top. Try the top on inside out and pinch out excess fabric at the center back or side seams into a dart shape, wide at one end and tapering to a point. Sew from the wide end to the point, backstitching at the start and tying off the thread tail at the point (not backstitching there) to avoid a pucker, then press the dart to one side.
Resew a button. A loose or missing button is usually the fastest fix on this whole list. Our button sewing guide covers the shank technique that keeps coat and jacket buttons from popping again.
DIY or Tailor?
Some of this is genuinely quick to do yourself. Some of it is worth paying for. Here’s how to tell the difference.
DIY is the right call for popped seams, small holes, tears, and darning; buttons and hems on casual pants and jeans; basic waistband take-in with an elastic or back-seam method; tapering pant legs; shortening sleeves from the cuff; zipper pull replacement and slider tightening; and patching knees, elbows, and visible mending.
A tailor earns their fee for structural work on suits and blazers; a ripped seat or inseam where the fabric itself has shredded, not just the seam thread; leather, suede, and fully lined garments (linings must be opened and re-closed neatly); resizing by two or more sizes; shoulder-based sleeve shortening on tailored jackets; and full zipper replacement on coats or lined garments, where matching and reinstalling correctly is hard without practice.
Here’s roughly what those tailor jobs cost, based on current US pricing:
| Service | Typical Price |
|---|---|
| Pants hem (basic) | $10-25 |
| Jeans hem | $10-20 (up to $45-80 to preserve the original hem) |
| Waist take in/out (pants) | $15-35 |
| Zipper replacement (pants/skirt) | $10-25 |
| Zipper replacement (jacket/coat) | $20-50+ |
| Suit jacket alteration (sides/sleeves) | $40-100 |
| Suit waist/shoulder alteration | $75-150+ |
| Full suit alteration package | $100-200 |
That jeans number is worth pausing on. A basic jeans hem costs about the same as any other pants hem, but preserving the original worn hem (factory stitching and fade still visible) is a specialty job that can run $45-80, since it takes more careful handwork than a plain cut-and-restitch. If you like that look and want to DIY it, it’s the same fold-and-restitch method above, just done more carefully so the original edge stays visible.
Prevent the Next Repair
Fix small damage as soon as you spot it. A loose thread or pinhole left alone spreads into a hole, a run, or a full seam split much faster than it takes to stitch it now.
Reinforce high-wear spots (knees, elbows, inner thighs, pocket corners) with an extra row of stitching or a patch before they wear through completely.
Wash delicates, knits, and anything with buttons, hooks, or embellishments in a mesh laundry bag to prevent snagging and stretching in the machine.
Avoid over-drying knits and stretch fabrics. High heat breaks down elastic fibers and shrinks or distorts the weave, which makes future tears and pilling more likely.
Zip zippers all the way up before washing, so the slider doesn’t snag on other items in the load.
When It’s Beyond Repair: Upcycle It
When a garment is damaged beyond a reasonable repair, whether the fabric is shredded through, there are multiple failure points, or it’s just not worth the time, refashion it instead of tossing it. A worn-out t-shirt becomes cleaning rags or a tote bag, a graphic panel can be cut out and transferred onto a new blank, and sound sections of fabric from a beyond-saving garment make excellent patch material for your next repair.
Once mending starts feeling easy, making something from scratch is a natural next step, and our library of 155+ printable PDF sewing patterns, each with step-by-step instructions, is a good place to look when you’re ready.
Frequently Asked Questions
How do you mend clothes for beginners?
Start with the easiest fixes: resew a loose button, close a popped seam with a ladder or whip stitch, or patch a small hole with a self-fabric patch. A basic kit (needles, matching thread, small scissors, seam ripper, pins) covers most beginner repairs, and the ladder stitch is quick to learn and forgiving.
How do you fix a small hole without it showing?
Work from the inside with a ladder (slip) stitch, catching only small bits of the fold on each side so the thread sinks into the seam rather than sitting on top. For knits, nudging the surrounding threads back over a tiny hole and stretching gently often closes it without any stitching at all.
What is darning?
Darning is weaving new thread over a hole to rebuild the missing fabric, laying vertical threads across the gap and weaving horizontal threads over and under them like a tiny woven patch. It’s traditionally used on sweaters, socks, and elbows, and matching the thread’s color and weight to the garment makes the repair blend in.
How do you fix a broken zipper pull?
If the pull tab has snapped off but the slider is intact, loop a small keyring or a paperclip through the hole as an instant replacement pull. For a more permanent fix, replace the whole slider: remove the top stop, slide off the old slider, put on a correctly-sized new one, and reattach a stop.
Can you fix a hole in a sweater?
Yes. Darning is the standard fix, using a darning mushroom or egg to support the fabric while you weave matching yarn over the gap. For finer knits, duplicate stitch (following the existing knit stitches with a tapestry needle) often blends in better than a traditional woven darn.
Is it cheaper to alter clothes yourself?
Yes, for basic fixes like hems, small seam repairs, and simple waist take-ins, since a tailor typically charges $10-35 for these. It’s usually not worth the risk to DIY structural suit work, lined or leather garments, or major resizing, where a mistake is harder to undo and a tailor’s $40-150+ fee buys real expertise.
How do you take in pants that are too big?
Turn the pants inside out, try them on, and pin out the excess fabric at the back center seam or side seams in a tapered line. Sew along the new pin line, trim the extra seam allowance, and try them on again before finishing the raw edges.
When should I take clothes to a tailor?
Take a garment to a tailor for structural work on suits and blazers, anything lined or made of leather, resizing by two or more sizes, or shoulder-based sleeve alterations. These require pattern-level adjustments that are hard to redo cleanly if a DIY attempt goes wrong.