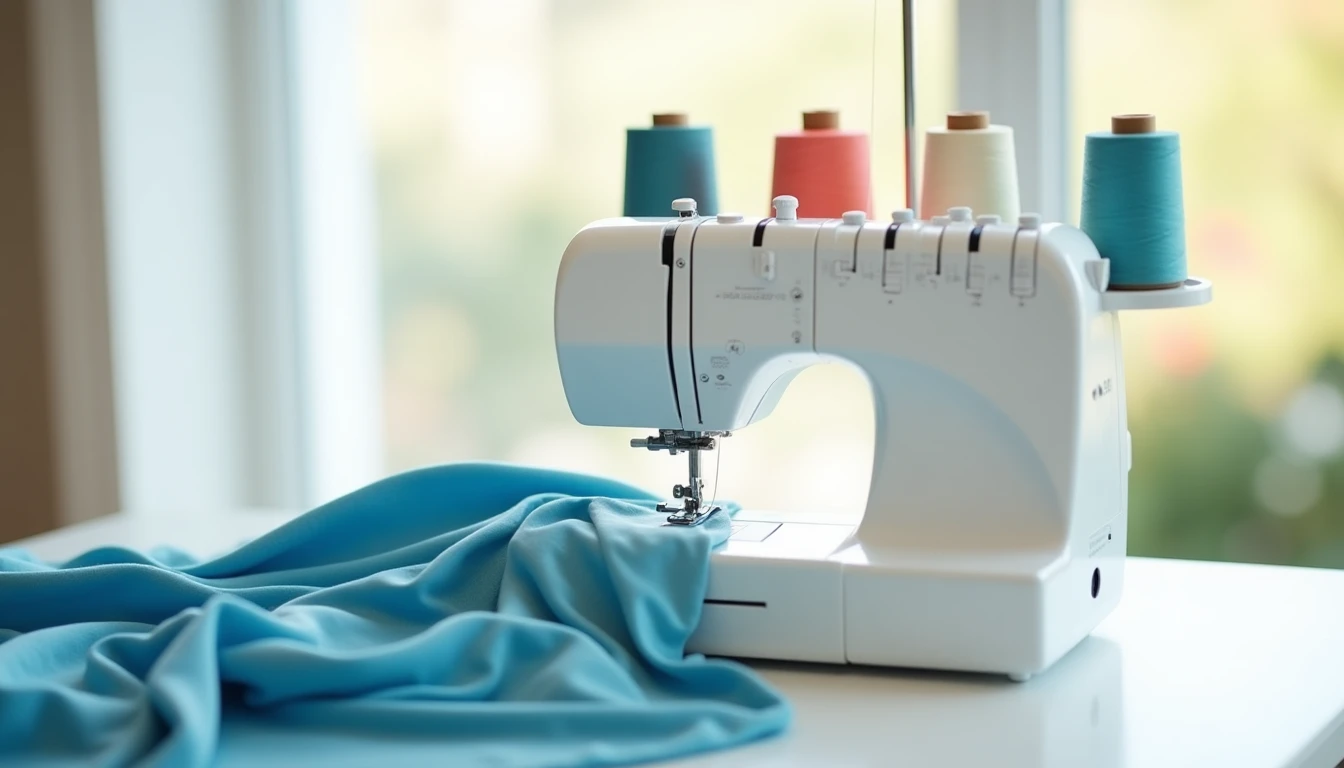
If you sew, you’ve probably heard the word “serger” tossed around in patterns, sewing groups, or YouTube tutorials, usually right before someone shows off the clean, bound edges on the inside of a t-shirt. Maybe you’ve also heard “overlocker” and wondered if that’s a different machine entirely. It isn’t. A serger and an overlocker are the exact same machine, just named differently depending on where you live. In North America it’s called a serger. In the UK, Europe, and Australia, it’s called an overlocker.
So what is a serger, really? At its core, it’s a specialized machine that sews a seam, trims the extra fabric, and wraps the raw edge in thread, all in one pass. It’s not a replacement for your regular sewing machine. It’s a second machine that handles a job your sewing machine was never built to do well.
In this guide, you’ll learn exactly what a serger does (and doesn’t do), how it’s different from your regular machine, what those intimidating loopers and knives actually mean, and whether you personally need one right now. If you decide you do, you’ll also get four solid beginner picks to shop from.
Some links below are affiliate links. Prices are 2025-2026 estimates and change often, so always check current pricing.
What a Serger Actually Does
A serger’s whole job is to sew, trim, and finish a fabric edge in one motion. As the fabric feeds through, a built-in knife trims the seam allowance to a clean, even width, while a set of loopers wraps the raw edge in interlocking thread. Your sewing machine can approximate parts of this with a zigzag stitch, but it can’t trim and wrap in a single automated pass the way a serger does.
That overlock stitch has one property your regular straight stitch doesn’t: it stretches. Because the thread loops over the fabric edge instead of locking flat, a serged seam moves with the fabric instead of fighting it. That’s the reason sergers are the go-to tool for knit and stretch fabrics like t-shirt jersey, activewear, and swimwear, where a rigid seam would eventually pop.
On woven fabrics, a serger stops fraying cold and gives your garments that clean, bound look you see on the inside of ready-to-wear clothing, the kind of finish that makes a homemade piece look store-bought. Beyond basic seaming, a serger can also sew a rolled hem for napkins, scarves, and ruffles, create a flat, decorative flatlock stitch popular on activewear, and gather or ruffle fabric automatically using differential feed or a gathering foot. And because home models run at roughly 1,300 to 1,700 stitches per minute, finishing a garment’s seams takes a fraction of the time it would on a regular machine.
Serger vs Sewing Machine
It helps to see the two machines side by side. They’re not competitors, they’re teammates with different jobs.
| Aspect | Sewing Machine | Serger |
|---|---|---|
| Primary function | General construction: straight stitches, zigzag, buttonholes, zippers, topstitching, decorative stitches, quilting | Seam finishing and construction speed: trims, sews, and overcasts an edge in one pass |
| Edge finishing | Possible but manual and slow: zigzag over the raw edge, pinking shears, or a folded French seam | Built-in knife trims the edge while the loopers wrap it in thread automatically |
| Knit/stretch fabrics | Can sew knits with a stretch or zigzag stitch and a walking foot, but seams can pop or look homemade | Purpose-built for knits; the overlock stitch stretches with the fabric so seams don’t pop |
| Threading complexity | One needle, one bobbin thread; threading is simple and quick | Three to five spools threaded through loopers and needles in a strict order; tension must be balanced per thread |
| Essential vs complementary | Essential first purchase; can build an entire garment alone | A complementary, optional upgrade; cannot build a garment on its own |
| What it cannot do | Cannot trim and overcast an edge in a single automated pass, and cannot make a true overlock stitch | Cannot sew buttonholes, install zippers unassisted, backstitch, topstitch, or make a twin-needle coverstitch hem |
| Speed | Typically 700 to 1,100 stitches per minute on home models | Typically 1,300 to 1,700 stitches per minute, noticeably faster on long seams |
| Learning curve for beginners | Straightforward; most beginners learn the basics in a single sitting | Steeper: threading order, tension dials per thread, and the knife all take practice |
Notice that last row about what a serger can’t do. That’s the part people miss. A serger does not replace your sewing machine, it complements it. If you don’t own one yet, you’re not stuck with raw, fraying edges in the meantime. A regular machine’s zigzag stitch, run along the raw edge, keeps fabric from fraying for free. Pinking shears do the same job with a one-time tool purchase. And a French seam, where you sew the seam twice so the raw edge ends up hidden inside itself, gives a genuinely couture finish with no special equipment at all. For a closer look at these and other seam-finishing options, our guide to sewing stitches and seams walks through each one in detail.
What a Serger Does NOT Do
It’s worth being blunt about this, because a lot of first-time buyers expect a serger to do everything, and then feel let down. A serger cannot:
- Sew buttonholes
- Install a zipper on its own (some sewists serge the raw edges first, but you still need a regular machine to actually stitch the zipper in place)
- Backstitch to lock off the start and end of a seam (sergers rely on thread chains or seam sealant instead)
- Topstitch, edgestitch, or do decorative stitching
- Quilt or do free-motion embroidery
- Produce the flat, twin-needle coverstitch hem you see on the bottom and sleeve hems of store-bought t-shirts
That last one trips people up the most. The stretchy, double or triple row of stitching on a ready-to-wear t-shirt hem isn’t made by a serger at all. It’s made by a coverstitch machine, a separate piece of equipment (or, on some higher-end models, a combo unit that does both jobs). A serger and a coverstitch machine look similar and often get lumped together, but they’re not interchangeable.
The Parts That Scare Beginners
Open up a serger for the first time and it can look like a lot more machine than your sewing machine. Loopers, two knives, multiple tension dials, it’s a fair amount to take in. Here’s what each piece does, in plain English.
The upper looper and lower looper are curved arms that carry thread and interlock with each other (and with the needle thread) to form the overlock stitch that wraps around the raw edge. Think of them as the mechanism that “knits” the thread loops together over the fabric.
The upper knife and lower knife work like a pair of scissors, shearing against each other to trim the seam allowance to a consistent width right before the stitch is formed. The lower knife stays fixed in the machine bed; the upper knife moves with the fabric feed.
Needles number one or two, depending on the stitch you’ve selected. Two needles come into play for 4- and 5-thread stitches, adding a second line of stitching alongside the overlock edge for extra strength. Tension dials exist for every thread in play, so a 4-thread machine has four separate dials to balance. This is the trickiest part of serger setup, and it’s completely normal to test and adjust on a scrap before sewing your actual project. Differential feed is a second, independent set of feed dogs that can move fabric through at different speeds than the main set, which we’ll cover in a moment.
The thread chain is the loopy tail of stitching the machine produces even with no fabric under the needle. Because a serger has no reverse stitch, you always sew a few stitches into a thread chain before and after a seam to keep things from unraveling. Threading order matters more than it does on a sewing machine: loopers go first, needles last, because each new thread has to pass behind or through the threads already in place. Get the order wrong and the machine jams or skips stitches. Most machines print a numbered diagram right on the body to walk you through it.
Finally, on higher-end machines you’ll find self-threading or air-threading, where a puff of air or a lever mechanism pushes the looper thread through automatically. It’s a genuine convenience, but it’s a premium feature, not something you need on your first machine. None of this is intuitive on day one, but it’s learnable within a few practice sessions with the manual open next to you.
Serger Thread Counts Explained (2, 3, 4, and 5 Thread)
Serger listings almost always mention a thread count, and it’s one of the more confusing specs for beginners. Here’s what each one is actually for.
2-thread uses one needle and one looper thread. It produces a light, flat overedge stitch best suited to sheers, chiffons, and narrow rolled hems. It’s the least bulky option, but also the least stretchy, and it’s rarely the only capability on a modern machine.
3-thread uses one needle and two loopers (upper and lower). This is the classic overlock stitch most people picture when they hear “serger.” It finishes edges beautifully and stretches well on knits, though on its own it isn’t meant to bear the full structural load of a woven seam, so many sewists sew the seam first and then serge over the raw edges.
4-thread adds a second needle to the 3-thread setup, creating a stronger, more elastic “mock safety stitch.” This is the workhorse setting for t-shirts, leggings, and other knitwear, because it constructs the seam and finishes the edge at the same time. It’s also why most beginner sergers are marketed as “3/4-thread” machines, and it’s the setting you’ll reach for most often.
5-thread combines a separate 2-thread chainstitch (a strong, straight seaming stitch) running alongside a 3-thread overlock finish, using two needles and two loopers at once. This is the true industrial-style safety stitch found in ready-to-wear clothing, and it’s generally only available on higher-end, higher-priced home sergers.
If you’re shopping for your first machine, look for one that does 3-thread and 4-thread. That combination covers the vast majority of what beginners actually sew.
What Differential Feed Does
Differential feed is a serger-only feature, no home sewing machine has it, and it exists because a serger has two separate sets of feed dogs instead of one: a front set and a rear set, each able to move fabric at a different speed. At the neutral setting, usually marked 1.0 or “N,” both sets move at the same pace. Turn the dial below 1.0 and the front feed dogs feed slower than the back, which stretches lightweight or sheer fabric slightly as it sews, useful for preventing puckering. Turn it above 1.0 and the front feed dogs feed faster than the back, which gathers or eases the fabric in. That’s exactly what stops the wavy, stretched-out “lettuce edge” that shows up when knit fabric gets pulled through a serger, and it’s also how sewists intentionally create ruffles or a decorative lettuce edge on stretchy fabric.
Do You Actually Need a Serger?
Here’s the honest answer: it depends on what you’re already sewing.
A serger is a strong yes if you regularly sew knit garments like t-shirts, leggings, or activewear, where stretch in the seam actually matters. It’s also a yes if you sew a high volume of garments and want to speed up seam finishing, or if you want that professional, ready-to-wear look on the inside of your clothes.
It’s a no, at least for now, if you mostly sew occasional woven projects like quilts, bags, home decor, or simple garments, where a zigzag stitch, pinking shears, or a French seam already finishes edges just fine. It’s also a no if you’re brand new to sewing and haven’t yet gotten comfortable with straight seams, tension, and basic construction. And if your budget is tight, that money is better spent on fabric, patterns, and feet for your primary machine first. If you’re still building those fundamentals, our guide on how to use a sewing machine is the better place to start.
Consider it an upgrade if you’ve been sewing on a regular machine for a while, keep hitting frustration with knit fabric or seam finishing, and are ready to invest in faster, more polished results, or if you’re moving into a more serious hobby or small business where finish quality and speed both matter.
The bottom line: a serger is a second, specialized machine, not a starter machine, and not a replacement for your regular sewing machine. Buy your main machine first and learn the fundamentals on it (our sewing machine buying guide can help you choose one). Add a serger later, specifically when knit sewing or professional seam finishing becomes a real, recurring need rather than a nice-to-have.
The Best Sergers for Beginners
If you’ve decided you’re ready, here are four solid options, from the classic budget pick to a premium upgrade.
Brother 1034D
The Brother 1034D (and its near-identical sibling, the 1034DX) has been the best-selling entry-level serger in the US for over a decade, and it’s the machine most sewists picture when they think “beginner serger.” It’s a 3/4-thread machine with color-coded thread guides, differential feed, a free arm, and 22 built-in stitch functions including rolled hem, ribbon lock, gathering, and narrow serge. It comes with a needle set, tweezers, cleaning brush, four spool nets, a soft cover, a trim trap, a hex wrench, and three presser feet.
This is a genuinely good default first serger for anyone sewing a mix of knits and wovens on a budget. It’s affordable, the color-coded threading cuts down on beginner setup mistakes, and its huge installed user base means tutorials and replacement parts are easy to find. The tradeoff is that threading is still fully manual, it can feel a bit noisy at full speed, and it has no coverstitch capability. Expect to pay around $220 to $310, commonly listed near $230 to $280.
Juki MO654DE
The Juki MO654DE (also sold as the MO644D) is built on Juki’s industrial sewing heritage, and it shows. It’s a 2/3/4-thread serger that’s noticeably quieter and more solidly built than typical entry machines, with color-coded threading, an automatic rolled hem, speeds up to roughly 1,500 stitches per minute, and a retractable upper knife.
This one suits beginners or improvers who want a quieter, more stable machine and don’t mind a steeper threading learning curve in exchange for smoother stitching. It’s stable at full speed and handles a range of fabric weights confidently. On the downside, it has no free arm, threading is reportedly more finicky than the Brother 1034D, and there’s no coverstitch function. Prices generally run $350 to $430.
Singer ProFinish 14CG754 (or Singer Heavy Duty line)
Singer’s budget overlocker line covers two flavors: the ProFinish 14CG754, a classic 2/3/4-thread model, and the Heavy Duty variants (like the 14HD854 or X5004HD), which add a larger cutting knife and stronger motor for thicker fabrics. Both offer speeds up to about 1,300 stitches per minute, adjustable differential feed, a removable free arm, and four built-in rolled hems.
This is a good fit for budget-conscious beginners who also want to occasionally serge heavier fabric like denim, canvas, or home decor weight. It’s affordable, the free arm is handy for sleeves and cuffs, and it handles thicker fabric well, especially the Heavy Duty variant. That said, reviewers frequently mention it’s harder to thread and keep threaded than the Brother 1034D, and durability reviews are mixed. Pricing runs about $230 to $320, with the ProFinish typically closer to $300 to $320 and Heavy Duty variants often nearer $250 to $300.
Premium air-threading option: Baby Lock Celebrate or Bernette B44/B48
If you already know you want a serger long-term and threading is the part that worries you most, a premium air-threading machine solves that specific problem. The Baby Lock Celebrate uses Jet-Air Threading, pushing looper thread through at the touch of a lever, with color-coded paths and speeds around 1,300 stitches per minute. The Bernette B44 offers a similar automatic air looper threading system with 15 built-in stitches, and the Bernette B48 goes a step further as a combo serger and coverstitch machine, adding a 5-thread combination stitch.
These machines suit sewists who already know they’ll use a serger regularly and are willing to pay more to skip the threading learning curve, or anyone upgrading out of pure threading frustration. Threading time drops from minutes to seconds, build quality steps up noticeably, and the B48 gives you coverstitch in one machine. The catch is the price jump, generally $700 to $1,300 or more (Baby Lock Celebrate around $999, Bernette B44 around $699 to $899, Bernette B48 around $999 to $1,299), plus more complexity if the mechanism ever needs repair. For most people buying their first serger, this is more machine than you need right away.
Beginner Serger Tips
A few habits will save you frustration (and broken parts) once your machine arrives.
Never sew over pins on a serger. The cutting knife will hit the pin and can break, damaging the blade or the machine itself. Use Wonder Clips to hold fabric layers together instead. If you absolutely must pin, keep pins well inside the seam allowance, parallel to the cut edge, far from the knife’s path.
Always run the machine a few stitches past the end of your fabric to build a thread chain before cutting away. Sergers have no backstitch, so that chain, later tied off, tucked in with a loop turner, or dabbed with seam sealant, is what keeps your stitching from unraveling.
Test your tension and stitch settings on a scrap of your actual project fabric before touching the real seam. Tension needs shift with fabric weight and thread type, and a quick “happy face” tension-test scrap is the standard way to confirm all threads are balanced before you commit.
Thread in the correct order every time: loopers first (lower, then upper), needles last, always with the power off and the presser foot up. Threads laid down first get crossed and locked by the ones added afterward, so skipping the order causes jams. Keep your machine’s manual within reach, since threading diagrams and tension charts are numbered and machine-specific.
Buy cone thread and thread nets for regular use. Standard spool thread empties fast when you’re running three to five threads at once, and cones with nets are the economical, serger-standard way to keep the machine fed. And clean lint and fabric dust out from around the knives and feed dogs regularly; the trimming action generates far more lint than a regular sewing machine ever does.
Once your machine setup is sorted, whether that’s just your sewing machine or a sewing machine and a serger working together, you’ll want projects worth sewing. Our library of 155+ printable PDF sewing patterns comes with step-by-step instructions if you want a head start.
Frequently Asked Questions
Is a serger worth it for beginners?
Not as a first machine. Most beginner sewists get more value learning fundamentals on a regular sewing machine first. A serger becomes worth it once you’re specifically sewing knits often or want faster, more professional seam finishing.
Can a serger replace a sewing machine?
No. A serger can’t sew buttonholes, install zippers on its own, backstitch, topstitch, or do most decorative stitching. It’s a companion machine for seam finishing and knit construction, not a substitute for a regular sewing machine.
What is the difference between a serger, an overlocker, and a coverstitch machine?
A serger and an overlocker are the same machine (serger is the North American term, overlocker is used in the UK, Europe, and Australia). A coverstitch machine is a different, separate machine that makes the flat, stretchy twin- or triple-needle hem seen on ready-to-wear t-shirts. It doesn’t have a knife and doesn’t trim fabric the way a serger does. Some combo machines do both jobs in one unit.
Do I need a serger to sew knits?
No, but it helps a lot. A regular sewing machine can sew knits using a stretch stitch, narrow zigzag, or a walking foot, but a serger’s overlock stitch is inherently stretchy and finishes the edge at the same time, which is why it’s the preferred tool for knit garments like t-shirts and activewear.
Why can’t you use pins on a serger?
A serger has a built-in cutting knife that trims the fabric edge as it feeds through. If a pin is in the knife’s path, it can break the blade or damage the machine, so sewists use Wonder Clips or place pins well away from the cutting line instead.
How many threads does a beginner serger need, 3 or 4?
Look for a 3/4-thread capable machine. The 3-thread stitch is great for finishing edges and rolled hems, while the 4-thread “mock safety stitch” constructs and finishes knit seams in one pass, making it the most useful all-around setting for garment sewing. Most beginner sergers, including the popular Brother 1034D, offer both.
Is a serger hard to thread?
It’s more involved than a sewing machine because you’re threading three to five spools through loopers and needles in a specific order, and getting it wrong causes jams or skipped stitches. Color-coded thread guides on budget machines make it manageable with practice, and premium models with air or automatic threading remove most of the difficulty entirely.
How much does a serger cost?
Budget beginner sergers like the Brother 1034D or Singer ProFinish run roughly $220 to $320. Quieter step-up models like the Juki MO654DE run about $350 to $430. Premium air-threading machines from Baby Lock or Bernette start around $700 and can run past $1,300 for combo serger/coverstitch models.