
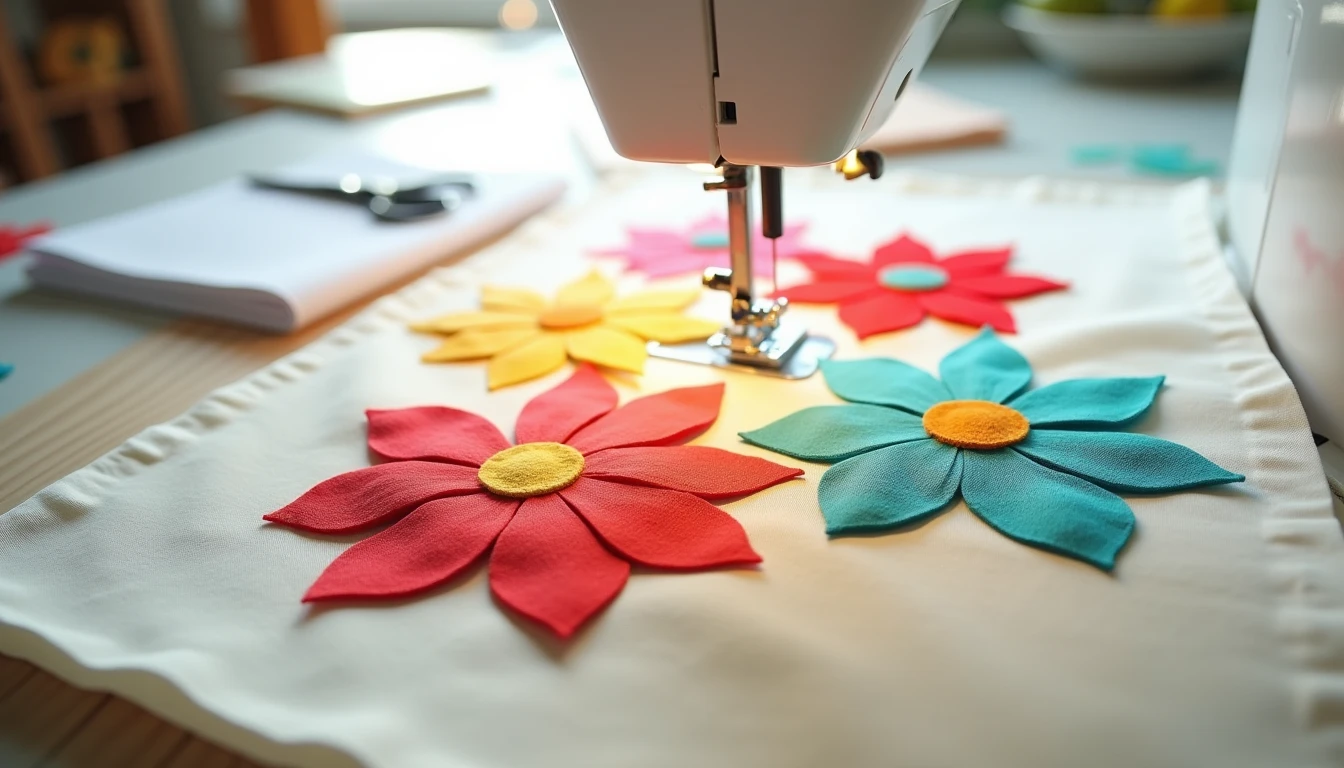
Applique turns a plain piece of fabric into something with personality. Cut a shape out of one fabric, stitch it onto another, and a t-shirt gets a fox on it, a quilt block gets a flower on it, or a torn knee gets a patch worth showing off instead of hiding. It works with almost no special equipment, which is why it’s stuck around this long. If you already know a few decorative hand stitches, our embroidery stitches guide pairs well here, since applique edges get finished with many of those same stitches. Below are the four core methods, the stitches that finish them, the supplies worth buying, and the one mistake that trips up almost everyone the first time.
Some links below are affiliate links. Prices are 2025-2026 estimates and change often, so always check current pricing.
What Applique Is
Applique is the technique of sewing a smaller piece of fabric onto a larger background fabric to build a picture, motif, or pattern. The word comes from the French appliquer, “to apply” or “to put on” (from the Latin applicare), and that’s exactly what’s happening: a shape is applied on top of a base fabric rather than joined to it edge to edge.
That’s the key distinction from patchwork or piecing. In piecing, fabric pieces are sewn together at their edges with no separate background, so the seams do the structural work. In applique, a piece of fabric is layered on top of a larger background, and that background shows behind and around the shape. The two get combined constantly: a pieced quilt block often gets an appliqued motif added, and an appliqued quilt can just as easily have a pieced border.
Applique has a long history in quilting. Baltimore Album quilts, a mid-1800s Baltimore, Maryland tradition, are sampler quilts with a different appliqued block in nearly every square, often floral or figural, embellished with embroidery and ink. Hawaiian applique takes a different approach: a single large piece of fabric is folded like a paper snowflake, cut into a symmetrical motif, and appliqued onto a contrasting solid background for a bold, two-color design. If quilting is new territory for you, our quilt patterns guide covers the basics applique fits into, from blocks to borders to sashing.
The Four Methods
Every applique project boils down to one of four approaches.
Raw-Edge Fusible Applique
The fastest method, and the default starting point for most quilters and garment sewists.
- Trace the shape onto the paper side of paper-backed fusible web, reversed (mirror-image) from how you want it to look finished. The web fuses to the wrong side of the fabric, so any asymmetrical shape, letters, numbers, an animal facing a direction, will flip once fused. This is the single most common beginner mistake, so trace it backward on purpose.
- Cut out the traced shape roughly, leaving a small margin outside the drawn line.
- Fuse the web to the wrong side of the applique fabric with a hot, dry iron per the manufacturer’s instructions, and let it cool completely.
- Cut the shape precisely on the traced line and peel off the paper backing.
- Position it adhesive-side down on the background fabric and fuse in place.
- Stitch around the raw edges (satin, blanket, or straight stitch) to secure it permanently and stop the edges fraying or lifting in the wash.
Needle-Turn (Turned-Edge) Applique
The traditional hand method behind Baltimore Album quilts, and the one to reach for without a machine.
- Cut the fabric shape with an added seam allowance, roughly 3/16 to 1/4 inch, around the finished design line.
- Optional freezer-paper variant: trace and cut the finished-size shape from freezer paper (no seam allowance), iron it shiny-side down onto the right side of the fabric as a pressing template, then cut the fabric around it leaving the seam allowance. Freezer paper can be reused roughly ten times before it stops adhering well.
- Pin or glue-baste the shape onto the background fabric in position.
- Using the tip of the needle, turn the seam allowance under along the drawn or template edge a small section at a time, finger-pressing as you go.
- Slip-stitch the folded edge to the background, catching just a few threads of both layers so the stitches stay invisible.
- Continue turning and stitching around the shape, removing the freezer paper once it’s fully stitched down.
Machine Applique
The workhorse for durable, washable projects like kids’ clothes, quilts, and bags.
- Fuse or baste the applique shape to the background fabric first, typically with fusible web as above.
- Back the background fabric with a stabilizer. Without one, dense zigzag or satin stitching will pucker or tunnel the fabric.
- Set the machine to a narrow, dense zigzag (satin stitch) or a blanket stitch.
- Stitch slowly around the shape, pivoting with the needle down at curves and corners so the stitch line stays smooth.
- Tear or trim away the stabilizer once stitching is complete, pulling gently to the side rather than straight up so the stitches don’t distort.
Reverse Applique
A layered, textured look built by cutting away rather than adding on.
- Layer two or more fabrics together, the fabric you want to reveal underneath and the top fabric on top.
- Baste or pin the layers together and stitch around the outline of the design through all layers.
- Cut away only the top layer inside the stitched outline to reveal the fabric underneath.
- Finish the cut edge depending on fabric: turn and stitch a woven edge under, or leave it raw if the fabric doesn’t fray, such as jersey knit.
Reverse applique is the signature technique of Alabama Chanin, whose founder Natalie Chanin popularized it on cut jersey t-shirt fabric, where raw edges don’t fray and just roll softly with washing instead of needing to be turned under.
Which Stitch for the Edges
The method gets your shape in place. The stitch is what finishes it, and in most cases, what makes it wash-durable.
- Satin stitch. A dense, narrow machine zigzag that fully covers the raw edge, narrower for tight curves and wider for bold outlines. The classic machine-applique finish.
- Blanket stitch. A looped edge stitch, by hand or machine (many machines have a built-in setting), for a visible, folk-art look that still secures the raw edge.
- Straight stitch, scrappy style. A simple line set back about 1/8 inch from the edge. It’s the basis of the modern “scrappy” applique look, where edges are left exposed on purpose and soften into a gentle fray after washing, a real, intentional style, not an unfinished shortcut.
- Slip stitch (invisible stitch). A hand stitch for turned-edge applique. The needle catches just a few threads of the fold and the background, so the stitches disappear.
- Free-motion sketchy stitch. A loose, wandering straight stitch with the feed dogs dropped, echoing the shape’s outline two or three times for a hand-drawn effect rather than a clean edge.
Supplies That Matter
Fusible web is paper-backed adhesive that bonds fabric with heat, and it comes in weights that matter more than you’d think. HeatnBond Lite is the sewable version, made to add adhesive without stiffening the fabric or gumming up a needle, so it’s the right choice whenever the edge will be stitched down (for anything going in the wash, that’s almost always). HeatnBond Ultrahold, the regular or heavyweight version, is a stronger no-sew adhesive meant for permanent bonding without stitching, and it’s noticeably harder to sew through since the heavier adhesive gums up the needle. If you’re buying fusible web for a sewn project, look for a sewable, lightweight fusible web on Amazon, not the no-sew heavyweight kind.
Stabilizer (tear-away, cut-away, or wash-away) goes under the background fabric for machine applique to prevent puckering and tunneling. Freezer paper, shiny on one side, works as a reusable pressing template for the turned-edge method, since it irons on temporarily without residue and peels off cleanly. Applique (duckbill) scissors have one paddle-shaped, rounded blade that slides beneath the top layer to shield the background while the other blade trims close to the stitching, handy for trimming against satin stitching without risking a cut through the background fabric. A washable fabric glue stick is a fast way to baste pieces in place before stitching, as an alternative to pins.
Tips From the Scrap Pile
Mirror your designs before tracing them onto fusible web paper. Since the web fuses to the wrong side of the fabric, tracing a design the way you want it to look will flip it backward once fused onto the background. Worth repeating: it’s the single most common mistake in fusible applique, and an easy one to catch before you cut.
When machine-stitching, pivot at curves and corners with the needle down so the fabric can rotate without the stitch line shifting. On needle-turn applique, clip into inner (concave) curves before turning the seam allowance under, so the fabric can spread and lie flat instead of puckering. Start and end a line of stitching on a straight edge or gentle curve rather than a sharp point, since points fray more easily if stitching starts or stops there.
Fusible web alone holds well at first, but repeated washing works the adhesive loose and edges fray and lift. Stitching the edges (satin, blanket, or straight) is what makes a fusible piece washable long term. Fine for a one-time decoration, not for anything headed to the laundry basket.
What to Applique
Quilt blocks, sashing, and borders built around a single or repeated motif are the classic use, but applique shows up everywhere sewing does. Children’s clothing gets playful motifs, animals, initials, numbers, on onesies, t-shirts, and dresses; our sewing for kids guide has more project ideas that pair naturally with a quick applique. Monogrammed towels and linens get a single initial appliqued in a contrasting fabric. Patches appliqued over holes or worn spots are visible mending that doubles as decoration instead of hiding the repair; our mending and alterations guide covers more ways to fix and refresh clothes worth keeping. Tote bags get a motif or word appliqued onto the front panel, and plain t-shirts get a quick graphic with fusible web and a zigzag or straight stitch.
If you want a shortcut to project ideas without designing your own patterns from scratch, our printable PDF sewing pattern library has over 155 patterns you can print at home and adapt for applique motifs.
Frequently Asked Questions
What is applique in sewing?
Applique is a technique where a smaller piece of fabric is cut into a shape and sewn on top of a larger background fabric to create a design, as opposed to patchwork or piecing, where pieces are joined edge to edge with no separate background.
What is the easiest applique method?
Raw-edge fusible applique is easiest for beginners. Fusible web bonds the shape to the background so it can’t shift, then the edges get stitched down with a straight, satin, or blanket stitch on the machine.
Do you have to reverse applique designs?
Yes. For fusible web applique, any shape that isn’t symmetrical (letters, numbers, animals facing one direction) needs to be traced in reverse onto the fusible web paper, since the web fuses to the wrong side of the fabric and the shape flips once turned over onto the background.
What stitch do you use for applique?
Common choices are a machine satin stitch (a dense zigzag covering the raw edge), a blanket stitch (for a decorative folk-art edge), a straight stitch set back from the edge (for a modern, scrappy look), or a hand slip stitch for turned-edge applique where the fold stays invisible.
Can you applique without a sewing machine?
Yes. Needle-turn applique is a traditional hand method where the seam allowance is turned under with the tip of a needle and secured with a slip stitch, no machine required, the classic technique behind Baltimore Album quilts.
Does fusible applique survive washing?
Fusible web alone loosens with repeated washing and the edges eventually fray and lift. Stitching around the edges (satin, blanket, or straight stitch) after fusing is what makes an appliqued piece hold up through regular laundering.