
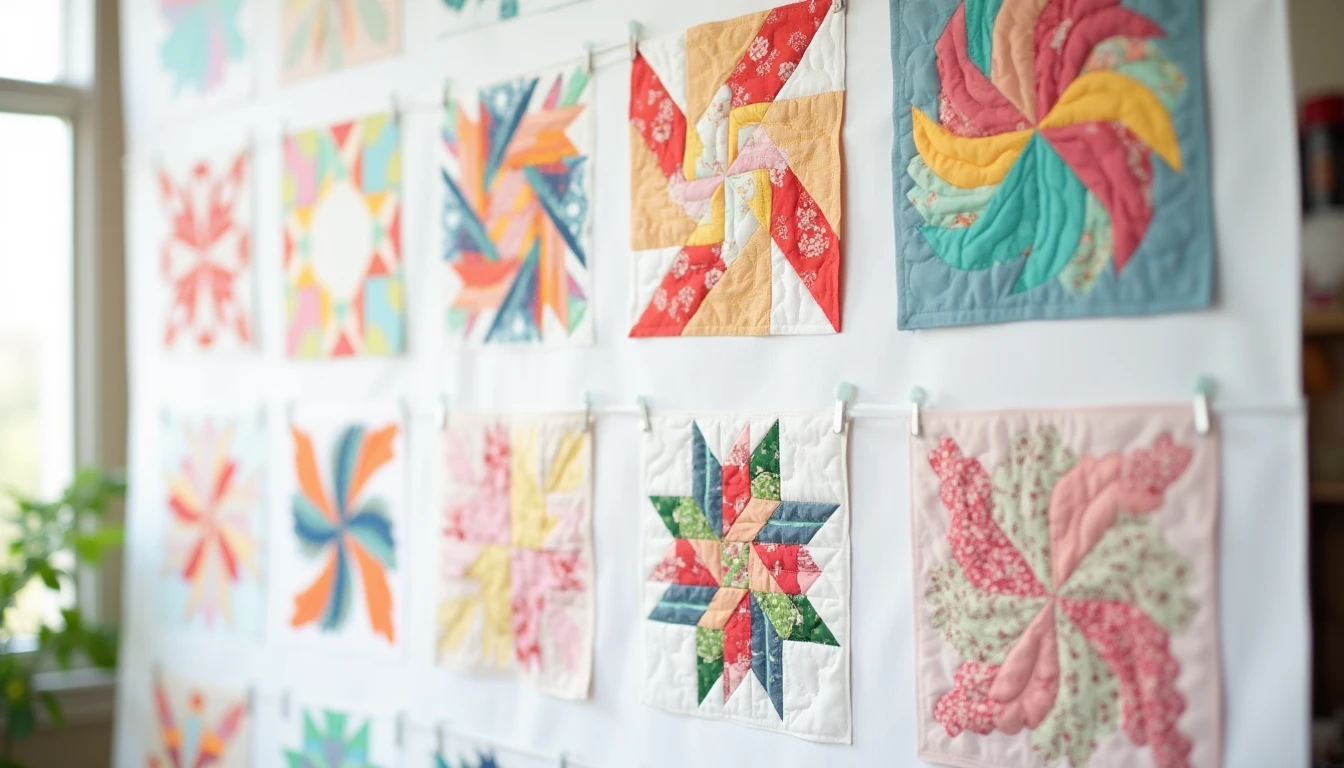
A quilt pattern is really a recipe. It tells you which blocks to make, how many, what size to cut everything, and how to lay the finished pieces out into a top. Once you can read that recipe, you can make almost anything, from a simple lap quilt to a queen-size heirloom.
The blocks themselves are the vocabulary. Four Patch, Log Cabin, Flying Geese, Churn Dash: learn to recognize these shapes and how they go together, and every new pattern starts to look familiar instead of overwhelming. This guide walks through the classic blocks, the beginner-friendly styles that skip the fussiest parts, how to read a pattern once you buy or download one, where to find good free patterns, and the painted barn quilt tradition that borrows the same block names for a different kind of project.
If you are brand new to any of this, start with our quilting for beginners roadmap for the full path from first stitch to finished quilt, and our how to quilt hub for the sewing and quilting techniques referenced below.
Some links below are affiliate links. Prices are 2025-2026 estimates and change often, so always check current pricing.
The Classic Blocks, Decoded
Every quilt pattern draws from a shared library of blocks built up over two centuries of American quiltmaking. Learn these eight and you can read most patterns on sight.
Four Patch. Four equal squares in a 2×2 grid, usually alternating two fabrics so it reads like a small checkerboard. Cut four identical squares, two of each fabric, or sew two strips into a strip set and cross-cut it into paired segments. Sew into two rows of two, then join the rows, nesting the center seam. Difficulty: beginner. Often the very first block a new quilter sews.
Nine Patch. A 3×3 grid of nine squares in a light and dark checkerboard, one of the oldest and most recognizable quilt blocks. Strip-piece it rather than cutting nine separate squares: sew a light-dark-light strip set and a dark-light-dark strip set, cross-cut both, then sew three rows together, light-dark-light on top and bottom, dark-light-dark in the middle. Difficulty: beginner.
Half-Square Triangle (HST). A square split corner to corner into two triangles of contrasting fabric, the single most-used unit in quiltmaking, showing up inside pinwheels, churn dashes, star blocks, and dozens of others. Two-at-a-time method: place two same-size squares right sides together, draw one diagonal line on the back of the top square, sew a scant 1/4in seam on both sides of that line, then cut apart directly on the drawn line. Open the two triangle pairs and press for two HSTs from one pass. For many matching HSTs at once, an eight-at-a-time variation uses two larger squares marked with both diagonals (an X), sewn 1/4in on both sides of both lines, then cut with a horizontal line, a vertical line, and both diagonals for eight HSTs from two squares. Difficulty: beginner to intermediate. Squaring up the units accurately takes a little practice.
Log Cabin. A concentric-square block built from fabric strips (logs) wrapped around a small center square. Half the block reads light, half reads dark, which is what lets Log Cabin blocks arrange into larger secondary patterns across a quilt top. Start with a small center square, traditionally red for the hearth or fire of the home. Sew a strip to one side, press, rotate a quarter turn, sew the next strip, and keep rotating and adding progressively longer strips around all four sides, keeping the light logs on one half of the block and the dark logs on the other. Because whole tops are built from identical blocks, the design lives in how they are arranged: Barn Raising radiates concentric diamonds of alternating light and dark from the center; Straight Furrow alternates diagonal rows of light with diagonal rows of dark; Sunshine and Shadow bisects each block diagonally, dark triangle over light, repeated in a grid; and Courthouse Steps adds strips to opposite sides only, top and bottom, then left and right, instead of rotating, for a more symmetrical, cross-like block. Difficulty: intermediate. Each seam is simple, but the strip sequence and consistent pressing take care.
Flying Geese. A rectangular unit, twice as wide as tall, with one large triangle (the goose) pointing up and two smaller triangles (the sky) filling the corners. Stitch-and-flip method: start with one rectangle and two small squares, draw a diagonal line on each small square, lay one in a corner of the rectangle right sides together, sew on the line, flip the corner triangle over and press, then repeat on the opposite corner. A faster no-waste method yields four units with no scraps: one large square in the goose fabric plus four small squares in the sky fabric, diagonal lines drawn and sewn 1/4in on both sides onto opposite corners, then cut, and repeat with the remaining two squares. Difficulty: intermediate. Points need to line up precisely, but the no-waste method makes accuracy easier.
Rail Fence. A block divided into three to five parallel strips of alternating or graduated fabrics. Rotate identical blocks a quarter turn from neighbor to neighbor and the strips zig-zag across the top like an actual rail fence. Sew the strips into one strip set, press, then cross-cut it into square units, rotating alternating units 90 degrees in your layout. Difficulty: beginner. A favorite scrap-buster and strip-piecing starter.
Churn Dash. A nine-patch variation with a plain square center, framed by four half-square-triangle corners and four rectangular bar units, reading like a pinwheel handle wrapped around a hub. Assembled on a nine-patch grid, but the four corners are half-square triangles and the four side units are strip-pieced rectangles, surrounding one plain center square. Difficulty: beginner to intermediate. A natural next step once you are comfortable making HSTs.
Pinwheel. Four triangles that appear to spin around a central point. Made from four matching half-square triangles: sew the HSTs, rotate each a quarter turn, then arrange in a 2×2 grid so the diagonal seams line up and create the spinning blades when joined. Difficulty: beginner to intermediate. Straightforward once HSTs are mastered, since orientation is the only tricky part.
Beginner Styles That Skip the Hard Parts
Not every quilt needs pieced blocks. A handful of styles trade block construction for speed, and they are some of the best ways to finish your first quilt without getting stuck.
The plain patchwork grid is the simplest style there is: squares, or same-size rectangles, sewn directly edge to edge in rows, then rows joined into a top. There is no block piecing beyond cutting and sewing straight seams, which makes it the fastest entry point into quiltmaking and a natural fit for precut squares like charm packs or layer cakes.
The jelly roll race
A jelly roll race, also called a 1600 quilt, turns a bundle of precut strips into a finished top fast.
- Start with a jelly roll: a bundle of coordinating fabric strips, traditionally 40 strips, each 2.5in wide by the width of fabric.
- Sew the strips end to end, joining the short ends (often at a 45 degree angle to distribute bulk) until they form one continuous strip roughly 1,600 inches long, hence the nickname “1600 quilt.”
- Fold the entire long strip in half lengthwise and sew down the long raw edge with a 1/4in seam, then snip the folded edge open so the strip is now twice as wide and half as long.
- Repeat the fold-and-sew step several more times, roughly five total halvings, and the strip keeps doubling in width and shrinking in length until it reaches quilt-top width.
- A standard 40-strip jelly roll produces a finished top of about 50in x 64in, a generous lap or throw size, with a wavy, organic stripe pattern from the staggered strip joins.
The whole top comes together in under an hour, the actual source of the “race” name. Quilters at retreats and quilt shops time themselves doing it.
The rag quilt
A rag quilt swaps the usual hidden seams for exposed, fringed ones, and the technique is different enough from standard piecing that it is worth spelling out.
- Cut fabric squares, flannel is traditional, and slightly smaller batting squares, sized 1 to 2in smaller than the fabric so it stays clear of the seam allowances.
- Layer the flannel-batting-flannel sandwich for each block and sew an X through the layers, corner to corner both ways, to hold it together.
- Assemble the quilt by sewing the sandwiched blocks together with a 1/2in seam allowance, wrong sides together. That is the opposite of standard piecing, and it puts every seam on the front of the quilt instead of hiding it inside.
- Clip every seam allowance, including the outer border, at roughly 1/2in intervals, cutting perpendicular into the allowance almost to the stitching line without cutting through the stitches. Rag-quilt or fringe scissors, spring-loaded and made for this repetitive clipping, speed the step up considerably.
- Wash and dry the finished quilt: a first wash in the machine, then a full dry cycle. The agitation frays the clipped seam allowances into the soft, fluffy rag texture that gives the style its name.
Beyond those two, a more modern big-block trend also skips complex piecing: oversized simple blocks, sometimes a single large square or a giant HST, enlarged to fill much of the quilt top with generous negative space. It leans on bold fabric choices and improvisational piecing rather than repeating many small blocks, and pairs well with heavier quilting to fill the open areas.
Reading a Quilt Pattern
Once you move past a plain grid, you will be working from a written pattern, and it helps to know what you are looking at before you start cutting.
A written quilt pattern is a recipe with four core parts: a fabric requirements chart (yardage needed per fabric, based on the finished quilt size), a cutting list (exact pieces and sizes to cut from each fabric, usually expressed as width-of-fabric strips), block assembly diagrams (step by step, how the pieces combine into each block), and a layout map or quilt assembly diagram (how the finished blocks, sashing, and borders combine into rows and then the full top).
You will see “WOF” constantly in cutting lists. WOF (width of fabric) means cutting strips across the fabric from selvage to selvage, typically about 40 to 42in of usable width once trimmed. A line like “cut 3 strips 2.5in x WOF” means cut three strips that run the full width of the fabric, then get cross-cut into the smaller pieces the pattern needs. Pressing arrows on the diagrams show which direction to press each seam, usually toward the darker fabric, so seams nest together and bulk stays distributed evenly.
One rule trips up more new quilters than any other: finished versus unfinished size. Finished size is a block’s size once it is sewn into the quilt top, after seam allowances are used up. Unfinished size is the block’s size before it is joined to its neighbors, and it is always 1/2in larger than the finished size, because a 1/4in seam allowance gets consumed on each side once the block is sewn in. So a “6in block” in a pattern almost always means a 6in finished size, which means it should measure 6.5in unfinished before assembly. The same logic scales up to full quilt sizing. For the finished-size math across common quilt sizes like crib, twin, and queen, see our sewing measurements guide.
Free Quilt Patterns, Verified
Good free quilt patterns exist in real numbers, but quality varies a lot depending on where you look.
Riley Blake Designs hosts a dedicated free-patterns section, organized by precut type (fat quarter bundles, 5in stackers, 10in stackers, Rolie Polie strip rolls), built around its own fabric collections.
Moda Bake Shop is Moda’s long-running free tutorial hub, built entirely around precuts like charm packs, layer cakes, and jelly rolls. Patterns are written by guest designers, so quality varies. Check the precut size and skill notes before starting any one of them.
Robert Kaufman publishes free downloadable patterns designed around its solids and precuts, including a heart quilt built for charm packs that finishes at 80in x 86in.
Fat Quarter Shop curates a large free-pattern library organized by fabric brand, precut type, and skill level, including a dedicated beginner section.
AllFreeSewing is a broad, user- and editor-submitted aggregator. Volume is high, but quality is inconsistent, so treat it as a discovery tool rather than a first stop.
Whichever source you use, vet the pattern the way you would vet any free download: a named designer, clear yardage requirements, tested notes, and recent comments confirming it works as written. Our free sewing patterns quality filter walks through the full checklist.
Barn Quilts
Barn quilts borrow the block vocabulary above and put it on the side of a building instead of a bed.
The modern barn quilt trail movement traces back to a single family project. In 2001, Donna Sue Groves wanted to honor her mother, Maxine Groves, a quilter, by painting a quilt block on the barn of their family farm in Adams County, Ohio. The idea grew into a community project, and local residents painted a trail of 20 barn quilts across the county, with the first block, an Ohio Star, unveiled on October 13, 2001. That Adams County trail became the template copied across the United States and into Canada, and it is now generally credited as the origin of the barn quilt trail phenomenon.
A barn quilt is a large wooden panel painted with a quilt block design, using the same names and geometry as pieced quilts, Ohio Star, Log Cabin, and dozens of others, mounted on a barn, house, garage, or shed. It is a painting project, not a sewing one, but it borrows its shapes and names directly from pieced quiltmaking.
To make one:
- Choose a quilt block design and cut a board to size. Exterior-grade MDO (medium-density overlay) plywood is standard, since its smooth, paper-faced surface takes paint well and holds up outdoors.
- Sand the board, then seal all edges with multiple coats of wood glue or exterior sealant to keep moisture out of the plywood layers.
- Prime the board with two to three coats of exterior latex primer, front, back, and edges.
- Draw the block onto the primed surface with a ruler and pencil to lay out an accurate grid, since most quilt blocks sit on simple geometric grids that scale up cleanly to large sizes.
- Tape off the design lines with painter’s tape and fill each section with exterior-grade acrylic or latex paint, at least two to three coats per color for full opacity and weather resistance.
- Finish with a clear exterior sealant over the cured paint, then mount the panel with exterior-rated hardware.
Board size scales to the building. 8ft x 8ft is the standard size for barns, built from two 4ft x 8ft MDO sheets joined together. 4ft x 4ft is common for smaller outbuildings, and 2ft x 2ft is typical for houses, garages, and garden sheds. Individual barn quilts have grown into organized barn quilt trails, mapped driving routes connecting dozens or hundreds of painted blocks across a county or region, which now function as rural tourism draws similar to covered-bridge or lighthouse trails, found across most US states and parts of Canada.
If painting a quilt block appeals to you more than sewing one, our fabric dyeing guide covers the fabric-side version of that same creative, hands-on urge.
Seasonal and Memory Quilts
Quilt blocks are not limited to bed-size quilts. Holiday and seasonal quilts, table runners, mini wall hangings, tree skirts, reuse the same classic blocks at a smaller scale with seasonal fabric. See our seasonal and holiday sewing hub for project ideas built around the calendar. Memory quilts and t-shirt quilts are another popular use of the same vocabulary: instead of piecing traditional blocks, squares are cut from meaningful fabric, old t-shirts, baby clothes, special-occasion fabric, and set into a simple patchwork or big-block grid, turning the same skills into a keepsake rather than a from-scratch design.
If you would rather work from a finished pattern than draft your own, our printable pattern library has more than 155 PDF sewing patterns you can download and print at home: browse the library. It is a pattern collection, not a course, so there is nothing to sign up for beyond the download.
Frequently Asked Questions
What is the easiest quilt pattern for a beginner?
A simple patchwork grid of same-size squares sewn edge to edge is the easiest true quilt pattern, since it needs only straight seams and no pieced blocks. Among block patterns, the Four Patch and Nine Patch are the traditional starting points, and a jelly roll race is the fastest beginner project because it uses precut strips and skips block construction entirely.
How do you make a log cabin quilt block?
Start with a small center square, traditionally red for the home’s hearth. Sew a strip to one side, press, rotate the block a quarter turn, and add the next strip, continuing to rotate and add progressively longer strips around all four sides while keeping one half of the block light and the other half dark. Blocks are usually made identically, then arranged into a setting like Barn Raising or Straight Furrow to create the finished design.
What is a jelly roll race quilt?
A jelly roll race, or 1600 quilt, is made by sewing all the 2.5in strips from a jelly roll end to end into one continuous strip about 1,600 inches long, then repeatedly folding that strip in half and sewing the long seam until it reaches quilt-top width. A standard 40-strip jelly roll produces a finished top around 50in x 64in, done in under an hour.
How do you make half-square triangles?
The standard two-at-a-time method: place two same-size squares right sides together, draw one diagonal line on the back of the top square, sew a scant 1/4in seam on both sides of the line, then cut apart on the line to yield two HSTs. For patterns needing many matching HSTs at once, an eight-at-a-time method uses two larger squares marked with both diagonals, sewn on both sides of both lines, then cut into eight pieces.
What is a rag quilt?
A rag quilt sandwiches batting between two fabric squares, often flannel, and sews the blocks together with the seams facing outward, wrong sides together instead of the usual right sides together. Every seam allowance is clipped at roughly 1/2in intervals with rag or fringe scissors, and washing and drying the finished quilt frays those clipped seams into a soft, textured finish.
Where can I find free quilt patterns?
Fabric-brand pattern libraries are the most reliable source. Riley Blake, Moda Bake Shop, and Robert Kaufman all publish free patterns around their own fabric lines, and retailer Fat Quarter Shop curates several hundred free downloads by brand and skill level. Aggregators like AllFreeSewing add volume but vary in quality, so vet any free pattern for a named designer, clear yardage, and tested instructions before starting.
What is a barn quilt?
A barn quilt is a large wooden panel, usually exterior-grade MDO plywood, hand-painted with a quilt block design and mounted on a barn, house, or outbuilding. The tradition began in 2001 when Donna Sue Groves painted a block on her family’s barn in Adams County, Ohio, to honor her mother Maxine, a quilter. That project grew into organized barn quilt trails now found across the US and Canada.
How many blocks do I need for a quilt?
Divide the quilt’s finished width by the finished block size, divide the finished length by the finished block size, then multiply the two results: (quilt width / finished block size) x (quilt length / finished block size). A 50in x 65in lap quilt made from 5in finished blocks needs (50 / 5) x (65 / 5) = 10 x 13 = 130 blocks. See our sewing measurements guide for standard quilt-size dimensions.