
Over 300 embroidery stitches exist, and you can make genuinely beautiful work knowing fewer than ten. So if you have been scrolling stitch catalogs convinced you must memorize all of them before you begin, take a breath. Hand embroidery stitches come down to a small, reliable set, and that set is all this guide asks you to learn.
Every stitch here does one of four jobs: it outlines a shape, fills a shape, adds texture, or decorates. See stitches that way and choosing the right one stops feeling like a guessing game.
We get you set up first: the hoop, the floss, the needle, and transferring your design. Then we walk the core stitches easiest first, so the no-fail running stitch and backstitch come well before anything fiddly. Embroidery is one branch of the broader full sewing techniques guide family of hand skills, and a lovely place to begin. Let’s get your supplies in order.
1. Start Here: Hoop, Floss, Needle, and Transferring Your Design
Set up once, and every stitch below gets easier. This is not a stitch, but skipping it is the most common reason beginners struggle, so give it five minutes.
Your starter kit is small. You need a wooden embroidery hoop (the two rings that sandwich your fabric and hold it taut), embroidery floss (the thread, sold in 6-strand lengths), an embroidery needle (a sharp point with a slightly larger eye than a sewing needle, easy to thread and useful across stitches), and light-colored fabric. Linen suits beginners because its looser weave lets the needle pass through with less resistance.
Floss confuses everyone at first. That single strand you buy is really six thinner strands twisted together, and most beginner work uses just 2 or 3. To separate them:
- Cut a length of floss about the distance from your fingertip to your elbow, roughly 18 to 24 inches.
- Hold it loosely and tap the cut end to loosen the strands.
- Pinch one strand and pull it straight up slowly so it slides free without tangling the rest.
- Repeat until you have the number of strands you want.
- Recombine those strands and thread your needle.
Pulling the strands apart and recombining them “fluffs” the floss, untwisting the factory twist so your stitches lie fuller and more even.
Now mount your fabric in the hoop and tighten it until it is drum tight, meaning it feels like a taut drum skin under your finger. Then transfer your design:
- Hoop the fabric drum tight first.
- Tape your printed pattern to a lightbox or a sunny window.
- Lay the fabric over it so the design shows through.
- Trace the lines with a water-soluble fabric pen.
- Rinse the marks out later with a damp cloth.
Last, start your thread without a bulky knot using a waste knot: knot the end, push the needle down from the top about an inch from your starting point so the knot sits on the surface, take 2 to 3 tiny backstitches to anchor the thread, stitch over them, then snip the knot off once your line reaches it. An away knot does the same job for stitches like chain, where a back knot would show. This needle-handling carries straight over from the hand sewing stitches guide, so nothing you learn is wasted.
Beginner tip: never cut floss longer than fingertip to elbow. Longer thread tangles and frays from being dragged through the fabric over and over.
2. Running Stitch: The Easiest Stitch for Dashed Lines and Outlines
Your first real stitch cannot fail, and it still looks intentional. The running stitch is the simplest stitch there is, and it makes a neat dashed or dotted line. Its job is to outline, meaning it follows the edge or drawn line of a shape, here as a light, broken outline. Several fancier stitches build on it.
Work it in four moves:
- Bring the needle up at the start of your line.
- Push it back down a short distance ahead to make one dash.
- Come back up leaving a small, even gap.
- Repeat along the line, keeping your stitch lengths and gaps consistent.
That is the whole stitch, the entry point every embroiderer starts from, and it builds confidence fast.
Beginner tip: keep the stitches and the gaps the same length as each other. Evenness makes running stitch look neat, not how small you make it. Once you hold that rhythm, close the gaps completely and you have turned your running stitch into a backstitch, which is next.
3. Backstitch: A Solid, Clean Outline for Lettering
If running stitch is the warm-up, backstitch is the workhorse. It makes a solid, unbroken line, so its job is again to outline, and it is the go-to for lettering because it follows curves and corners cleanly with no gaps.
Work it in five moves:
- Come up one stitch-length ahead of your starting point.
- Go back down at the start point. This is the “back” step that names the stitch.
- Come up one stitch-length ahead of the last stitch.
- Go back down into the end of the previous stitch so there is no gap between them.
- Repeat, keeping your stitches short and even.
With just running stitch and backstitch, you can handle most lines and letters a beginner pattern throws at you.
Beginner tip: shorten your stitches on tight curves and around letters. Short stitches keep the line smooth instead of angular and choppy.
Backstitch pulls double duty. Beyond embroidery, it is a core hand-sewing stitch that joins fabric and reinforces seams, so for the garment-construction version, the hand sewing stitches guide covers it. For a rope-like, textured take on this same outline, the split stitch up next is a small, satisfying upgrade.
4. Split Stitch: A Textured Outline With a Soft Rope Look
Split stitch takes the plain line you just learned and gives it body. It looks like a fine braid or rope, so its job is an outline with texture. It also makes an excellent foundation line to stitch fills over, which pays off later with satin stitch.
Stitch it like this:
- Make one small straight stitch along your line.
- Bring the needle back up through the middle of that stitch, splitting its threads.
- Make the next straight stitch forward.
- Come up splitting that one down the middle too.
- Repeat along the line.
The result is a soft, ropey outline with more presence than a flat backstitch.
Split stitch has a quiet second use too. Three or four tiny split stitches at the start of a line, later covered by a fill stitch, anchor your thread end with no visible knot.
Beginner tip: use an even number of strands, 2 rather than 3, so the needle splits them cleanly down the middle instead of shoving threads to one side. For flowing curves and plant stems, stem stitch is the classic choice, and that is next.
5. Stem Stitch: Smooth Curved Lines, Stems, and Vines
You have drawn a stitch onto a curve and watched it come out lumpy and uneven. Stem stitch is the fix. It makes a smooth, slightly ropey line that flows around bends, so its job is to outline, and it is the traditional choice for flower stems, vines, and flowing script.
Work it this way:
- Come up at the start of the line.
- Make a stitch forward along the line, but do not pull it flat yet.
- Come back up at the midpoint of that stitch, keeping the working thread below the needle.
- Pull through.
- Repeat, always keeping the thread on the same side each time.
That last step is the whole secret to a clean stem stitch.
Beginner tip: keep the loop of thread on the same side, below your line, for every stitch. Switching sides partway along is what makes stem stitch look uneven and bumpy, so pick a side and stay there.
That covers every line you need: running for dashes, backstitch for solid outlines and letters, split for texture, stem for curves. Now we move from drawing lines to filling shapes with satin stitch.
6. Satin Stitch: Fill a Shape With Smooth, Glossy Color
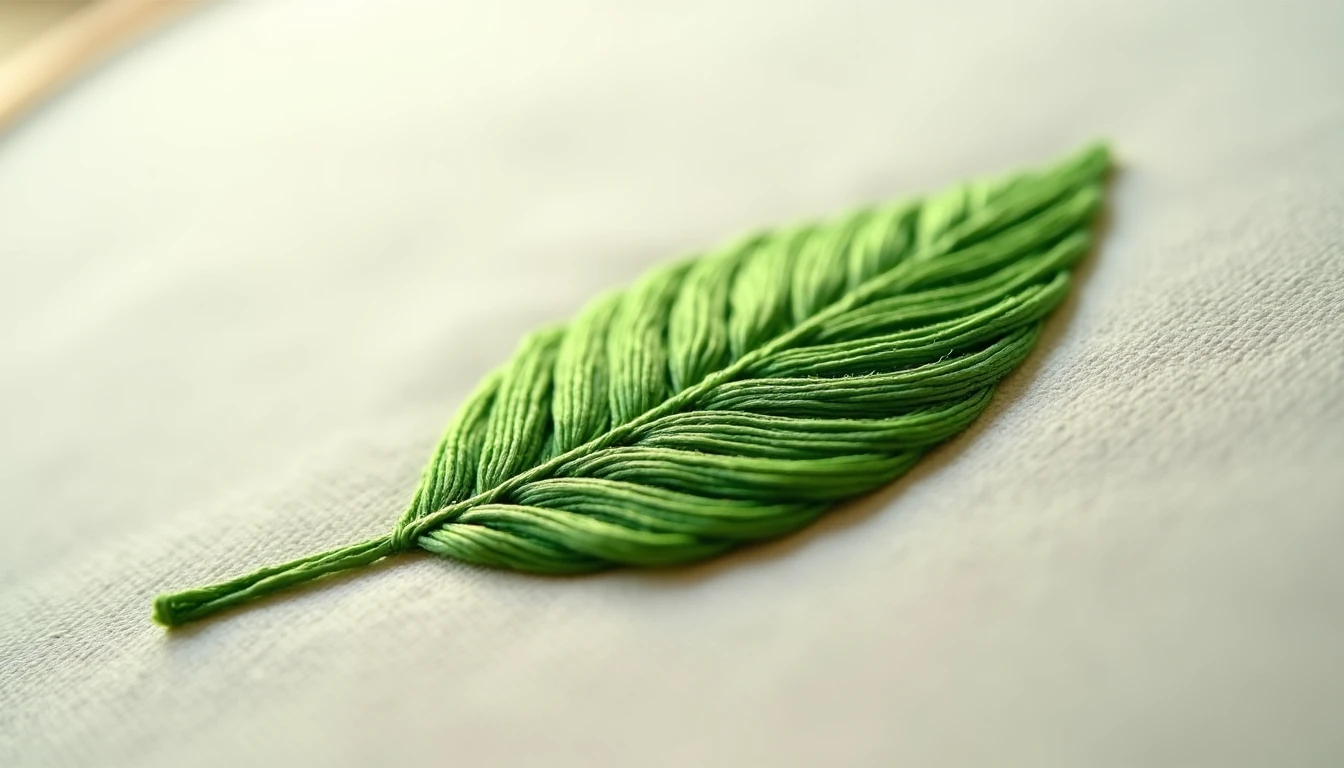
Now fill a shape with solid, glossy color. Satin stitch lays smooth stitches side by side to cover an area completely, so its job is to fill, meaning it covers the inside of a shape rather than tracing its edge the way an outline stitch does. It is often called the most popular embroidery stitch because it is the go-to fill in both hand and machine work.
Fill evenly like this:
- Bring the needle up at the center of the shape.
- Take it down at the opposite edge, mentally splitting the shape into two halves.
- Fill one half first, coming up right next to the previous stitch each time and going down at the far edge, keeping the stitches touching with no gaps.
- Go back to the center and fill the second half the same way.
- Check that no fabric shows through anywhere.
A cleanly filled shape looks impressively finished, which makes satin stitch satisfying once it clicks.
Beginner tip: for anything bigger than a small shape, divide it into sections and fill one at a time. Long stitches stretched across a wide area sag, shift, and snag, while shorter sections stay tidy.
Want texture instead of solid coverage? Reach for seed stitch: scatter tiny straight stitches (single running-stitch dashes) at random angles across the shape for a light, speckled fill. Next comes texture proper, starting with the stitch every beginner loves to hate.
7. French Knot: Neat Dots and Texture Without the Frustration
The French knot is the stitch beginners dread. Plenty of first-timers finish a whole piece happily, reach the French knots, and feel back at square one. Almost every failed knot comes down to two fixable mistakes, and once you know them, this stops being scary.
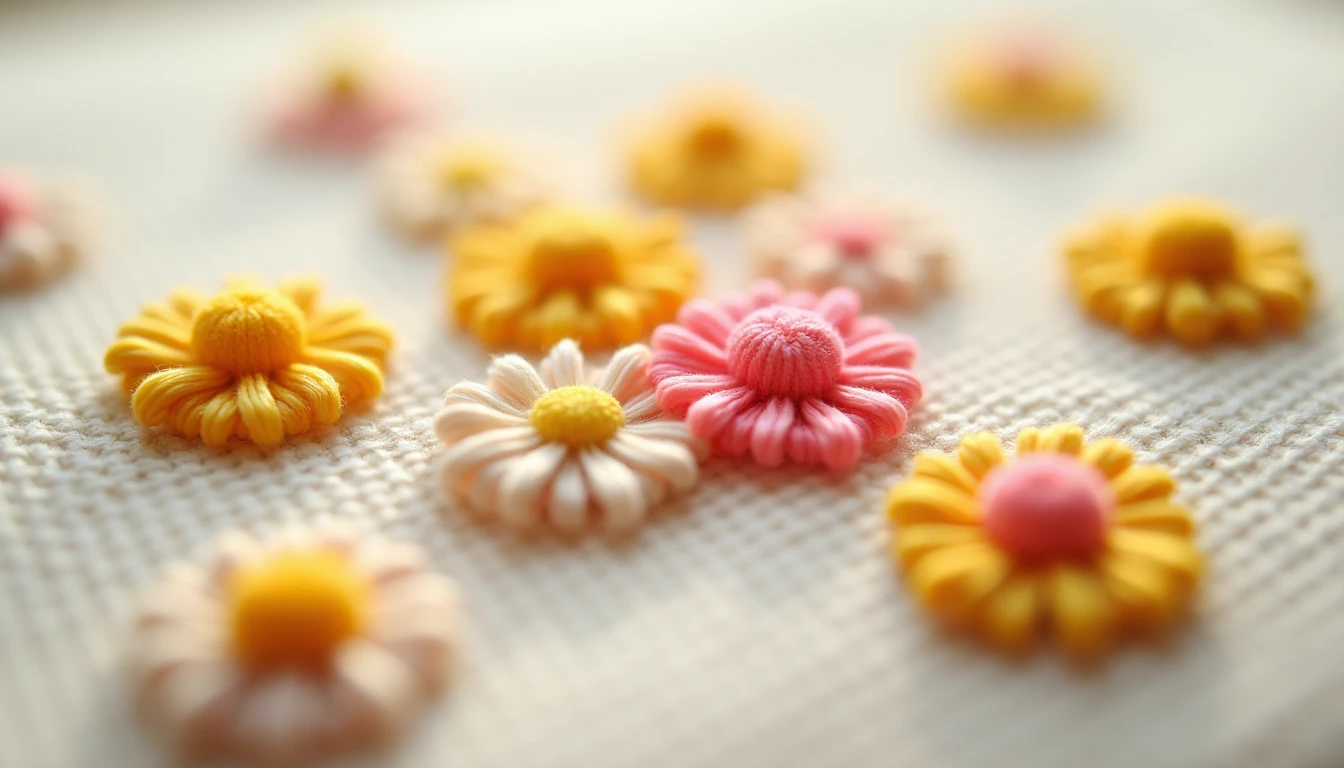
A French knot is a small raised dot, so its job is texture and decorative accent. You will use it for flower centers, tiny eyes, scattered dots, and stippled filling. Make a secure one like this:
- Use about 3 strands for your first attempts and keep your thread fairly short, because a too-long thread makes knots almost impossible.
- Bring the needle up where you want the dot.
- Hold the needle near the fabric and wrap the thread around it once or twice, never more than three times.
- Insert the needle back down right next to the exit hole, never into the same hole.
- Slide the wraps down snug against the fabric.
- Hold light, steady tension as you pull through to the back, releasing only as the knot settles into place.
Beginner tip, and this is the whole game: the two failures are going back into the same hole, which lets the knot vanish through the fabric, and letting tension go floppy, which leaves loops floating instead of a knot sitting on the cloth. Go beside the hole, not into it, and keep the thread taut but not strangled the whole way through. One more edge: a milliner’s or straw needle, the same thickness from tip to eye, slides through the wraps more cleanly than a needle with a bulge at the eye.
A few practice knots on scrap fabric is all it takes to get the feel. Once you have it, you never lose it, and then you are ready for petals with the lazy daisy.
8. Lazy Daisy: Instant Flower Petals and Leaves
One loop, and you have a petal. The lazy daisy, also called the detached chain, makes a single looped petal or leaf, so its job is decorative. It is perfect for flower petals and leaves, and one of the most satisfying stitches you will learn.
Build it in six moves:
- Bring the needle up at the inner tip where the petal starts.
- Go back down through that same hole, but do not pull all the way. Leave a small loop on the surface.
- Come back up at the outer end of the petal, bringing the needle up through the loop.
- Gently pull the loop snug, not tight.
- Take a tiny stitch over the far end of the loop to tack it down.
- Repeat 4 or 5 times around a shared center point to make a full daisy.
That is a whole flower from one simple looped stitch.
Beginner tip: if the loop looks bunched or twisted before you tack it, nudge the threads flat with your needle tip. A few seconds of tidying makes the difference between a lumpy petal and a smooth one. Connect several loops end to end and you get the chain stitch, which is next.
9. Chain Stitch: A Bold, Decorative Line for Borders
If the lazy daisy is one loop, chain stitch is that same loop repeated so each link flows into the next. It makes a bold, linked line that really looks like a little chain, so its job is a decorative line. Reach for it when you want a thick outline, a border, or lettering with presence.
Work it link by link:
- Come up at the start of the line.
- Go back down through the same hole, leaving a loop, exactly like starting a lazy daisy.
- Come up a short distance along the line, inside the loop.
- Pull snug so the loop lies flat.
- Go back down through that same second hole to start the next loop, again coming up inside it.
- Repeat down the line, then anchor the final loop with a tiny stitch over its end.
The rhythm feels natural after a few links, and the line carries a lovely weight.
Beginner tip: keep every loop the same length so the chain looks even, and resist pulling the loops tight, or they lose the rounded shape that reads as a chain. Chain stitch is also the moment to use the away knot mentioned earlier, preferred for stitches where a knot on the back would show or add bulk. One edge-finishing stitch left, the blanket stitch.
10. Blanket Stitch: Clean Edges and Easy Applique
The last stitch in your core set finishes edges. Blanket stitch makes a row of little L-shaped, comb-like stitches along an edge, so its job is a decorative edge and finishing stitch. You will use it to trim the border of a shape and to hold applique in place, the technique of stitching one piece of fabric onto another.
Work it in five moves:
- Come up on the edge line.
- Go down a little above and to the side of that point, and as you pull through, catch the working thread under the needle tip so it forms an L.
- Pull to set the little upright and the connecting bar of the L.
- Move along the edge and repeat, keeping the uprights evenly spaced and the same height.
- At the end, take a small stitch to lock the last upright.
The stitch looks fancy but is really just that L shape, repeated.
Beginner tip: mark or eyeball two guide lines, one for the base edge and one for the top of the uprights, so your stitches stay the same height. Uneven heights are the telltale sign of a rushed blanket stitch. Edge finishing is where embroidery meets garment sewing, so for the seam-finishing side of it, the stitches and seams guide picks up from here. With all ten stitches covered, use the quick reference below to choose between them.
11. Which Stitch for Which Job: Your Quick Reference
Keep this section open while you stitch. Every stitch you have learned does one of four jobs: outline a shape, fill a shape, add texture, or decorate. Standing over a project unsure what to reach for? Match the job to the stitch below.
| The job | Reach for |
|---|---|
| Outline a shape or line | Running (dashed), backstitch (solid), split (textured), stem (curves) |
| Fill a shape | Satin (solid and glossy), seed (light texture) |
| Add dots or texture | French knot |
| Flower petals | Lazy daisy |
| Bold lines and borders | Chain |
| Finish an edge or applique | Blanket |
To learn them in order, follow this easiest-first path: running, backstitch, split, stem, satin, French knot, lazy daisy, chain, blanket. Master those and you can stitch the vast majority of beginner patterns, proof that two stitches for lines, one for filling, and a couple of decorative ones is plenty.
The fastest way to get comfortable holding a hoop and controlling tension is to keep your hands busy with real projects. If you want ready-made ones to practice on, we keep a library of 155+ printable PDF sewing patterns to build your hand skills. Embroidery sits within the wider full sewing techniques guide, and every one of these stitches feeds into it. A few questions come up again and again, so let’s answer them.
Hand Embroidery Stitches: Frequently Asked Questions
These are the exact worries that stall beginners before they even thread a needle.
What are the easiest embroidery stitches for beginners?
Running stitch and backstitch are the two easiest. Both simply move along a line and need no special tension or technique, so they are almost impossible to get wrong. From there, add split stitch and stem stitch for lines, then satin stitch for filling, and finally the French knot and lazy daisy for texture and petals.
How many strands of embroidery floss should I use?
Six-strand floss is usually separated down to 2 or 3 strands for beginner work. Two strands give fine, delicate lines, while three give a fuller look. When you are first practicing French knots specifically, use 3 strands, since a slightly thicker knot is easier to control and see while you learn the tension.
How do you keep a French knot from coming loose?
Keep light, steady tension on the thread the whole time, and take the needle back down right next to the exit hole, never into the same hole. Wrap the thread around the needle no more than three times. A too-loose grip leaves floating loops, and re-entering the same hole lets the knot pull straight through.
How do you start embroidery without a knot?
Use a waste knot: knot the thread, push the needle down from the top about an inch away so the knot sits on the surface, anchor it with 2 to 3 tiny backstitches, then snip the knot off later. An away knot placed a few inches away works too, as does simply weaving a thread tail into the back.
How many embroidery stitches do you need to learn?
About five is plenty for most beginner projects: two stitches for lines, one for filling, and two decorative ones. Out of the 300-plus stitches that exist, that small handful covers the vast majority of patterns you will want to make. You can always add more specialty stitches later, once the basics feel automatic.
What fabric is best for embroidery?
Light-colored, medium-weight woven fabric is best for beginners. Linen is especially friendly because its looser weave lets the needle pass through easily, and cotton works well too. Light colors matter because they let you trace your design by holding the fabric against a window or lightbox, and they show your stitches clearly.