
Dull fabric scissors don’t just make cutting annoying, they wreck your work. A dull blade crushes and tears fibers instead of slicing them, so pattern pieces come out frayed before you’ve even threaded a needle. And if you’ve ever forced a stubborn cut and felt the ache creep into your hand, that’s a dull blade too, making you grip harder instead of letting a sharp edge do the job.
Learning how to sharpen scissors is cheaper and simpler than most sewists assume. You don’t need a new pair every year or a shop trip every few months. If your kit is still missing the basics, our guide to sewing tools and notions covers what belongs in a well-stocked sewing room before you get to sharpening.
Some links below are affiliate links. Prices are 2025-2026 estimates and change often, so always check current pricing.
Why Your Fabric Scissors Went Dull
The single biggest cause of dull fabric scissors is cutting paper. Paper and cardboard are loaded with mineral fillers, kaolin clay, calcium carbonate, titanium dioxide, and talc, added for brightness and printability. These minerals are abrasive at a microscopic level, and every pass across paper grinds a little steel off the edge much the way sandpaper would. Fabric fibers (cotton, wool, silk, synthetics) are comparatively soft, so fabric-only scissors hold an edge for years, while the same pair dulls in weeks if it also handles paper.
That’s the logic behind the “fabric-only scissors” rule: keep one pair for fabric, label it, and hand paper duty to a cheap second pair. It matters even more once you factor in the fabric itself, our guide to choosing fabric covers why cutting quality material with a sharp blade makes such a difference.
Other dulling causes worth watching for: cutting through pins or needles left in the fabric (steel on steel nicks the edge instantly), fusible interfacing or tape residue gumming up the blades so they tear instead of glide, and dropping the scissors on a hard floor, which can knock them out of alignment even if the edge still looks fine. A merely dull scissor can usually be resharpened. One that’s been dropped and bent is a tension problem no stone work will fix.
Scissors 101 Before You Sharpen
Fabric scissors are really two knife blades joined at a pivot, and only one face of each blade is ground at an angle, the bevel. The other face is flat, and that flat face is what lets the blades shear cleanly past each other. Sharpening it would ruin the scissor’s action, which is why every legitimate method touches only the beveled side.
Bevel angle varies by brand, so treat any single number as a rough guide. Kitchen knives run a narrow 15 to 20 degrees, while dressmaker shears are typically ground wider, roughly 25 to 30 degrees, because a shallower bevel would chip on thicker fabric. The practical goal at home is to preserve whatever angle the manufacturer already ground, not chase an exact figure.
Edge sharpness is only half the story. Blade alignment and pivot tension matter just as much: two razor-sharp blades that don’t meet correctly, or that sit too loose or too tight at the screw, will still crush fabric instead of slicing it. Standard knife-edge shears (the classic Gingher-style edge) are the type meant to be stone-sharpened. Serrated or micro-serrated shears have tiny teeth on the lower blade to grip slippery fabrics like silk, and that serrated blade should never be sharpened at home.
Every Sharpening Method, Ranked Honestly
Professional sharpening service. Best option for shears worth more than about $15 to $20, and the only safe choice for pinking or serrated shears. Check quilt shops, sewing machine dealers, farmers markets with a sharpening booth, or mail-in services. Pricing runs $5 to $10 for standard dressmaker shears, up to $10 to $20 for pinking or convex-edge blades. A well-made pair only needs this once every several years, and pros hold the factory angle exactly.
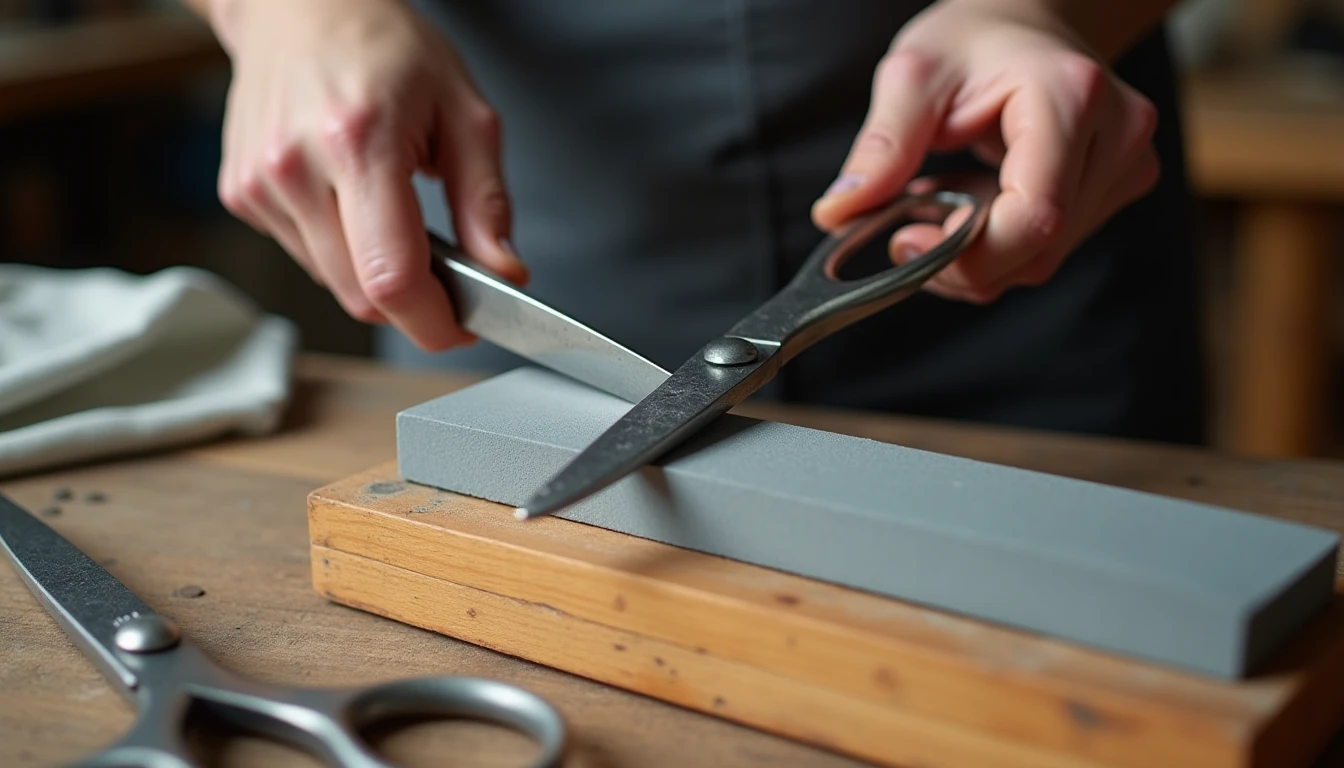
Sharpening stone (whetstone) DIY. The genuine at-home method experts back, though it takes practice and a light hand. Lubricate the stone, hold the factory bevel angle, and sharpen only the beveled face with light, single-direction strokes from heel to tip, never back and forth like a kitchen knife. Full steps below.
Pull-through or rotary sharpeners (Fiskars-style slot tools). Fine as a stopgap for cheap or mid-range scissors, risky for quality shears. Draw the open blades through with light pressure and let the mechanism work. Results are inconsistent: they can revive a bargain pair, but on good shears they tend to leave a burr, ignore brand-specific angles, and flatten the hollow ground over time. Never use one on serrated or pinking blades.
Then there’s the folklore that circulates in sewing forums.
Aluminum foil trick: debunked. Steel is far harder and denser than aluminum, so foil cannot grind or re-bevel a steel edge, however many times you fold it and snip through it. Foil can burnish away tiny burrs, making the cut feel smoother briefly, an illusion of sharpness, not real sharpening. A magazine test on five dull pinking shears found zero improvement, and repeated foil-cutting can dull scissors further.
Sandpaper trick: mixed, mostly skip it. Some hobbyist sources claim folded fine-grit sandpaper mildly hones the edge, since sandpaper is genuinely abrasive, unlike foil. But most pros lump it with the foil trick as unreliable, it can scratch the flat face and won’t hold a proper angle. Treat it as an emergency touch-up on cheap scissors only.
Pin or needle trick: not a real fix. The idea is to trap a pin between the blades and slowly close them along the edge. Experts don’t back this, at best it knocks loose some debris, but it’s inconsistent and can nick or bend a fine edge instead. Skip it.
Sharpening on a Stone, Step by Step
- If the pivot screw allows, remove it and separate the blades to work each one individually. If not, hold the scissors fully open to reach the full bevel.
- Run a fine-point marker (a Sharpie works well) along the entire beveled edge. Once the stone removes ink evenly across the whole bevel, you’re holding the correct factory angle.
- Wet the coarse side of a combination stone, or add honing oil. Lay the beveled face flat against the stone and stroke smoothly from heel to tip, always away from the edge, evenly along the blade.
- Switch to the fine grit side and repeat the same motion to refine and polish the edge.
- Check for a burr: run a fingernail lightly along the flat, uncut side of the blade. A faint raised lip means the coarse grit reached the edge.
- Remove the burr with one or two very light, flat passes of the flat side against the fine stone, zero angle, minimal pressure. Do not bevel this flat face.
- Reassemble (or close) the scissors and test-cut a fabric scrap. A clean slice with no snagging means you’re done; if it still catches, repeat the bevel strokes.
- Wipe both blades clean of metal dust, add a drop of sewing machine oil at the pivot, and work the blades open and closed before storing.
A decent combination stone also handles kitchen knives and pocket knives, so it earns its keep fast. You can browse sharpening stones on Amazon if you don’t already have one on the shelf.
Keep Them Sharp: Maintenance That Actually Matters
Wipe the blades with a dry cloth after each project to remove lint and dust, which alone prevents a lot of drag. When fusible interfacing or tape residue gums up the blades, dab on rubbing alcohol rather than cutting through it again.
Add one drop of sewing machine oil to the pivot occasionally and work the blades to distribute it, a dry pivot makes even a sharp edge feel sluggish. Periodically run the drop test: open the blades to roughly 45 degrees, hold one handle, and let the other fall on its own. Properly tensioned scissors ease shut rather than slamming (too loose) or barely moving (too tight). If it fails, make small turns of the tension screw and retest.
Store scissors dry, in a sheath or blade guard, never loose in a drawer where they can knock against other tools. And enforce the golden rule: never use fabric scissors on paper, cardboard, wire, tape, zippers, or floral stems, keep a cheap pair for anything that isn’t cloth. Our fabric care guide covers more maintenance habits worth building into your routine.
Sharpen or Replace?
Not every dull pair is worth resharpening. Bargain-bin scissors under roughly $10 to $15 are usually soft, low-grade steel that won’t hold a new edge for long, so once a sharpening visit costs close to what you paid, replacement is the smarter call. Structural damage is the other trigger: a visibly bent blade, a deep nick, a stripped pivot on a non-adjustable pair, or heavy rust generally aren’t worth repairing on inexpensive scissors.
Quality shears (Gingher, Kai, and similar) are worth professional sharpening almost every time, their steel holds an edge far longer, and a $10 to $20 sharpening restores a $50 to $100+ tool. Rule of thumb: cheap and damaged, replace; quality and just dull, sharpen, professionally if you’re not confident on a stone yet.
Buying Fabric Scissors Worth Sharpening
What sets fabric shears apart from household scissors is mostly the handle and edge geometry. Dressmaker shears use a bent-handle (sidebent) design, where the lower handle sits at an angle so the bottom blade rides flat along the table while cutting, keeping fabric from lifting and giving straighter long cuts. The 8-inch bent-handle shear is the standard dressmaker size, with 5 to 6-inch for detail work and 9 to 10-inch-plus for heavy fabric.
Standard knife-edge shears give the cleanest cut on most wovens and are meant for home stone-sharpening. Serrated or micro-serrated shears add tiny teeth to grip slippery fabrics like silk, but that serrated blade can’t be sharpened at home.
On brands: Gingher and Kai sit at the professional tier, Kai for a lighter feel and edge retention, Gingher for precision at a slightly lower price (Fiskars owns Gingher but markets it separately). Fiskars’ own line spans inexpensive craft scissors to titanium-coated shears, the practical mid-range pick depending on the model. Pinking shears should never be sharpened at home, a wrong-angle DIY attempt can flatten the zigzag teeth permanently, so send them to a pro. Thread snips round out a kit for quick trims and are cheap enough to just replace once dull.
A well-chosen pair pays for itself in years of clean cuts, the same “invest once, invest well” mindset behind our sewing machine buying guide if you’re outfitting a sewing space from scratch. When you’re ready to shop, compare fabric scissors and dressmaker shears on Amazon for current options and pricing.
If you’d rather spend your sewing time cutting than hunting for patterns, our library of 155+ printable PDF sewing patterns is available at Sewing Pattern Secrets’ pattern library, ready to print and go.
Frequently Asked Questions
How to sharpen scissors at home?
Use a sharpening stone (whetstone). Mark the bevel with a Sharpie to find the factory angle, stroke only the beveled face from heel to tip on a coarse then fine grit, check for a burr on the flat side, remove it with one light flat pass on the fine stone, then test-cut fabric scrap before oiling the pivot. Never sharpen the flat inner face beyond that light deburring pass, and never DIY-sharpen serrated or pinking shears.
Does cutting aluminum foil sharpen scissors?
No, it’s a myth. Aluminum is far softer than steel, so foil can’t grind or re-bevel the edge. It can burnish away small burrs, making a dull pair feel smoother briefly, but that’s a temporary illusion, not real sharpening, and repeated foil-cutting can dull scissors further.
Why does cutting paper dull scissors?
Paper and cardboard contain hard mineral fillers, kaolin clay, calcium carbonate, talc, and titanium dioxide, added for brightness and printability. These are abrasive at a microscopic level and wear down the steel edge with every cut, which is why fabric-only scissors should never double as paper scissors.
How much does professional scissor sharpening cost?
About $5 to $10 for standard dressmaker or fabric shears, and roughly $10 to $20 for pinking shears or larger, convex-edge blades. Mail-in services usually run $15 to $30 plus shipping. A well-made pair generally only needs this once every few years.
How do I know when my scissors need sharpening?
Watch for fabric that puckers or requires extra force instead of slicing cleanly, blades that leave frayed edges, or a cut that only works at the very tip or base of the blades. Also run the drop test, if the blades are sharp but still cut poorly, a loose or tight pivot screw may be the real problem.
Can you sharpen pinking shears?
Not reliably at home. The zigzag teeth are ground at a specific angle that’s easy to ruin with a stone or pull-through sharpener, flattening the pattern permanently. Send pinking shears to a professional sharpening service, it’s inexpensive and avoids that risk entirely.