
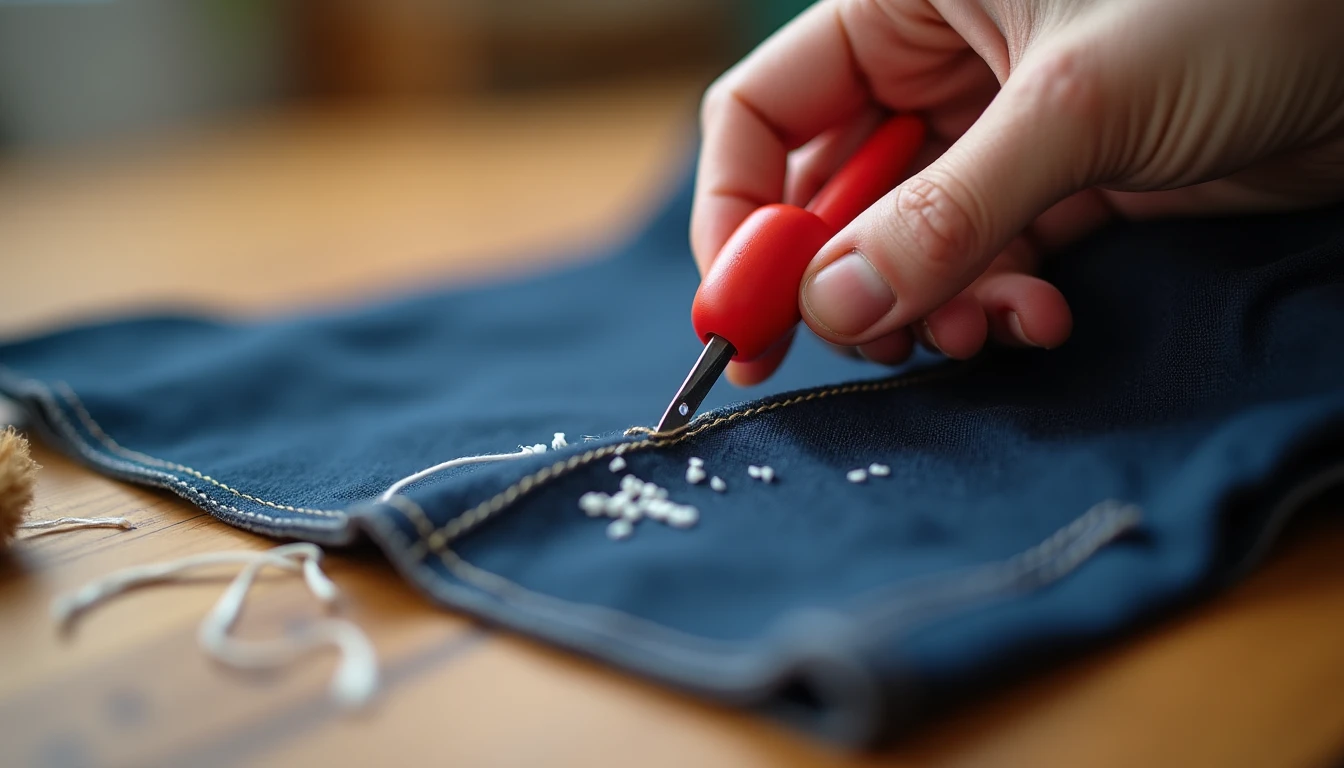
Almost every sewing kit has a seam ripper in it, usually the free one stuck in a pattern envelope. Almost nobody uses it right. Unpicking a seam is sewing’s version of a walk of shame, you sewed it wrong, now you have to undo it, and most people respond by stabbing at the stitches like they’re mad at the fabric. That’s how you get snagged threads and a seam allowance that looks chewed. Below is how to use a seam ripper properly: the anatomy, the actual techniques, and where the tool earns its keep beyond fixing mistakes. For the rest of your notions kit, see our guide to sewing tools and notions.
Some links below are affiliate links. Prices are 2025-2026 estimates and change often, so always check current pricing.
The Anatomy (and What That Red Ball Is For)
A seam ripper looks simple, but every part earns its place. There’s a handle (often capped for storage), a shaft, and a two-pronged fork at the working end: one long prong ending in a sharp point, one short prong tipped with a small colored ball, usually red.
What actually cuts the thread isn’t the point on its own, it’s the curved blade tucked into the “U” between the prongs. The point slides under a stitch and guides the thread into that curved edge, which does the slicing.
The red ball isn’t decoration, it’s a safety buffer. Run the ball side down against the fabric, or slip it between two layers, and the ball glides along the surface while the point and blade on the opposite prong do the cutting. Ball on the fabric side, point on the thread side, that detail explains almost every technique below.
Standard seam rippers run small, 2.5 to 4 inches, with a fine point suited to delicate work. Ergonomic versions with a thicker, cushioned handle add leverage for heavy fabric like denim, and help if your hands cramp during a long session.
The Right Way to Rip a Seam
There are three real methods, and they’re not interchangeable. Pick based on the fabric and the seam, not habit.
1. Every 3-4 stitches, then pull (the default method)
- Work from the bobbin side. Bobbin stitches sit looser than the top thread, so they’re easier to catch.
- Slide the sharp point under a single stitch sideways, not straight down, so it goes between thread and fabric, not into the weave.
- Cut that stitch, skip 3 to 4 stitches, and cut again. Repeat down the seam, that interval loosens the line without shredding it into confetti.
- Flip to the right side and gently pull the intact top thread. With every 3rd or 4th bobbin stitch already cut, it should pull free in one continuous piece.
- Clear the thread fuzz with a lint roller or your fingers.
2. The ball-run glide (fast, but read the fine print)
- Turn the ripper so the ball-tipped prong faces down into the seam allowance, between the layers, blade against the stitching line.
- In one continuous motion, glide the tool forward along the seam. The ball skates on the fabric while the blade slices stitches as it passes.
- Stop periodically to clear cut thread and check the ball hasn’t popped out of the channel.
This method is real and genuinely faster, but be honest about when it applies. If the ball rides up out of the channel, or the seam isn’t straight and taut, the point can catch the fabric instead of the thread, and that’s a slice or a snag. It works reliably on straight, sturdy, tightly woven seams held taut, think a plain cotton side seam. It’s a bad idea on stretch knits, silky fabric, curved seams, or if you’re still learning how the tool feels. Save it for low-stakes, straight, stable seams. Faster isn’t the same as safer.
3. One stitch at a time (for delicates)
- Slide the point under a single stitch, sideways, and cut only that one.
- Move to the next stitch immediately and repeat, don’t skip ahead.
- Keep the fabric taut but don’t stretch or pull hard, delicate or stretch fabric distorts and tears easily.
- Clear threads as you go so the next stitch stays visible.
Slow, but it’s the right call for silk, chiffon, lace, or anything loosely woven or stretchy.
Never do this: don’t saw back and forth at the seam from above the fabric like a knife. It’s the most common mistake, and it’s exactly what shreds fabric, dragging the point across the weave instead of sliding it under a stitch. Never force the tool through resistance either, if it doesn’t glide, reposition rather than push harder. Let the blade work at a shallow, sideways angle, never straight down.
Ripping Serged and Chain Stitched Seams
Overlocked seams need a different approach, because a serged stitch is really two systems locking together: straight needle threads, plus upper and lower looper threads wrapping the fabric edge. If you’re new to that machine, our guide to sergers and overlockers covers how the stitch is built.
Leave the looper threads alone and only cut the needle threads. Working from the side showing the two straight lines of stitching, slide the point under a needle thread, cut it, move down an inch or two, and cut again, careful not to catch a looper thread, which would lock the seam instead of loosening it. Grab a cut tail and pull, it usually eases out a good stretch, sometimes the whole seam, in one go. Then tug the looper threads gently, they unravel on their own once nothing is anchoring them.
Chain-stitched seams have a direction to them. Unpick a few stitches and test both ends, one direction locks, the other keeps unraveling. Find the free-running direction and pull steadily, using the point only to tease out snags.
Four Jobs Beyond Unpicking
A seam ripper earns its space in your kit for more than fixing mistakes.
Opening machine-sewn buttonholes. Place a straight pin horizontally just inside each bar tack (the reinforced stitching at either end) so it acts as a stop. Insert the point in the center between the two rows of stitching and cut outward toward each pin, working from the middle out. The pins keep the ripper from sliding past the bar tack into surrounding fabric, just watch that the blade doesn’t strike the pin itself. See our full guide on how to sew buttons for the rest of the process.
Removing embroidery or monograms. Work from the back of the design, where bobbin threads sit looser, rather than the front. Slide the point sideways under bobbin stitches, cutting every few stitches or in short rows for dense fills. Once a section is loose, flip right side out and lift away the threads with tweezers.
Trimming elastic and thread tails. The sharp point doubles as a small precision cutter for snipping thread tails close to the fabric, or trimming elastic in tight spots where scissors are too bulky.
Clearing lint and stray threads. Some rippers, like the Dritz Seam-Fix, have a rubber-tipped cap that doubles as a thread sweeper, rolled against a cut seam it picks up loose fuzz (only mildly sticky, a bonus rather than a full replacement for tweezers). This kind of tool comes up constantly in mending and alterations work, where you’re forever opening old seams.
Small Things That Make Ripping Painless
Good, direct light and a plain, contrasting surface make stitches visible, dark thread on dark fabric under dim light is the biggest cause of missed stitches and slipped points. Press the seam flat first, ironing it open makes each stitch stand out against the fold so you know exactly where to place the ripper. Gently stretch the seam side to side to pop the stitches slightly proud of the surface, but keep it gentle, especially on knits, where overstretching distorts the weave. Clear thread bits every few inches instead of waiting until the end, a lint roller, a scrap of tape, or a soft brush lifts the fuzz before it tangles back into stitches you haven’t ripped yet.
They Dull (Replace Them)
Seam ripper blades genuinely dull with use. This isn’t a sharpen-once-use-forever tool. Signs include needing to saw or press harder to catch a stitch, tugging at thread instead of slicing it cleanly, and fraying fabric because the point is forcing its way through rather than slipping under. A dull ripper is actually more dangerous than a sharp one, since more force and more passes means more chances to slip and stab a finger or gouge the fabric. For regular sewists, replacing the tool every 6 to 12 months, or sooner at the first sign of dragging, is the commonly cited guideline.
Sharpening is technically possible with fine-grit sandpaper, a jeweler’s file, or fine steel wool run through the curve, but the blade is small and fiddly to work on. Seam rippers are cheap enough that most sewists just toss a dulled one and grab a new one instead. Cap the point when it’s not in use, both to protect the edge and to keep it from stabbing you in your kit.
A few names come up often: Clover makes a fine-tipped, precision ergonomic ripper good for delicate fabric, Dritz’s Seam-Fix pairs the cutting fork with that rubber-tipped cap, and there are large-handle ergonomic versions for anyone who wants extra grip or deals with hand strain. If yours is dragging instead of slicing, it’s worth browsing a comfortable ergonomic seam ripper on Amazon before your next alterations project.
If you’d rather spend your unpicking time on new projects instead of fixing old ones, our library of 155+ printable PDF sewing patterns is worth a look at Sewing Pattern Secrets’ pattern library.
Frequently Asked Questions
What is the ball on a seam ripper for?
It’s a safety guide, not decoration. Run the ripper ball-side down into the seam, and the ball glides along the fabric while the opposite point and blade do the actual cutting, keeping the point from digging into the material.
What is the correct way to use a seam ripper?
Work from the bobbin side, slide the point sideways under a single stitch, and cut every 3 to 4 stitches down the seam rather than every one. Flip over and pull the remaining thread, it should come away in one piece. Clear fuzz as you go and never saw at the fabric from above.
How do you rip a serged seam?
Cut only the straight needle threads every few stitches, leaving the looper threads untouched, then pull the needle-thread tails free. Once those are out, gently pull the looper threads, they unravel easily on their own once nothing is anchoring them.
How do you open a buttonhole with a seam ripper?
Insert a straight pin just inside each bar tack as a stopper, then insert the point between the two rows of stitching and cut outward from the center toward each pin. The pins keep the ripper from sliding past the bar tack into surrounding fabric.
Do seam rippers get dull?
Yes. Frequent use dulls the blade, causing it to tug or drag instead of cleanly slicing, which also raises the risk of slipping and damaging fabric or skin. Frequent sewists typically replace one every 6 to 12 months. Sharpening is possible but fiddly, so most people just replace the inexpensive tool instead.
How do you remove embroidery with a seam ripper?
Work from the back of the design where the bobbin threads sit, sliding the point sideways under stitches and cutting every few stitches or in short rows for dense fills. Once a section is loosened, flip right side out and lift away the cut threads with tweezers.