
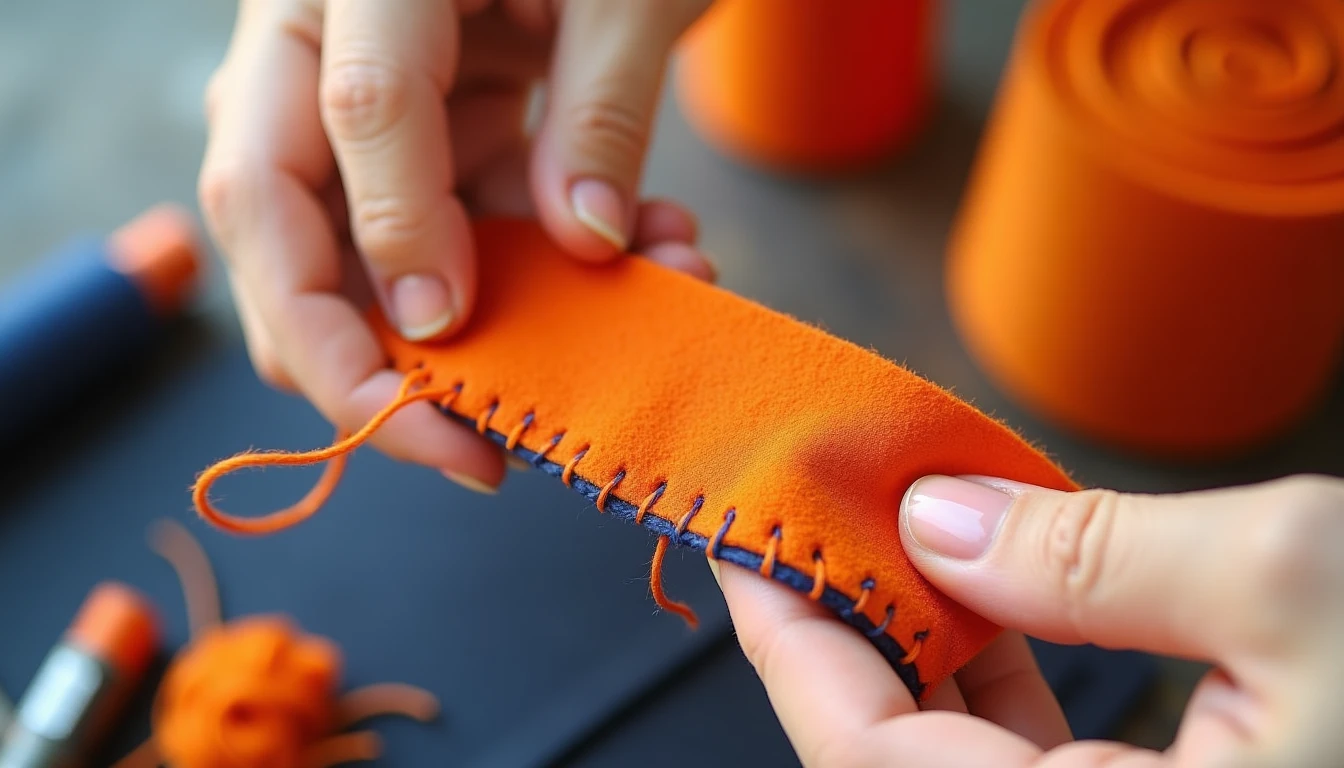
The whip stitch is the over-the-edge spiral stitch you probably learned before you knew its name. It’s one of the oldest hand stitches there is, and still the fastest way to join two edges by hand. You pass the needle over the edge and back through, again and again, so the thread wraps around it in a repeating spiral. Unlike most hand stitches, whip stitch doesn’t try to hide. It sits on top of the fabric as a row of diagonal ticks, forgiving to learn and, on the right project, genuinely decorative. For the full lineup of hand stitches worth knowing, see our hand sewing stitches guide.
Some links below are affiliate links. Prices are 2025-2026 estimates and change often, so always check current pricing.
What a Whip Stitch Is (and the Overcast Confusion)
A whip stitch joins two edges by wrapping thread around them in a spiral. Each pass creates a small diagonal stitch on top while the thread wraps fully around the raw or folded edge underneath. Keep spacing and angle consistent and you get a tidy row of parallel diagonal lines along the seam.
Here’s the honest naming note. Whip stitch and overcast stitch get used as if they’re the same thing in most modern tutorials, and in practice they usually are. Historically, though, they weren’t quite the same. Older stitch dictionaries (the kind sewhistorically.com draws from) treat overhand, overcast, hem stitch, and whip stitch as four separate techniques. Overcast, in that older framework, is a looser, more widely spaced diagonal worked on a single raw edge purely to stop fraying; it doesn’t need to join two pieces at all. Whip stitch is tighter and closer together, and its job is to join two edges. “Whipping,” in the strictest old sense, meant something even more specific: overcasting a tightly rolled edge while pulling the thread to gather it, the technique behind hand-rolled ruffles.
If precision matters, treat whip stitch as the joining stitch and overcast as the fraying-prevention stitch. If you’re just following a pattern, don’t stress over it. Most sites use the two terms interchangeably for the same basic over-the-edge stitch, and no project falls apart over the terminology.
How to Whip Stitch, Step by Step
- Thread your needle and knot the end. On folded or layered edges, hide the knot by starting inside the fold or between the layers so it never shows.
- Line up and hold (or pin, or clip) the two edges so they stay flush. Misaligned edges are the most common whip-stitch mistake.
- Bring the needle straight through both edges from back to front, perpendicular to the edge, pulling through until the knot catches.
- Carry the thread over the top of the edge (that’s the “whip”), then re-insert from back to front a short, even distance along, always entering from the same side, so the thread spirals rather than crossing back and forth.
- Keep spacing consistent: about 1/8 to 1/4 inch (3 to 6mm) apart, with roughly the same depth from the edge. Beginners can mark dots with a fabric pencil or seam gauge first.
- Keep the needle angle the same on every stitch (most right-handers work a slight diagonal, right to left), and keep tension even: snug enough that the edges sit flush, not so tight the fabric puckers or the edge rolls.
- Continue around the edge or opening, checking every few stitches that alignment holds, then finish with a couple of small backstitches or a hidden knot tucked between layers or inside a fold, and trim.
Where Whip Stitch Wins
Felt projects and plushies. The most common modern use. Felt doesn’t fray, so the visible diagonal line becomes a design feature instead of a flaw, the standard join for felt ornaments, softies, and craft kits. Embroidery floss is the usual thread: 2 to 3 strands of 6-strand floss is typical, with 2 strands the common middle ground (1 for delicate work, 4 to 6 for a bold, thick stitch). A variety pack of embroidery floss covers most contrast-color needs in one order.
Closing stuffed toys. Fast and beginner-friendly, at the cost of a visible, slightly bulky ridge. Most makers start here and graduate to ladder stitch once comfortable, since it pulls closed into an invisible seam. See our ladder stitch tutorial for that technique.
A whipped hem. Fold the raw edge under and whip-stitch it down. Quicker than a blind hem, though the stitches show faintly on the right side, so it suits linings and inside edges better than visible hemlines.
Appliqué edges. Catch just a thread or two of the appliqué piece on each stitch and the join reads as nearly invisible from the front, an alternative to satin stitch or blanket stitch appliqué.
Quilt binding ends. Hand-quilters use small, tight whip stitches to sew binding to the quilt back and tack down mitered corners, often three stitches per corner with an anchor stitch on the fourth.
Quick tear mending. Catch both edges of a tear and whip over them for a fast field repair, even if it’s not the strongest or most invisible mend around. For more fixes, see our mending and alterations guide.
Leather and canvas edges. In leatherwork and saddlery, a whip-stitch-style join is often worked with an awl and waxed thread instead of a needle alone. Waxed linen or bonded nylon grips the material and resists abrasion, a heavier-duty cousin of the fabric stitch that shouldn’t go through a sewing machine.
Whip Stitch for Crochet and Knitting
Whip stitch is also one of the most common ways to seam crochet pieces, joining granny squares, amigurumi parts, or garment panels. Use a yarn or tapestry needle with a strand of the same yarn, lay the pieces edge to edge, then pass the needle under both loops of a stitch on each piece in turn, whipping over the join roughly once per crochet stitch. Whip through both loops for a strong, slightly raised seam, or just the back loops for a flatter seam, which is why amigurumi makers favor it.
For knitting, whip stitch works too and is fast to learn, but the honest consensus among knitters is that mattress stitch gives a far more invisible, professional seam for garments. Save whip stitch for squares or a quick project, and reach for mattress stitch (or Kitchener stitch for live seams) whenever the seam needs to disappear.
Whip vs Ladder vs Blanket vs Overcast
Whip stitch vs. ladder stitch. Whip stitch is fast and easy, but the stitches show and leave a visible ridge. Ladder stitch takes more practice but pulls closed into an invisible seam, which is why it’s preferred for closing stuffed animals. Our ladder stitch guide covers that option in full.
Whip stitch vs. blanket stitch. Blanket stitch adds a locking bottom bar that binds the fibers and creates a decorative L-shaped border, the sturdier, more deliberately decorative pick for felt doll bodies and edging. Whip stitch is quicker and simpler, but less decorative and less durable at a raw edge.
Whip stitch vs. overcast stitch. As above: overcast is typically looser, worked on one edge to stop fraying, while whip stitch is tighter and joins two edges. Many sources use the names interchangeably, so treat this as a useful distinction, not a hard rule.
Speed, fastest to slowest: whip stitch, then blanket stitch (slower thanks to the locking loop), then ladder stitch and mattress stitch, which take longer but give the most invisible results. For a contrasting-thread decorative look, our embroidery stitches guide covers stitches built for that.
Getting Even Stitches (Troubleshooting)
Edges don’t line up as you sew. Pin or clip the edges first, and recheck alignment every few stitches instead of only at the end. For long edges, baste first with loose stitches.
Stitches come out uneven. Mark even dots along the edge with a fabric pencil or seam gauge, especially on felt where every stitch shows, and keep the needle angle identical on every pass.
Thread keeps twisting and knotting. Cut thread no longer than about 18 inches (hand-to-elbow length); longer thread twists on itself more. Let the needle hang and spin freely every several stitches to release the twist.
The edge rolls or curls as you stitch. Loosen your tension; pulling too tight drags the edge over. A slightly wider stitch depth also helps stabilize a rolling edge, especially on knits.
Stitches look bulky on delicate fabric. Drop to 1 to 2 floss strands instead of 3 or more, switch to a finer thread, or reduce stitch depth.
Puckering along the seam. Ease up on tension and keep stitch length consistent. Uneven tension is the usual cause of puckers on a whip-stitched seam.
If you want more projects to practice on, our library has 155+ printable PDF sewing patterns you can print and sew right away, at Sewing Pattern Secrets’ pattern library.
Frequently Asked Questions
What is a whip stitch used for?
Joining two fabric, crochet, or knit edges, closing stuffed-toy openings, hemming quickly, attaching appliqué, securing quilt binding, mending small tears, and edging felt or leather. Any time you need a fast, simple way to bind two edges by hand.
How do you sew a whip stitch?
Knot your thread, bring the needle through both layers from back to front near the edge, then loop it over the top edge and re-insert from back to front a short, even distance along, always entering from the same side so the thread spirals. Keep spacing and angle consistent, then finish with a hidden knot.
Is whip stitch the same as overcast stitch?
Closely related but not strictly identical. Historically, overcast is a looser stitch worked on a single raw edge purely to stop fraying, while whip stitch is tighter and joins two edges together. Many modern tutorials use the names interchangeably, so treat “whip stitch” as the joining version and “overcast” as the fraying-prevention version when precision matters.
What is the difference between whip stitch and ladder stitch?
Whip stitch is faster and easier but leaves visible diagonal stitches and a ridge on the surface. Ladder stitch takes more practice but pulls closed into a nearly invisible seam, which is why it’s preferred for closing stuffed animals and other spots where the stitching shouldn’t show.
How do you whip stitch crochet pieces together?
Place the pieces edge to edge with a yarn needle and matching yarn. Pass the needle under both loops (or just the back loops, for a flatter seam) of a stitch on each piece in turn, whipping over the joined edge roughly once per crochet stitch, then weave in the tail.
How far apart should whip stitches be?
About 1/8 to 1/4 inch (3 to 6mm) apart is typical, with stitch depth kept about the same for a uniform look. On felt or decorative work, marking even dots first helps keep spacing consistent.