If you’ve already pieced a top and you’re wondering what actually happens between “finished top” and “finished quilt,” you’re in the right place. Our quilting for beginners pillar covers the whole map, from choosing your first fabric to picking a block. This page is about your hands: basting the sandwich so it doesn’t shift, quilting it on the machine you already own, and binding the edge so it looks like you meant to do that. Once you’ve got blocks pieced (or you’re browsing for your next quilt pattern to try), everything below is how you turn that top into something you can actually sleep under.
Some links below are affiliate links. Prices are 2025-2026 estimates and change often, so always check current pricing.
Basting the Quilt Sandwich
Basting is the unglamorous step that decides whether your quilting looks flat and smooth or puckered and lumpy, so it’s worth doing slowly. Start by taping your backing fabric wrong side up to a table or a clean floor. Tape the center of each edge first, then work out toward the corners, pulling gently taut, not stretched tight, so the fabric lies drum smooth without distorting the grain. Lay your batting on top and smooth it flat, then add your pieced quilt top right side up, smoothing it from the center outward.
Once the three layers are stacked, you need to hold them together before they go anywhere near a needle. There are three common ways to do it.
Curved safety pins. Use curved safety pins about 1.5 inches long so they can grab all three layers easily. Place them roughly every 4 to 6 inches, about a fist width apart, working from the center out. If your batting is thick or the quilt is going to get handled a lot before it’s finished, pin denser, every 2 to 3 inches.
Spray basting. Fold back half the quilt top, mist the batting lightly with a temporary fabric adhesive like 505 spray (use less than you think you need), then smooth the top down from the center out. Repeat for the other half. Because it’s an aerosol, use it somewhere well ventilated, outdoors or with the windows open, even though 505 itself is marketed as odorless and acid free.
Hand basting. With a long needle and inexpensive thread, sew long running stitches in a grid roughly every 4 to 6 inches across the whole sandwich. It’s slower than pins or spray, but it’s the traditional choice for hand quilted pieces since there’s no pin or adhesive residue for a hand needle to snag on later.
Whichever method you pick, the rule that matters most is this: always smooth from the center of the quilt out toward the edges. That pushes slack and wrinkles out to the border, where you can trim them away, instead of trapping them in the middle where they’ll show up as puckers once the quilting is done.
Quilting on a Regular Sewing Machine
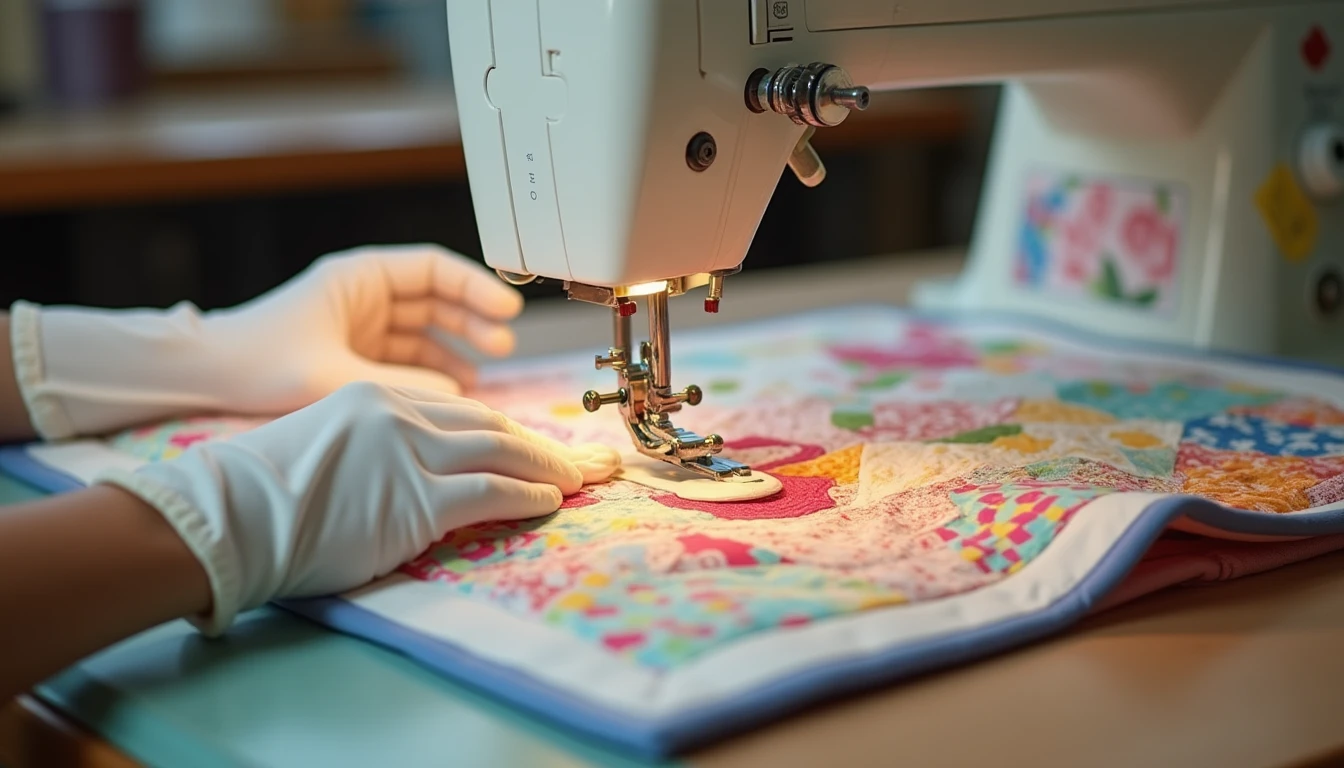
Yes, you can quilt on the machine already sitting in your sewing room. You don’t need a longarm to finish a quilt at home, and most home quilters do the whole thing on a regular domestic machine with the right foot attached.
For straight lines, that foot is a walking foot. It has its own set of feed dogs built in that move in sync with the machine’s regular feed dogs, gripping the top layer of the sandwich so all three layers move through together instead of shifting, stretching, or puckering against each other. It’s the standard tool for straight line quilting and it doesn’t require dropping your feed dogs or changing any machine settings beyond swapping the foot. For a refresher on how your machine’s feed and tension actually work together, our guide to using a sewing machine covers the basics.
With a walking foot, a few classic designs cover most quilts:
- Stitch in the ditch: quilting directly in the seam lines of the pieced top so the stitching disappears into the seam.
- Echo quilting: repeated lines that echo the outline of a shape at even intervals outward from it.
- Grid or crosshatch: straight lines run at two angles, often 45 and 90 degrees, to form a diamond or square grid.
- Organic wavy lines: loose, hand-guided undulating lines instead of a rigid straight grid.
A couple of settings changes make a real difference here. Lengthen your stitch to about 3 to 3.5mm for quilting, longer than the 2 to 2.5mm you’d use for piecing, since a longer stitch shows less and handles the extra thickness better. Quilting gloves with grippy, textured fingertips help you hold and steer the bulky sandwich without gripping too hard or letting it slide. Start quilting at the center of the quilt and work outward in both directions rather than edge to edge, which pushes any fullness toward the borders instead of trapping it in the middle. As you get close to the edges, roll or scrunch the sides of the quilt so you can fit the bulk through the machine’s throat space without fighting it.
Dipping into free-motion
Free-motion quilting drops or covers the feed dogs and swaps your regular foot for a darning or free-motion foot. Instead of the machine feeding the fabric for you, you guide the sandwich by hand in any direction you like. Meander or stipple quilting, a continuous line that wanders randomly across the surface, is the most forgiving design to try first, since there’s no pattern to match up and small wobbles just read as texture. Practice on a scrap sandwich, spare fabric plus batting plus fabric, before you try it on an actual project. Most beginners find the motion starts to feel natural after about 15 to 20 minutes of practice, so don’t judge yourself on your first few passes.
If you’d rather skip the learning curve, or your quilt is bigger than your machine can comfortably handle, sending a finished top out to a longarm quilter for edge-to-edge pantograph quilting typically costs about $0.02 to $0.025 per square inch for lighter, simple designs, and $0.03 to $0.04 per square inch for denser, more elaborate custom patterns, plus the cost of batting and often a $15 to $40 setup fee. On a queen size quilt, roughly 7,600 square inches, that works out to about $150 to $300 in quilting labor alone before extras. It’s worth weighing that against your own time if your machine and skills can handle the project instead.
Binding a Quilt, Step by Step
Binding is the last big technique standing between you and a finished quilt, and it rewards patience more than speed. Here’s the process from strip to finished edge.
Make the binding
- Cut binding strips 2.25 to 2.5 inches wide across the width of fabric. A 2.25 inch strip gives a snugger, lower profile binding suited to thinner batting. A 2.5 inch strip is more forgiving and easier to wrap over thicker batting or bulky pieced seams.
- Join the strips end to end with 45 degree diagonal seams rather than straight seams. Overlap two strip ends at a right angle, right sides together, mark and stitch a diagonal line corner to corner, trim to a 1/4 inch seam allowance, and press the seam open. Diagonal joins spread the seam bulk out so no hard ridge shows in the finished folded binding.
- Fold the long joined strip in half lengthwise, wrong sides together, and press. This creates double fold (French) binding, giving you two layers of fabric wrapping the quilt’s edge for durability.
Attach it
- Trim the quilt sandwich’s edges square, trimming away any excess batting and backing so they’re flush with the quilt top.
- Starting partway along one side, not at a corner, and leaving a 6 to 8 inch tail unstitched, align the binding’s raw edges with the quilt top’s raw edge and sew through all layers with a 1/4 inch seam, attaching the binding to the front of the quilt first.
- As you approach each corner, stop stitching 1/4 inch from the raw edge and backstitch, then remove the quilt from the machine. Fold the binding strip straight up and away from the quilt at a 45 degree angle, then fold it back down onto itself so the top fold aligns with the quilt’s next raw edge, trapping the diagonal fold underneath.
- Resume stitching from that folded edge with a fresh 1/4 inch seam down the new side. Repeat at all four corners. The miter forms automatically once the binding is later folded over to the back, so you don’t need to do any extra shaping now.
Join the tails
Stop stitching about 10 to 12 inches from your starting point, leaving two loose tails. Lay the ending tail flat and overlap the starting tail over it by exactly the cut width of your binding strip (for example, 2.5 inches for a 2.5 inch wide strip), then trim off the excess. Open both tails, place them right sides together at a right angle, and join them with a diagonal seam the same way you joined the strips originally. Trim to a 1/4 inch seam allowance, press open, refold the binding, and finish sewing the remaining gap down.
Finish the back
Wrap the folded edge of the binding around to the back of the quilt so it just covers the line of machine stitching, then finish it one of two ways.
The traditional route is a hand finish: ladder stitch, also called slip stitch, the folded edge down by hand for a fully invisible, heirloom style result. If you haven’t practiced that stitch before, our guide to hand sewing stitches walks through the motion. It takes longer, but it forgives small inconsistencies in your fold and gives you a back with no visible stitching at all.
The faster route is a machine finish: glue baste or clip the folded edge in place on the back, then stitch from the front, sewing in the ditch (the seam line between the binding and the quilt top) so the stitching catches the folded edge on the back as it goes. Hand finishing is the traditional pick for show quilts, heirlooms, and anywhere you want a completely invisible result. Machine finishing is faster and holds up better to heavy everyday use and repeated washing, at the cost of a slightly more visible line of stitching on the back. Pick based on what the quilt is actually for, not which one sounds fancier.
Quilt-as-You-Go
Quilt-as-you-go means quilting individual blocks or sections, each layered with its own small batting and backing, before joining them into the full quilt, rather than basting and quilting one giant sandwich all at once. It’s the standard workaround for wrestling a king or queen size quilt through a regular home machine, since you only ever have a block-sized piece under the needle at any one time.
Sections are most often joined with sashing strips. A folded strip is stitched over the front raw edges of two adjoining blocks, and then the strip’s other edge is finished by hand or machine on the back, rather than sewing the blocks directly to each other in one long seam. It’s especially useful for large bed quilts made on small domestic machines, or for group and swap projects where different blocks get quilted by different people before coming together. If the idea of shoving a queen size sandwich through your machine’s throat space sounds miserable, this is the method that sidesteps the whole problem.
Quilted Things That Are Not Quilts
Once you’ve got basting and machine quilting down, the same skills open up a handful of projects that aren’t beds at all.
The quilted tote
- Build a quilted “slab” first: layer your outer fabric, batting, and lining fabric into a mini quilt sandwich cut larger than your finished bag pieces will need.
- Grid-quilt the slab, or use another dense straight-line design, keeping lines no more than about 1 inch apart, with a walking foot for the structure and rigidity a bag needs.
- Only after the slab is fully quilted do you lay your pattern pieces on it and cut out the actual tote pieces (body, handles, pockets), then construct the bag as the pattern directs.
That order matters. Quilting pre-cut pieces individually gives you mismatched shrinkage and wavy edges. Quilting the yardage first and cutting from it afterward is what gives a bag its structure. Once your slab is cut and ready, our guide to sewing bags covers the construction from there.
The quilt coat
Quilt coats and quilted jackets have been one of the biggest sewing and fashion crossover trends since designer Emily Bode’s upcycled vintage quilt menswear collection went viral around 2017 to 2019, and interest hasn’t slowed since. Boxy, oversized coat patterns are the most common choice for the style, because their minimal shaping and darts are far more forgiving of thick, already-quilted fabric than a fitted jacket pattern would be.
Here’s the part worth being honest about. Cutting up an actual antique or heirloom quilt to make a coat is a genuinely contested topic in the quilting community, described by some quilters as being as polarizing as politics. Quilt historians and prominent voices like Mary Fons argue against cutting intact vintage quilts, since they’re historical documents that hold irreplaceable handwork that can’t be recreated. The widely shared middle ground within the community is this: reserve cutting for so-called “cutter quilts,” meaning quilts that are already damaged, stained, or falling apart but still have large enough undamaged sections to reuse, and leave historically or artistically significant, collectible, or otherwise intact heirloom quilts alone. Plenty of quilters sidestep the debate entirely by quilting their own new yardage specifically to make a coat instead of sourcing a vintage quilt at all, which gets you the exact same look with none of the ethical weight.
Practically, that means picking a simple, boxy jacket pattern with minimal darts or fitted seams, then cutting the pieces from a cutter quilt, purpose-quilted yardage, or a quilted slab you make yourself, and assembling it much like an unlined or lightly lined jacket.
And the small stuff
Quilted pillow covers and potholders use the same sandwich-and-quilt approach on a small scale. Layer a fabric top, batting (or a heat-resistant batting like Insul-Bright for potholders), and backing, quilt a simple grid or wavy design across it, then construct as normal, finishing the edges with binding or a hanging loop as the pattern calls for. They’re a good place to practice free-motion quilting or a new binding technique before committing to a full-size project.
Quilting Terms, Quickly
- WOF: Width of fabric, the distance from selvage to selvage, usually 40 to 44 inches on quilting cotton, used as a standard measure for cutting strips.
- Fat quarter: A quarter yard of fabric cut as an 18 by 22 inch rectangle instead of a long 9 by 44 inch strip, giving more usable width for cutting varied shapes.
- HST (half-square triangle): A pieced square made from two right triangles joined along their diagonal, one of the most common building blocks in pieced quilt tops.
- Flying geese: A pieced unit shaped like a large triangle flanked by two smaller corner triangles, commonly arranged in rows to suggest geese in flight.
- Sashing: Strips of fabric sewn between quilt blocks to separate and frame them before they’re joined into the full top.
- Cornerstones: The small squares of fabric pieced in at the intersections where sashing strips cross, often in a contrasting color.
- Borders: Strips of fabric sewn around the outer edge of a pieced quilt top to frame it before basting and quilting.
- Loft: The thickness or puffiness of batting. Low-loft batting gives a flatter, more traditional look, while high-loft gives a puffier, more dimensional quilt.
- Stitch in the ditch: Quilting or binding stitches sewn directly in an existing seam line so they sink in and become nearly invisible.
- Feed dogs: The small toothed mechanism under the needle plate that grips and advances fabric during normal sewing, dropped or covered for free-motion quilting.
- Fussy cutting: Deliberately centering a cut piece on a specific motif or design element in a printed fabric rather than cutting at random.
- Scrappy: A quilt style pieced from many different fabrics, often leftover scraps, rather than a coordinated, limited fabric palette.
Precuts like fat quarters and charm packs come in standard dimensions, and if you ever need to double check a cut size or convert one measurement to another, our page on sewing measurements has you covered.
If you’d rather not draft your own quilt blocks from scratch, our library of 155+ printable PDF sewing patterns at Sewing Pattern Secrets includes patterns you can print at home and get straight to cutting.
Frequently Asked Questions
Can you quilt with a regular sewing machine?
Yes. A walking foot handles straight line designs like stitch in the ditch, echo lines, and grids on any regular machine, and a darning or free-motion foot with the feed dogs dropped lets you stitch meander and other free-motion designs. You don’t need a longarm to finish a quilt at home, and this is how to quilt on the machine most people already own.
How do you baste a quilt?
Tape the backing wrong side up so it’s taut but not stretched, layer batting and the pieced top on top, smoothing from the center out, then secure the layers with curved safety pins every 4 to 6 inches, a temporary spray adhesive like 505, or long hand-basting stitches in a grid.
How wide should quilt binding strips be?
Most double-fold binding is cut 2.25 to 2.5 inches wide across the width of fabric. Use 2.25 inches for a snugger finish on lower-loft quilts and 2.5 inches for more ease over thicker batting or bulky seams.
How do you bind a quilt step by step?
Cut and join strips with diagonal seams, fold in half lengthwise, sew the raw edges to the quilt front with a 1/4 inch seam, miter each corner by stopping 1/4 inch from the edge and folding the strip up then back down, join the tails with a diagonal seam, then wrap the folded edge to the back and finish it by hand stitching or by machine stitching in the ditch from the front.
What is quilt-as-you-go?
Quilt-as-you-go means quilting individual blocks or sections separately, each with its own small batting and backing, then joining the finished sections with sashing strips instead of basting and quilting one giant sandwich. It’s the easiest way to manage a large quilt on a small home machine.
How do you make a quilted tote bag?
Build a quilt sandwich (outer fabric, batting, lining) larger than your bag pieces, quilt it densely with a grid or other design using a walking foot, and only then cut your bag pattern pieces from that quilted slab before constructing the bag.
Is it OK to cut up an old quilt for a quilt coat?
It’s genuinely debated in the quilting community. The common-sense line most quilters land on: don’t cut historically significant, collectible, or intact heirloom quilts, but a damaged “cutter quilt” with large undamaged sections, or fabric you quilt yourself specifically for the project, is generally considered fair game.
What is stitch in the ditch?
It’s quilting or binding stitches sewn directly into an existing seam line, so the stitching sinks into the seam and becomes nearly invisible from the front, used both as a quilting design and as a way to secure binding by machine.