
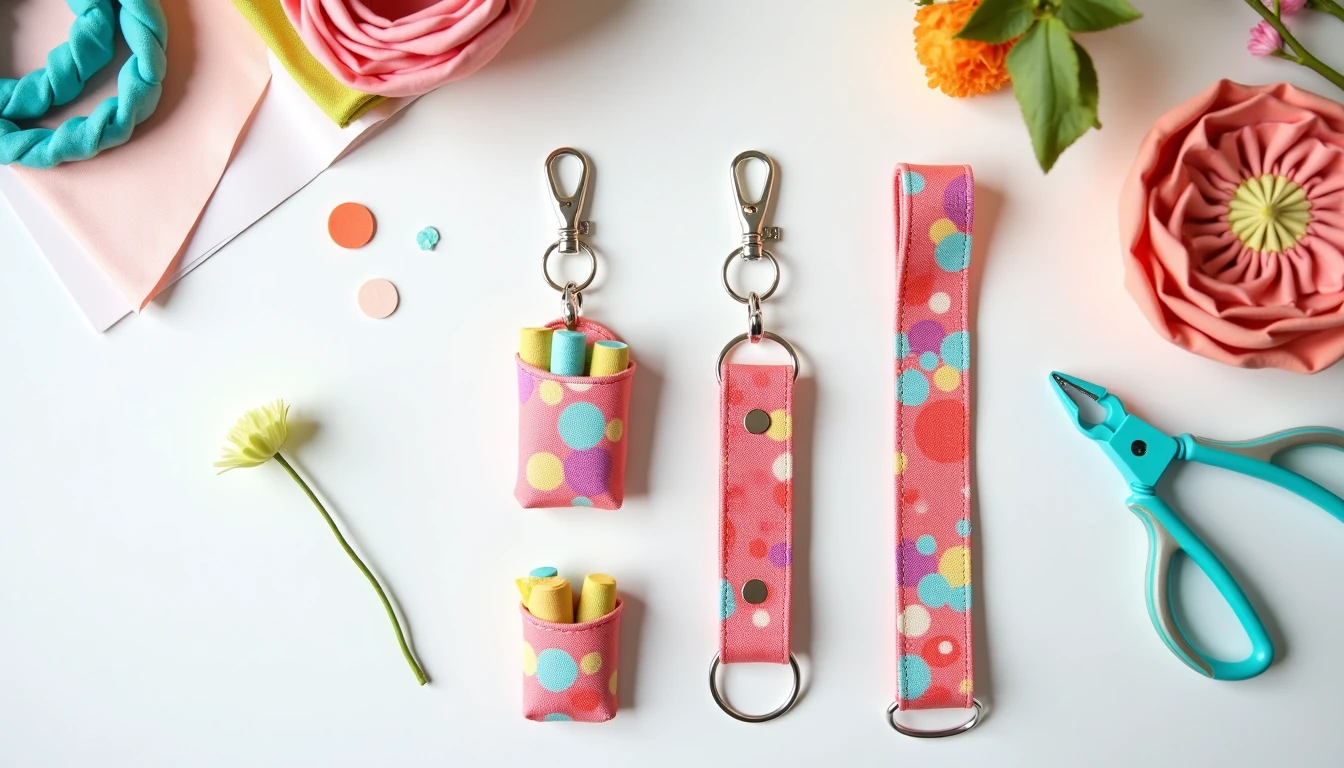
If you sew, you have a scrap pile, and a diy keychain is the fastest way to turn that pile into something people actually want. A fabric keychain eats up strips too small for anything else, sews up in about 15 minutes once you know the folding sequence, and covers every small gift on your list: teachers, coworkers, party favors, stocking stuffers. Add real hardware instead of a knot and it stops looking homemade.
This is a great entry point if quick makes are new to you. For more fast, low-commitment projects, see our full roundup of easy sewing projects.
Some links below are affiliate links. Prices are 2025-2026 estimates and change often, so always check current pricing.
The Classic Key Fob
This is the build every other keychain here borrows from, so learn it once.
- Cut a fabric strip about 2in x 14in for a self-fabric fob, or use 1in cotton or polyester webbing cut to 10-11in to skip the folding step. Fuse a lightweight to midweight interfacing (Pellon Decor-Bond is a common pick) to the wrong side of fabric strips so they hold their shape.
- Press the raw long edges in toward the center, about 3/4in each side, then fold the whole strip in half lengthwise and press flat. Every raw edge should now be tucked inside, like finished webbing.
- Topstitch down both long edges, close to the fold, with a stitch length of 3-4mm. This one step makes a fabric strip read as real webbing instead of a floppy tube.
- Fold the finished strip in half into a loop and slip the folded end into a key fob hardware clamp. Center it and squeeze shut with pliers. Wrap the pliers’ jaws in a fabric scrap, batting, or masking tape first so the metal doesn’t scratch or dent the hardware. Work from the center out for even pressure.
- Key fob hardware is sold as “1in (25mm) key fob hardware with split ring” (also in 1.25in), built to clamp over folded fabric or webbing with no stitching needed at that end.
- No hardware on hand? Sew the short raw ends of the folded strip together instead (overlap 1/2in and zigzag, or stitch right sides together at a 1/4in seam) to close it into one loop. Thread a plain split ring or swivel clasp straight through the fabric. No clamping, no pliers.
The Chapstick Holder Keychain
A chapstick holder keychain is a tiny fabric pouch sized to slide a lip balm tube in and out, and it’s one of the most genuinely useful small gifts you can sew.
- Cut two matching pieces (outer and lining, or one piece to fold), somewhere between 3.5in x 1.5in for a snug fit and 4.5in x 7in for a roomier pouch that also fits lipstick.
- Fuse light interfacing to the outer piece, then sew around the edges with a 1/4in seam, leaving a 1-2in gap for turning. Turn right side out and fold or stitch it into a tube or envelope shape.
- Before that last seam closes, add a small loop (a folded, topstitched fabric strip, or a piece of 1/2in elastic) at the top so a split ring has somewhere to hook. A grommet through the seam allowance works too.
- Optional: a small flap with a snap or Velcro dot to keep the tube from sliding out, handy if this one’s headed for a kid’s backpack.
Chapstick keychains show up everywhere as the go-to teacher or coworker gift because they use a single fat-eighth of fabric, come together in minutes, and actually get used.
The Wristlet Version
A wristlet fob is the classic key fob, scaled up so the loop slips over your hand and rests on your wrist. Cut a fabric strip about 4in x 12.5-14.5in, finishing to roughly 1in wide by 6-7in long, sized for an average wrist. Some patterns stretch the total loop to 13.5-16in for extra room so you can still dig through keys while it’s worn.
Fold, interface, and topstitch exactly like the classic fob above. The upgrade is at the hardware end: swap the small clamp for a 1in swivel snap clip, or add a D-ring plus a swivel or lobster clasp so the strap can also click onto a bag. That’s the move that turns a keychain into a bag accessory, and it borrows straight from bag-making hardware. Our guide to sewing bags covers the same D-rings and swivel clasps in more depth.
Five More Keychain Ideas
Once the folding and hardware click, these variations take almost no extra skill.
- Tassel keychain. Fringe a 4-6in wide piece of fabric or faux leather to about 1/4in strips, leaving the top edge uncut. Roll it tightly around a loop of cord, glue or stitch closed, and add a split ring.
- Scrappy patchwork fob. Piece a few narrow scraps into one strip, then build it like the classic key fob. It’s the true stash-buster of the bunch.
- Rope or cord knot keychain. Fold paracord or thick cord in half, tie an overhand or Celtic knot near the fold, trim and seal the ends, then add a split ring or lobster clasp. No sewing machine required.
- Felt shape keychain. Cut two matching felt shapes and stitch around the edge (a contrast blanket stitch looks great here), leaving a gap to tuck in a loop or ring tab before closing.
- In-the-hoop machine embroidery fob. A purchased or free ITH design hoops stabilizer and fabric together and stitches and trims the shape in one run. Finish the hardware end like a sewn fob. See our embroidery machine guide for beginners if this is new territory.
One honest note: resin pours and vinyl or HTV keychains are a different craft entirely, no sewing machine involved. This guide stays in the fabric lane, but plenty of resin-specific tutorials exist elsewhere.
Hardware That Makes It Look Bought
The fold does most of the work, but hardware is what separates handmade from boutique-quality.
- Key fob hardware sets, the metal cam or clamp piece, most commonly 1in (25mm) and also 1.25in, usually bundled with a matching split ring.
- Plain split rings, for the no-hardware loop method or felt and tassel builds.
- Swivel or lobster clasps, for wristlets and any fob you want clipped onto a bag.
- D-rings, for attaching a strap to a swivel clasp.
- Grommets, an alternative to a sewn loop on pouches like the chapstick holder.
Purchased webbing skips folding and pressing since its edges are already finished, while self-fabric strips with fusible interfacing let you match your stash but need that extra fold-and-topstitch step. Whichever you pick, protect the hardware finish before clamping: wrap your pliers’ jaws in fabric scrap, batting, or masking tape, and squeeze from the center out. Need a starter set? Browse a key fob hardware kit on Amazon, or see our full rundown of sewing tools and notions for what’s actually worth owning.
Batch Them
Key fobs are the classic production-line project. Stack several strips, fuse interfacing to the whole stack, and cut them apart at once with a rotary cutter. Chain-sew every strip’s edges one after another without snipping threads between pieces, then cut apart and topstitch as a batch. A fob that takes 15 minutes solo drops to roughly 5 minutes each once you’re making a dozen.
At craft fairs, handmade fabric key fobs commonly go for $5-12, simple fobs at the low end, wristlets and hardware-heavy pieces at the top. Most sellers stay above roughly $5, since bargain pricing tends to read as lower quality. For teacher gifts or party favors, batch a dozen in coordinating scraps, stick with basic clamp hardware or the no-hardware loop to keep cost down, and bag each one individually or tie it with a scrap of ribbon.
Want more quick, printable projects like this one? Our library has 155+ printable PDF sewing patterns at the Sewing Pattern Secrets pattern library.
Frequently Asked Questions
How do you make a fabric keychain?
Cut a fabric strip, fuse interfacing to the back for body, fold the long raw edges toward the center and press, fold the strip in half again to hide all raw edges, topstitch both long edges, then fold into a loop and attach key fob hardware, or sew the ends into a closed loop and add a split ring.
What hardware do you need for key fobs?
The core piece is key fob hardware, a metal clamp or cam sold in 1in (25mm) or 1.25in sizes, typically bundled with a matching split ring. Wristlets and bag-clippable versions add a swivel clasp and sometimes a D-ring, plus pliers to close the clamp.
How do you attach key fob hardware without scratching it?
Wrap the jaws of your pliers in a scrap of fabric, batting, or masking tape before squeezing the clamp shut. This cushions the metal-on-metal contact so the pliers don’t dent or scratch the finish. Apply even pressure, starting at the center and working outward.
What size should a wristlet keychain be?
Cut a fabric strip around 4in x 12.5-14.5in, finishing to roughly 1in wide and 6-7in long, long enough to slip over a hand and rest on the wrist. Some patterns extend the total loop to 13.5-16in for a looser fit that still allows using keys while worn.
How do you make a chapstick holder keychain?
Cut two small fabric pieces (or one piece to fold), sized around 3.5in x 1.5in up to about 4.5in x 7in depending on the pattern, add light interfacing, sew around the edges with a gap for turning, turn right side out, and add a small fabric loop or elastic tab at the top seam before closing so a split ring can attach.
What fabric works best for keychains?
Quilting cotton backed with fusible interfacing is the most common choice because it holds a crisp fold and topstitches cleanly. Cotton or polyester webbing skips the folding step entirely. Faux leather and felt are popular for tassels and no-fray shape keychains since their edges don’t need finishing.